
Maximize Space: Bedroom Layout Ideas for Rectangular Rooms
Rectangular bedrooms are the most common shape I encounter in residential design, yet they are often the most misused spaces in a home. While a square room offers symmetry, a rectangular room can easily start to feel like a bowling alley or a hallway if you aren’t careful with furniture placement. The natural instinct is to push everything against the walls to “save space,” but this usually creates a dead zone in the center and highlights the tunnel effect.
When I walk into a client’s home for a consultation, I often see a bed shoved into a corner and a dresser floating aimlessly on the opposite long wall. This layout fails to maximize the square footage and creates an unbalanced, uneasy atmosphere for sleeping. The secret to mastering this shape lies in breaking the visual “tunnel” and creating distinct functional zones that make the room feel wider than it actually is.
In this guide, I will walk you through the specific measurements, layout strategies, and styling tricks I use to transform narrow rooms into luxurious retreats. For plenty of visual inspiration and real-life examples, be sure to check out the Picture Gallery at the end of this blog post.
1. Stop the Tunnel Effect: The Zoning Strategy
The biggest mistake homeowners make with rectangular rooms is treating the entire space as one single function. In a long room, if you center the bed and leave the rest of the space empty, you emphasize the length.
As a designer, I approach rectangular rooms by dividing them into two distinct zones. Usually, this splits into a “sleeping zone” and a “utility zone.” The utility zone might be a dressing area, a reading nook, or even a small home office setup.
By visually cutting the room in half (or into thirds for very long rooms), you trick the eye into seeing two more proportionately square shapes rather than one long rectangle. This immediately makes the space feel cozier and more intentional.
Defining the Sleeping Zone
The sleeping zone should always take priority. This is the area dedicated solely to the bed and nightstands.
I typically use an area rug to define this boundary physically. The rug should stop a few feet short of the “utility zone,” creating a visual break in the floor plane.
Defining the Utility Zone
The remaining square footage is your opportunity to add function. If you have 4 to 6 extra feet at the foot of the bed, this is prime real estate.
I often place a small loveseat, a pair of armchairs, or a writing desk here. This furniture can face back toward the bed or toward a TV on the wall, creating a distinct “room within a room.”
Designer’s Note: The “Floating” Technique
- The Mistake: Pushing a desk or chair flush against the far wall.
- The Fix: Float the furniture. If you are placing a bench or chairs at the foot of the bed, leave at least 36 inches of walking space between the bed frame and the seating. This allows for smooth traffic flow and prevents shin-bumping in the middle of the night.
2. Bed Placement: Maximizing Width
The placement of the bed dictates every other decision in the room. In a rectangular space, you generally have two options: placing the bed on the short wall or the long wall.
While placing the bed on the long wall is the standard choice, it is not always the right one. You have to look at the room’s width relative to the bed size.
Option A: The Long Wall Placement
This is the most traditional layout. Centering the bed on the long wall allows you to place nightstands on either side and usually leaves the opposite long wall open for a dresser.
However, be careful with clearance. If your room is only 10 feet wide and you have a King bed (which is roughly 80 inches long with a headboard), you are left with less than 40 inches of walking space at the foot of the bed.
If you add a standard dresser (18–20 inches deep) on the opposite wall, you are now down to a 20-inch walkway. This is too tight. A comfortable main walkway needs to be 30 to 36 inches wide.
Option B: The Short Wall Placement
Placing the bed on the short wall is my favorite trick for very narrow rooms. This layout emphasizes the length of the room as a luxury rather than a constraint.
It allows you to look down the length of the room from the bed, which can feel quite regal. It also frees up the long walls for shallow storage or artwork without obstructing the flow.
Common Mistakes + Fixes
- Mistake: Blocking the window.
- Fix: If the only logical spot for the bed is in front of a window, do not be afraid to do it. Use a low-profile headboard that sits below the window sill. Alternatively, frame the window with floor-to-ceiling drapes that extend behind the headboard to create a soft, dramatic backdrop.
- Mistake: Using a massive footboard.
- Fix: In rectangular rooms, footboards stop the eye and cut off the visual flow. Opt for a platform bed or a simple frame with no footboard. This makes the room feel open and airy.
3. Storage Solutions for Narrow Spaces
Storage is usually the biggest pain point in rectangular bedrooms. Standard dressers are bulky and deep, eating up valuable floor space where you need it most—the walkways.
When I design for narrow spaces, I almost always ditch the traditional “bedroom set” dresser. Instead, I look for verticality and shallow depths.
Go Tall, Not Wide
Swap the low, wide dresser for a tall chest of drawers or an armoire. A tall chest (often called a highboy) utilizes vertical space and has a much smaller footprint.
If you have high ceilings (8 feet or higher), draw the eye up. Place storage that goes as close to the ceiling as possible to distract from the narrow floor plan.
The “Wall of Storage” Concept
If you own your home, built-ins are the ultimate solution for rectangular rooms. I often design a seamless wall of wardrobes along one of the short walls.
By color-drenching these built-ins (painting them the same color as the walls), they disappear visually. This corrects the room’s proportions by physically shortening the room while adding massive amounts of storage.
Measurements That Matter
If you must use a standard dresser, pay attention to depth.
- Standard Dresser Depth: 18 to 22 inches.
- Console Table Hack: If your walkway is tight, search for “console tables” instead of dressers. These are typically 12 to 15 inches deep. You can place baskets underneath or find consoles with drawers for socks and underwear.
- Nightstand Width: In narrow rooms, you might not have room for wide nightstands. Look for tables that are 12 to 18 inches wide. Wall-mounted floating shelves are excellent alternatives that keep the floor visible, making the room feel larger.
4. Visual Tricks: Lighting and Rugs
Once the layout is set, we use decor to manipulate the eye. Lighting and rugs are the most powerful tools in a designer’s arsenal for correcting bad architecture.
In a rectangular room, your goal is to draw the eye side-to-side, not just straight ahead. This creates a sense of width.
The Rug Rule
A common error is buying a rug that is too small, which creates a “postage stamp” look in the middle of a large room. In a rectangular room, the rug lines are crucial.
I prefer to place a large area rug so that the stripes or pattern run horizontally across the room (perpendicular to the long walls). This visual ladder effect widens the space.
Ensure the rug extends at least 18 to 24 inches beyond the sides of the bed. If you have a King bed (76 inches wide), you need a rug that is at least 9 feet wide (like a 9×12). For a Queen bed, an 8×10 is the minimum standard.
Lighting Layers
Do not rely on a single ceiling fixture. A central light in a rectangular room creates a spotlight effect that casts shadows in the corners, making the room feel like a tunnel.
Spread the light out to the corners. I love using wall sconces for bedside lighting. They free up nightstand space and draw the eye to the walls.
Add a floor lamp in the far corner of the “utility zone.” By illuminating the furthest corners of the room, you push the walls back visually.
Designer’s Note: Color Temperature
Always use warm white bulbs (2700K to 3000K). Cool white or daylight bulbs (4000K+) can make a narrow room feel like a clinical hallway or a hospital corridor. Warm light blurs the edges and makes the space feel expansive and welcoming.
5. Breaking the Angles: Softening the Box
Rectangular rooms are full of 90-degree angles. You have the room corners, the bed frame, the dresser, and the rug. If you only add square furniture, the room will feel rigid and boxy.
To counter this, you must introduce organic shapes. This is a fundamental principle of biophilic design that helps the human brain relax.
Curve Implementation
I always try to include at least two or three rounded items in a rectangular bedroom layout.
- Mirrors: A large round or oval mirror above the bed or dresser breaks up the straight lines.
- Lighting: Choose globe pendants or lamps with rounded bases.
- Furniture: If you have space for a chair, choose one with a curved back or rounded arms. Even a round ottoman at the foot of the bed can soften the harsh lines of a rectangular bed frame.
The Mirror Strategy
Mirrors are the oldest trick in the book, but they work. Placing a large mirror on one of the long walls reflects the opposite side, effectively doubling the visual width of the room.
However, be mindful of what the mirror reflects. Position it so it reflects a window or a piece of art, not a cluttered closet or the bathroom door.
Final Checklist: What I’d Do in Your Room
If I were managing your bedroom project today, this is the exact workflow I would follow. Use this checklist to ensure you haven’t missed a step.
1. Measure and Tape
Measure the room length and width. Use blue painter’s tape on the floor to outline where the bed will go. Ensure you have 30+ inches of walking space on the sides.
2. Zone the Space
Decide what the “second function” of the room is. Is it a dressing area? A reading nook? Tape that area off.
3. Choose the Bed Wall
Prioritize width. If the room is narrow, place the bed on the short wall to open up the center. If the room is wide enough, center it on the long wall.
4. Select Storage
Check the depth of your dresser. If it encroaches on the walkway, sell it and buy a taller, shallower chest or install wall shelves.
5. Rug Sizing
Buy a rug that fits under the bed and nightstands. Ensure it runs perpendicular to the long walls to widen the room.
6. Add Curves
Purchase a round mirror and a lamp with a curved base to break up the boxy geometry.
FAQs
What if my rectangular room has a door in the middle of the long wall?
This is a “pass-through” layout. In this case, you cannot float furniture in the center. You must treat the traffic path from the door to the opposite side as a sacred walkway. Place the bed on one side of the door and your storage/seating zone on the other. Do not block the direct line of sight from the door.
Can I use a sectional sofa in a large rectangular bedroom?
Generally, no. Sectionals are too heavy for a bedroom. If you have a very large master suite, opt for a chaise lounge or a pair of swivel chairs instead. They are lighter visually and easier to navigate around.
How do I handle a radiator that blocks furniture placement?
Radiators are common in older homes with rectangular rooms. Use a radiator cover to turn it into a shelf. You can lean art on top of it or use it as a makeshift console table. Just ensure the cover has proper ventilation so you don’t create a fire hazard or block heat.
Is it okay to put a bed in the corner?
For a child’s room or a guest room with a twin bed, yes. For a primary bedroom with two adults, no. Pushing a double or queen bed into a corner makes it incredibly difficult to make the bed and forces one person to crawl over the other to get out. Always leave at least 18 inches on the wall side if you absolutely must, but centered is always better for flow.
Conclusion
Designing a rectangular bedroom is less about fighting the shape and more about embracing it. When you stop trying to force a square peg into a round hole—or in this case, a square layout into a rectangular room—the space opens up.
Remember the hierarchy: Layout comes first, then scale, then lighting. If you get the bed placement right and ensure your walkways are clear (30 inches minimum!), the room will function beautifully regardless of its dimensions.
Don’t let the “bowling alley” feeling discourage you. With the right zoning and visual tricks, a rectangular room can offer the best of both worlds: a cozy, enclosed sleeping sanctuary and a separate, functional living area.
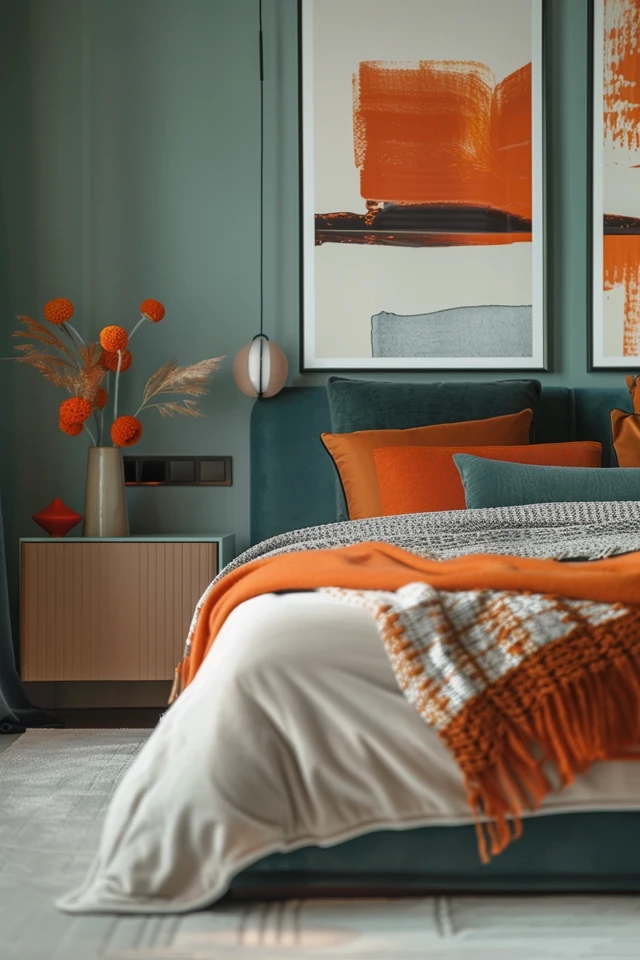
Picture Gallery


