
Maximize Space with Top Fridge Cabinet Ideas
Designing a kitchen is a game of inches, and the refrigerator is usually the biggest player on the field. It dominates the floor plan, yet somehow, the space immediately surrounding it often becomes a clutter magnet or a dust trap. If you are looking for visual inspiration, you can skip ahead to our Picture Gallery at the end of this post. However, if you want to understand the mechanics of turning that awkward gap into a storage powerhouse, stay with me.
I recall a specific project in a pre-war apartment where the kitchen was barely seventy square feet. The client was desperate for pantry space, but we had used every vertical inch of the walls—except for the cavernous void above the refrigerator. By installing a custom deep cabinet with vertical tray dividers and enclosing the fridge with finished side panels, we didn’t just gain storage; we made a freestanding appliance look like built-in millwork.
Whether you are planning a full gut renovation or just looking to retrofit your current setup, addressing the “fridge zone” is one of the highest-value changes you can make. It creates a polished, cohesive look while capturing cubic feet of storage that usually goes to waste. Below, I’ll walk you through the structural rules, the best storage configurations, and the aesthetic tricks interior designers use to make it all look seamless.
1. The Golden Rules of Fridge Enclosures: Measurements & Ventilation
Before we dream about finish materials or hardware, we have to talk about physics. The most common failure I see in DIY fridge surrounds is ignoring the appliance’s need to breathe. A refrigerator is essentially a heat pump; if you box it in completely without airflow, you will burn out the compressor years before its time.
Most standard refrigerators require specific clearances. You generally need at least one inch of space behind the unit and roughly 1/2 inch to 1 inch on the top and sides. However, you must check the “rough-in” specifications in your appliance manual. High-end built-in models (like Sub-Zero or Thermador) breathe from the front toe-kick, allowing for a flush install, but standard freestanding units breathe from the back or bottom.
The “Hinge Factor”
The second technical hurdle is the door swing. If you place a cabinet side panel flush with the front of the fridge doors, you might prevent the fridge from opening past 90 degrees. This means you won’t be able to pull out the crisper drawers to clean them.
Designer’s Note: The Water Line Reality
In my years of designing kitchens, the most overlooked detail is the water shut-off valve. If you are building a tight enclosure around your fridge, ensure the water line is long enough so you can roll the fridge all the way out for service. I also recommend placing the shut-off valve in an adjacent cabinet (like the sink base or a pull-out pantry) rather than directly behind the fridge. This allows you to shut off the water quickly in an emergency without having to move a 300-pound appliance.
2. Conquering the “Black Hole” Above the Fridge
The cabinet above the refrigerator is notoriously difficult to use. It is high up, usually deep, and hard to see into. In standard builder-grade kitchens, this cabinet is often only 12 inches deep, pushed back against the wall. This leaves a 12 to 18-inch gap of useless air in front of it. The first rule of maximizing this space is to bring that cabinet forward.
We always specify a 24-inch deep cabinet over a standard fridge. This brings the cabinet face flush with the refrigerator body (excluding the doors). This creates a cleaner look and doubles your storage volume. However, a deep, high shelf creates a “black hole” where items get lost. You need specific internal organizers to make this functional.
Vertical Tray Dividers
This is my favorite use for over-fridge space. Instead of stacking platters or baking sheets horizontally, install vertical dividers. This allows you to slide cutting boards, cookie sheets, and serving trays in and out like books on a shelf. You can grab exactly what you need without unstacking a heavy pile of cookware.
Hydraulic Lift-Up Doors
Traditional cabinet doors that swing left or right can be hard to maneuver around when you are reaching high up. I prefer top-hinged doors with pneumatic stays or hydraulic lifts. The door lifts up and stays out of your way while you rifle through the contents. This is excellent for storing large, lightweight items like paper towels, cereal bulk buys, or the holiday turkey roaster.
Common Mistakes + Fixes
- Mistake: Installing shelves that are fixed in place.
- Fix: Use adjustable shelving. The items you store up here are often odd sizes (stand mixers, blenders, large stock pots). Being able to move a shelf up or down by two inches can make the difference between fitting your pasta maker or leaving it on the counter.
- Mistake: No step stool access.
- Fix: Store a slim, folding step stool in the gap between the fridge side panel and the wall (if space allows) or in a nearby toe-kick drawer. Accessibility defines usability.
3. Side Panels and Pull-Out Pantries
If your refrigerator is at the end of a cabinet run, you absolutely need a side panel (often called a gable). Without it, you see the unfinished, often gray or black textured side of the fridge, which cheapens the look of the kitchen. A side panel anchors the fridge and supports the deep cabinet above it.
However, if you have a bit of extra width—even just six to nine inches—you can turn that side panel into a pull-out pantry. This is a massive space-saver for small urban kitchens.
The Broom Closet Pull-Out
A tall, narrow pull-out beside the fridge is perfect for brooms, mops, and Swiffers. These items are notoriously hard to store. By utilizing a 6-inch gap between the fridge and the wall, you keep cleaning supplies accessible but invisible.
The Canned Goods Tower
If you have 9 to 12 inches of width, install a tall pull-out with wire racks or adjustable wooden shelves. This is prime real estate for canned goods, spices, jars of pasta sauce, and oils. Because the storage is accessible from both sides when pulled out, nothing gets lost in the back. This is far superior to a deep, stationary narrow cupboard.
What I’d Do in a Real Project (Rental Friendly)
If you are renting and cannot install a permanent pull-out, look for a slim rolling cart on wheels. There are many powder-coated metal options designed specifically to slide between a fridge and a counter. I suggest finding one that matches the color of your appliances (white or silver) to help it blend in visually.
4. Achieving the Built-In Look with Trim Kits
The holy grail of kitchen design is the “integrated” look, where the fridge disappears into the cabinetry. True integrated appliances are expensive, but you can mimic the look with standard appliances using smart carpentry.
To achieve this, we build a “box” around the refrigerator using 3/4-inch thick cover panels on both sides and the deep cabinet above. The secret, however, is the filler strips.
Using Fillers for a Custom Fit
Since you need air gaps for the fridge to run, you can’t make the box the exact size of the fridge. Instead, we build the box slightly larger and use matching finish “filler strips” to close the visual gap, leaving just enough room for the required airflow. This shadows the gap and makes the unit look intentional.
The Trim Kit Option
Many manufacturers (like Frigidaire or Whirlpool) sell specific trim kits for their freestanding units. These are metal louvers or frames that screw into your cabinetry to bridge the gap between the fridge and the wood. They allow air to pass through while providing a sleek, stainless steel finish that looks like a high-end commercial unit.
Common Mistakes + Fixes
- Mistake: Forgetting the floor molding (baseboard).
- Fix: When you install a side panel down to the floor, it needs to be integrated into the room’s baseboard. Don’t just stop the molding at the cabinet; wrap it around the side panel for a furniture-style finish.
- Mistake: The “floating” fridge.
- Fix: If your fridge is significantly shallower than your counters (which happens with older models), pull the fridge forward so the carcass aligns with the cabinetry, and put a block behind the wheels so it doesn’t roll back. It looks much tidier.
5. Material Selection and Durability
The area around a refrigerator endures specific stressors: heat from the compressor, moisture potential from water dispensers, and heavy traffic. Your material choices need to be robust.
Heat Resistance
Standard thermal foil cabinets can sometimes peel if exposed to constant heat from an old refrigerator compressor. If you are retrofitting an older kitchen, painted wood or high-quality laminate is generally more durable than cheap vinyl wraps. If you feel excessive heat coming off your fridge, ensure your clearances are correct before installing new panels.
Aesthetics: Breaking up the Bulk
A full fridge surround creates a large block of mass in the kitchen. To soften this, consider mixing materials.
- Glass Fronts: Use glass doors on the cabinet above the fridge. This breaks up the solid wall of wood and reflects light, making the ceiling feel higher.
- Open Shelving Side: If the side of your fridge faces a dining area or living room, attach open shelving to the side panel. This is a great place to display cookbooks or plants, transitioning the kitchen into the living space.
- Contrasting Color: In modern designs, I sometimes paint the fridge enclosure a different color than the rest of the cabinets. For example, in a white kitchen, a white oak fridge surround adds warmth and acts as a focal point.
6. Final Checklist: Planning Your Fridge Enclosure
Before you order lumber or cabinets, run through this quick checklist to ensure you haven’t missed a critical detail.
- Check the Manual: Verify the exact airflow requirements for your specific make and model.
- Measure Twice: Measure the fridge width at the top, middle, and bottom (fridges can bulge).
- Account for Swing: Open the fridge door fully and measure how much space the hinge needs so it doesn’t hit the side panel.
- Depth Check: Ensure your overhead cabinet is 24 inches deep, not 12 inches.
- Level the Floor: Fridges are heavy. If your floor isn’t level, the gap between the fridge and the cabinet will look crooked. Level the fridge legs first.
- Plan the Outlet: Ensure the electrical outlet is accessible and not blocked by the new cabinetry framework.
- Lighting: Consider adding a puck light inside the open shelf above the fridge or downlights in the ceiling to illuminate the front of the fridge.
FAQs
How deep should the cabinet above the fridge be?
For a standard look, the cabinet should be 24 inches deep. This allows the cabinet box to align with the body of the refrigerator (usually 24 to 30 inches deep depending on if it is counter-depth or standard). The refrigerator doors will protrude beyond this cabinet, which is necessary for them to swing open freely. Never use a standard 12-inch deep wall cabinet; it looks awkward and makes the contents difficult to reach.
Can I enclose a fridge that isn’t “counter-depth”?
Yes, absolutely. A standard-depth fridge sticks out about 6 to 10 inches past standard counters. To enclose this, you simply need deeper side panels. However, be aware that this can block traffic flow in a narrow galley kitchen. If you enclose a deep fridge, try to position it at the end of a cabinet run so it doesn’t interrupt the countertop workflow.
Is it safe to store wine above the refrigerator?
Generally, no. As an interior designer, I advise against this. Heat rises, and the area above the refrigerator is often the warmest spot in the kitchen due to the compressor exhaust. Fluctuating temperatures are the enemy of wine preservation. Use that space for durable goods like serving platters, vases, or dry goods, and keep the wine in a cooler, darker spot.
How do I match new cabinets to old ones?
If you are adding a fridge surround to an existing kitchen, matching aged wood or faded paint is nearly impossible. Instead of trying to match, go for a deliberate contrast. If your cabinets are white, build the fridge surround in natural walnut or paint it a bold accent color like navy or charcoal. Make it look like a freestanding piece of furniture rather than a botched renovation patch.
Conclusion
Transforming the space around your refrigerator is one of the most effective ways to upgrade your kitchen’s functionality and aesthetic. It takes a bulky, necessary appliance and integrates it into the architecture of the room. By following the rules of ventilation and measuring carefully for hinge clearance, you avoid the technical pitfalls that plague many DIY attempts.
Whether you choose to install vertical tray dividers for your baking sheets, a slim pull-out pantry for your spices, or simply a deep cabinet to hide the holiday gear, the goal is intention. Stop treating the fridge as an afterthought and start treating it as the anchor of your kitchen design. With the right planning, you can turn those wasted inches into your favorite storage feature.
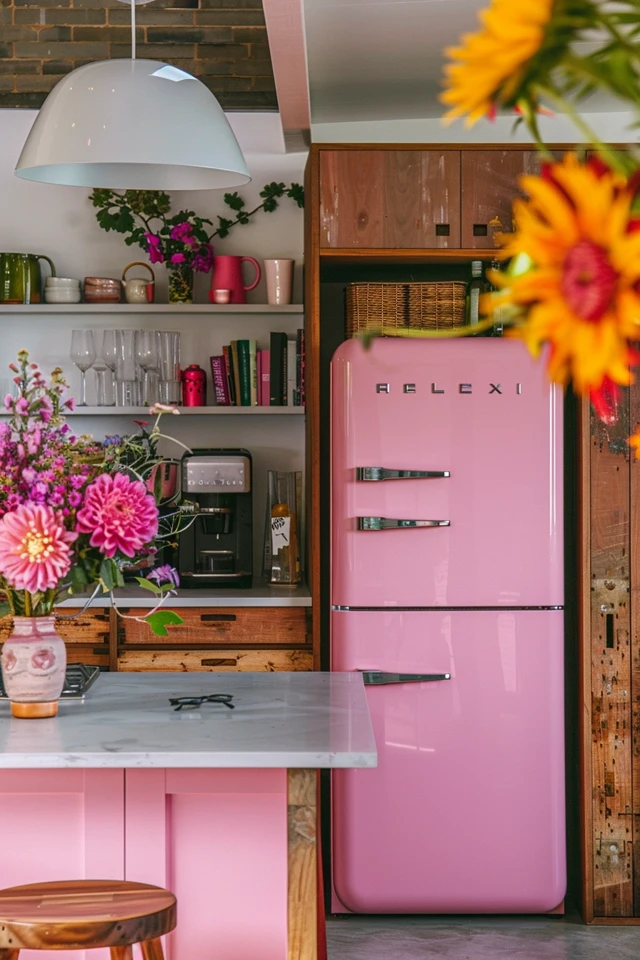
Picture Gallery


