
Mix and Match Tile Ideas for Creative Home Decor
Introduction
I remember walking into a client’s master bathroom years ago, and the space was covered floor-to-ceiling in the exact same beige travertine. It felt heavy, dated, and incredibly flat because there was no visual relief for the eye to rest on. For plenty of visual inspiration to help you visualize these concepts, be sure to check out the Picture Gallery at the end of this blog post. Mixing tiles is the antidote to that boring “builder-grade” look, allowing you to inject personality and custom flair into even the smallest rooms.
However, combining different materials can feel daunting if you do not have a roadmap. Many homeowners worry about creating a chaotic mess rather than a curated design. The secret lies in balancing scale, texture, and color so that the tiles talk to each other rather than shout over one another.
In this guide, I will walk you through the professional methods I use to pair tiles successfully. We will cover everything from technical transition strips to aesthetic rules regarding pattern weight. By the end, you will have the confidence to select combinations that look intentional and high-end.
1. Master the Rules of Scale and Proportion
The most common reason a mixed-tile installation fails is that the patterns or shapes are too similar in size. When two tiles compete for attention at the same scale, the room feels cluttered.
To fix this, you need to rely on the rule of opposites. If your floor tile is large (like a 12×24 inch porcelain), your wall tile should be significantly smaller (like a 3×6 subway or a penny round). This contrast tells the eye which surface is the background and which is the feature.
For example, in a small powder room, I love using a large-format hexagonal tile (around 10 inches) on the floor to make the floor space feel wider. I then pair this with a delicate finger mosaic on the vanity wall. The massive difference in size creates a harmonious balance.
Designer’s Note: The 3-Distance Rule
In my projects, I use a “3-Distance Rule” to test tile samples. I lay the two samples next to each other and look at them from three distances:
- Close up (in hand): Do the textures look good touching?
- Standing height (5-6 feet): Does the pattern overwhelm the floor?
- Doorway distance (10-12 feet): Can you still distinguish the two distinct shapes?
If the tiles look like a blur from the doorway, you need to adjust the scale of one of them. You want distinct visual separation.
Common Mistakes + Fixes
Mistake: Using two busy patterns of the same size, such as a medium floral floor tile and a medium geometric wall tile.
Fix: Keep one surface patterned and make the other solid, or drastically change the scale (e.g., a large-scale plaid floor with a tiny solid mosaic wall).
2. Balancing Patterns with Solids (The 70/30 Split)
Mixing tiles does not mean every surface needs to be a “statement.” In fact, the most successful designs usually feature one “hero” tile and one or two “supporting” tiles.
I recommend a 70/30 split for visual weight. 70% of your tiled surface should be a neutral or solid color that grounds the space. The remaining 30% can be your bold pattern, encaustic cement, or vibrant color.
If you fall in love with a bold, Moroccan-style cement tile for a bathroom floor, that is your hero. For the shower walls, you should likely choose a simple ceramic subway tile or a large-format white tile. This lets the floor shine without making the room feel like a kaleidoscope.
Real-World Project Strategy
When I am designing a kitchen backsplash and floor combo, here is my thought process:
- Scenario A: If the client wants a wild, patterned floor, the backsplash becomes a solid color (white, grey, or deeply saturated blue) with a simple layout.
- Scenario B: If the client wants a stunning hand-painted backsplash, the floor becomes a wood-look porcelain or a large-format slate.
What I’d Do in a Real Project: The Grout Trick
One of my favorite tricks to tie a solid tile to a patterned tile is through grout color.
- Step 1: Pick a color from within your patterned “hero” tile (e.g., a charcoal grey fleck in a marble mosaic).
- Step 2: Use that specific charcoal grey grout for your solid “supporting” tiles.
- Result: This subtle link connects the two surfaces subconsciously, making the design look cohesive.
3. Play with Texture and Finish
Color and pattern are obvious ways to mix, but texture is the secret weapon of interior designers. Mixing finishes adds depth to a room, especially if you are working with a monochromatic palette (like all white or all grey).
Contrast is key here. If you have a glossy, light-reflecting wall tile, pair it with a matte, honed floor tile. This is not just an aesthetic choice; it is also a safety requirement.
Glossy tiles are generally slippery and dangerous for floors, especially in wet zones like bathrooms or mudrooms. Matte or textured finishes provide the necessary friction (look for a Coefficient of Friction or COF rating above 0.42 for floors).
Texture Combinations That Work
- The Organic Spa: Matte slate floor (rough texture) + Glossy handmade Zellige wall tiles (high shine, uneven surface).
- The Modern Industrial: Polished concrete floors (smooth, matte) + Beveled subway tiles (structured, glossy).
- The Soft Traditional: Honed marble floor (satiny finish) + Crackle-glaze ceramic wall tile.
Designer’s Note: Lighting Matters
Texture relies on lighting to be seen. If you are mixing matte and gloss white tiles in a bathroom, ensure your lighting is positioned to wash down the wall. Recessed lighting or sconces placed about 18 to 24 inches from the wall will highlight the glossy ripples and make the matte surfaces recede, creating beautiful shadows.
4. Creative Transitions and Thresholds
In open-concept homes, you often need to mix tile with other flooring types, like hardwood or engineered vinyl. The standard solution is a straight line with a transition strip, but we can be more creative.
One current trend is the “organic transition.” This involves cutting the wood planks or concrete to follow the shape of the tile, rather than a straight line. Hexagon tiles are perfect for this, “spilling” from a kitchen into a living room.
However, this requires precision. The subfloor height must be perfectly level so that the tile and wood sit flush. If you are renting or on a strict budget, this might be too labor-intensive.
Managing Heights and Edges
When mixing two different tiles (like a hallway tile meeting a bathroom tile), the thickness of the material matters. A natural stone tile might be 1/2 inch thick, while a porcelain tile might be 3/8 inch.
- The Fix: Use a specialized transition strip, like a Schluter metal profile. These come in finishes like brushed brass or matte black and provide a clean, deliberate line between the two materials.
- My Preference: I prefer using a threshold made of the same material as the bathroom vanity countertop (like quartz or marble) for a high-end custom look.
Common Mistakes + Fixes
Mistake: Ignoring the “undertone” of adjacent wood flooring when picking tile.
Fix: If your wood floor is a warm oak (yellow/orange undertones), avoid cool blue-grey tiles. Opt for warm greys, creams, or slate with brown veins.
5. Room-Specific Layouts: Shower Niches and Rug Inlays
Small contained areas are the safest places to take risks with mixing tiles. The shower niche and the “tile rug” are two classic applications that add value to a home.
The Shower Niche
The recessed shelf in a shower is a perfect opportunity to introduce a third tile. If you have large tiles on the walls, use a small mosaic inside the niche.
- Pro Rule: Ensure the niche lines up with the grout lines of the main wall tile if possible. This requires careful math by your installer.
- Material Note: Glass mosaic tiles look beautiful in niches, but be aware they show water spots more than stone or ceramic.
The Tile Rug
In an entryway or a large master bath, you can create the illusion of a rug using tile. This is excellent for durability, as you don’t have to worry about washing a fabric rug.
- The Border: Use a solid border tile (2-3 inches wide) to frame the “rug.”
- The Center: Use a basketweave, herringbone, or decorative pattern inside the border.
- Spacing: Leave at least 24 to 30 inches of the main floor tile around the perimeter of the room so the “rug” feels centered and intentional, not like you ran out of material.
What I’d Do in a Real Project: Small Bathrooms
In a small 5×8 bathroom, I usually run the floor tile right into the shower if it is a curb-less design. However, if there is a curb, I will switch the shower floor to a 1×1 or 2×2 mosaic of the same material as the main floor. The smaller tiles require more grout lines, which provides essential grip for wet feet.
Final Checklist
Before you order boxes of tile, run your choices through this final checklist to ensure success.
- Check the Thickness: Are the two tiles roughly the same thickness? If not, do you have the correct thin-set mortar or transition strips to level them?
- Verify Slip Resistance: Is the floor tile rated for floor use? Look for “matte,” “honed,” or “textured” descriptions.
- Grout Coordination: Have you selected a grout color that unifies the two tiles? Avoid high-contrast grout on both surfaces; pick one surface to highlight.
- Scale Test: Have you placed the samples next to each other and viewed them from 6 feet away?
- Maintenance Reality: If mixing natural stone (porous) with ceramic (non-porous), are you prepared to seal the stone annually?
FAQs
Can I mix warm and cool tones in tile?
Yes, but you need a “bridge” element. If you are mixing cool grey floors with warm beige wall tiles, try to find a mosaic or a countertop material that contains both colors. Natural marble often has both warm gold and cool grey veining, making it an excellent bridge material.
Does mixed tile work in small spaces?
Absolutely. In fact, using a large-scale tile on the floor and a vertical stack tile on the walls can make a small bathroom feel taller and wider. The key is to avoid two busy small-scale patterns, which create a “closing in” effect.
How do I calculate overage for mixed tile patterns?
For standard layouts, we usually order 10% extra. However, when mixing tiles or doing complex layouts like herringbone or organic transitions, you should order 15% to 20% extra. You will have more waste due to the intricate cuts required to make the two materials meet.
Is it okay to mix metal finishes with mixed tiles?
Yes. If your tiles are mixed (e.g., grey slate and white ceramic), you can keep the hardware consistent (all matte black) to calm the space down. Alternatively, if your tiles are very neutral, mixing metals (like brass sconces with chrome faucets) adds another layer of interest.
Conclusion
Mixing and matching tiles is one of the most effective ways to elevate a home from standard to stunning. It allows you to define zones, create focal points, and add a layer of sophistication that single-tile rooms simply cannot achieve.
Remember that the goal is harmony, not noise. By respecting the rules of scale, balancing busy patterns with solids, and paying attention to texture, you can curate a space that feels professionally designed. Start with a neutral foundation, add your “hero” tile, and trust your eyes when testing samples in your actual lighting conditions.
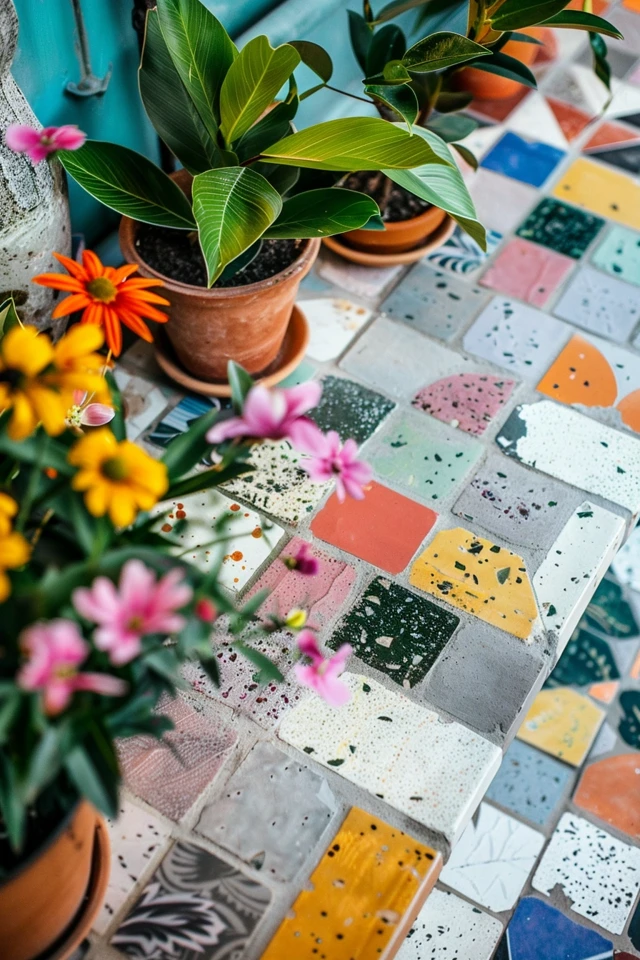
Picture Gallery


