
Modern White Rock Landscaping Ideas for Chic Gardens
There is something undeniably crisp about a garden that utilizes white rock. It acts as an instant palette cleanser for the exterior of a home, bringing a brightness that mulch simply cannot compete with. As a designer, I often turn to white stone when a client wants their outdoor space to feel larger, cleaner, and decidedly architectural.
However, using white rock requires a disciplined eye to prevent the space from looking stark or unfinished. It is about balancing the high-contrast brightness of the stone with lush, structural greenery and rigid hardscaping. If you are eager to see these concepts in action, please note that there is a curated Picture Gallery at the end of this blog post.
Whether you are dealing with a sprawling backyard or a modest city patio, the principles of modern landscaping remain the same. It comes down to scale, edging, and the interaction between organic and inorganic materials. Let’s dive into how you can execute this look with professional precision.
1. Choosing the Right Stone: Texture and Scale
Not all white rocks are created equal, and choosing the wrong type is the first stumbling block for many homeowners. In modern design, we usually lean toward two specific finishes: crushed angular stone or smooth river pebbles.
Crushed marble chips or “white spar” offer a jagged, angular look that locks together well. This is excellent for walkways because the stones don’t shift as much underfoot. This texture reflects light in different directions, giving the ground a sparkling, dynamic surface.
Smooth white Mexican beach pebbles or polished river rocks offer a completely different vibe. They are round, soft, and matte. I typically use these for decorative borders or areas that won’t see heavy foot traffic, as they are slippery and unstable to walk on.
Designer’s Note: The Scale Rule
When selecting your stone size, consider the scale of your yard. For a small courtyard, use 3/4-inch to 1-inch stones to keep the texture tight and refined.
If you have a large, expansive yard, 3/8-inch gravel will look like sand and get lost. For larger areas, bump up to 1.5-inch or 2-inch stones to ensure the texture is visible from a distance.
2. The Floating Paver Layout
One of the hallmarks of modern landscaping is the “floating” paver look. This involves placing large, geometric concrete slabs into a bed of white rock. The contrast between the industrial grey concrete and the bright white stone is visually striking.
To get this right, spacing is everything. A common amateur mistake is placing pavers too far apart, forcing people to hop rather than walk naturally.
The ideal gap between pavers for a comfortable stride is between 4 and 6 inches. This allows enough white rock to show through to create that “floating” effect without making the path treacherous.
Measurements that Matter
- Paver Size: For a modern look, go big. 24×24 inches is standard, but 24×48 inches creates a more luxurious, linear feel.
- Stone Depth: Your layer of white rock should be about 2 inches deep. Any deeper, and you sink in; any shallower, and the soil shows through.
- Paver Height: The pavers should sit about 1/4 inch higher than the rock. This keeps the stones from getting kicked onto the clean concrete surface.
3. High-Contrast Planting Palettes
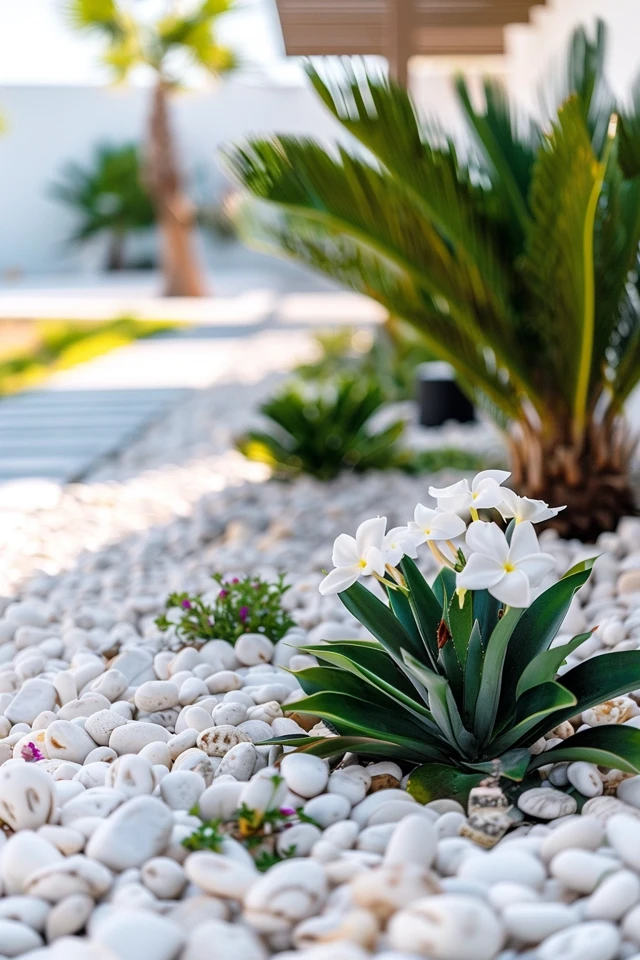
White rock acts as a spotlight for your plants. Because the ground cover is so bright, you need plants with deep, saturated colors or strong architectural shapes to hold their own. Wispy wildflowers often look messy against white stone.
I prefer using structural plants with dark green foliage. Snake plants (Sansevieria), Agave, and Yucca are fantastic choices because their rigid shapes mimic the clean lines of modern architecture.
Ornamental grasses also work well if they are kept clumped and tidy. The movement of the grass softens the hardness of the rock and concrete.
Specific Plant Pairings
- Boxwoods: Keep them manicured in spheres or cubes. The dark glossy green pops incredibly well against white marble chips.
- Black Mondo Grass: For the ultimate modern contrast, use black grass. It is moody, chic, and virtually indestructible.
- Succulents: If you are in a dry climate, Echeveria and Aloe create a beautiful sculptural look that requires minimal water.
4. Edging and Containment
The difference between a DIY project and a pro install is almost always the edging. White rock loves to migrate. Without a barrier, it will end up in your lawn, your flower beds, and your driveway.
For a modern aesthetic, invisible or metal edging is the gold standard. We want crisp, straight lines or perfect geometric curves.
Pro Recommendation: Steel Edging
I almost exclusively specify Corten steel or aluminum edging for modern projects. It is thin, strong, and creates a definitive line between the rock and the rest of the landscape.
Install the metal edging so it stands about 1/2 inch to 1 inch above the grade of the rock. This creates a lip that physically stops the rocks from tumbling over.
Avoid plastic “black roll” edging found at big-box stores. It inevitably warps in the sun and ruins the clean lines necessary for a modern look.
5. Lighting the Landscape
White rock has a unique property: it reflects light. This makes it a powerful tool for nightscaping. When you up-light a tree or a wall, the bounce from the white stones illuminates the ground naturally.
You don’t need as many path lights when using white gravel. The ambient light reflection helps guide the eye through the space.
Lighting Temperature
Be very careful with your LED color temperature. White rock is cool-toned. If you use very warm, yellow lights (2700K or lower), the rocks can look dingy or muddy at night.
I recommend a slightly cooler temperature, around 3000K or even 3500K. This preserves the crisp, moonlit appearance of the white stone after the sun goes down.
Common Mistakes + Fixes
Even with the best intentions, things can go wrong. Here are the most frequent issues I see on site visits and how to fix them.
Mistake 1: Skipping the Weed Barrier
The Issue: Homeowners pour rock directly on the soil. Within three weeks, weeds grow through, and the white rocks turn brown from mud mixing in.
The Fix: You must install a heavy-duty, non-woven geotextile landscape fabric. Do not use cheap black plastic; it traps water and creates runoff issues. The fabric separates the rock from the dirt.
Mistake 2: Overfilling the Area
The Issue: Buying too much rock and piling it high against the siding of the house or over the edging.
The Fix: Keep the rock level at least 2 inches below your home’s siding to prevent moisture damage and termite bridges. Rake the rock smooth so it sits flush with your hardscaping, not mounded above it.
Mistake 3: Ignoring Heat Reflection
The Issue: White rock reflects sunlight, which can cook delicate plants.
The Fix: Leave a “breathing room” circle of about 6 to 8 inches around the base of any plant stem. Use a little organic mulch right at the base if needed, or just leave the fabric visible in the tight circle. This prevents the plant from overheating.
Designer’s Note: Real-World Lesson
I once worked with a client who wanted an entire backyard filled with 3-inch white river rocks because they loved the chunky look.
Against my advice, they insisted on using it for the main dining patio.
Once installed, they realized furniture couldn’t sit flat. Chairs wobbled, and the table was unstable. We had to remove all the stone under the dining area and replace it with concrete pavers, using the large stones only as a perimeter border.
The lesson: Large stones are decorative accents, not flooring. Always verify the function of the zone before selecting your aggregate size.
What I’d Do in a Real Project: A Mini Checklist
If I were designing your garden today, this is the exact workflow I would follow to ensure success:
- Demolition: Remove all grass and topsoil to a depth of 3 inches.
- Leveling: Compact the soil base to ensure it is flat and drains away from the house foundation.
- Edging: Install 1/8-inch steel edging to define the perimeter.
- Barrier: Lay down professional-grade landscape fabric, overlapping seams by 6 inches. Staple it down every 2 feet.
- Placement: Place plants first, cutting X-shapes into the fabric for root balls.
- Hardscape: Place concrete pavers or stepping stones. Level them individually with sand underneath if necessary.
- Filling: Pour the white rock. Rinse it immediately with a hose to remove the “quarry dust” and reveal the true white color.
Final Checklist for Your Project
Before you head to the landscape supply yard, run through this final check to make sure you have everything covered.
- Measurement: Have you calculated the square footage? (Length x Width).
- Volume: For 2 inches of depth, a good rule of thumb is that one ton of rock covers roughly 100 square feet.
- Access: Can the delivery truck access your driveway? Pallets of stone are incredibly heavy.
- Drainage: Where will the water go when it rains? Ensure your grading doesn’t trap water against the foundation.
- Samples: Have you brought a sample of the rock home? Look at it in the shade and direct sun before buying bulk.
FAQs
Does white rock turn green with algae?
Yes, it can, especially in damp, shaded areas. The best fix is to spray the rocks with a mixture of water and white vinegar, or use a pressure washer on a low setting once a year to blast off organic buildup.
Is white rock bad for pets?
Generally, no. However, small jagged gravel can be tough on sensitive paws. If you have dogs, smooth river pebbles are much kinder to walk on than crushed marble. Also, white rock can get hot in direct summer sun, so ensure there is a shaded area or grass patch for pets.
How do I remove leaves from white rock?
Do not use a rake; you will just pull the rocks up. The only effective way to keep white rock clean is a leaf blower. Use it on a low setting to skim the leaves off the top without disturbing the stones.
Is landscaping with rock cheaper than mulch?
Upfront, no. Rock is significantly more expensive to buy and install than wood mulch. However, mulch needs to be replaced every year or two. Rock lasts indefinitely. Over a 5-10 year period, rock is often the more economical choice.
Conclusion
Modern white rock landscaping is more than just a trend; it is a design solution that offers longevity, low maintenance, and high visual impact. By focusing on the geometry of your layout, the scale of your materials, and the contrast of your planting, you can create a space that feels like a high-end sanctuary.
Remember that the success of this look lies in restraint. Don’t overcomplicate the design. Let the clean lines and the brightness of the stone do the heavy lifting. With the right preparation and materials, your garden can maintain that chic, designer look for years to come.
Picture Gallery


