
Mounting Large Staghorn Ferns: Creative Displays
There are few plants that bridge the gap between greenery and fine art quite like the Staghorn Fern. In my design projects, I often treat a large, mounted Platycerium not just as a houseplant, but as a living sculpture that commands the room. They offer an organic texture that softens modern lines and brings a crucial biophilic element to sterile spaces.
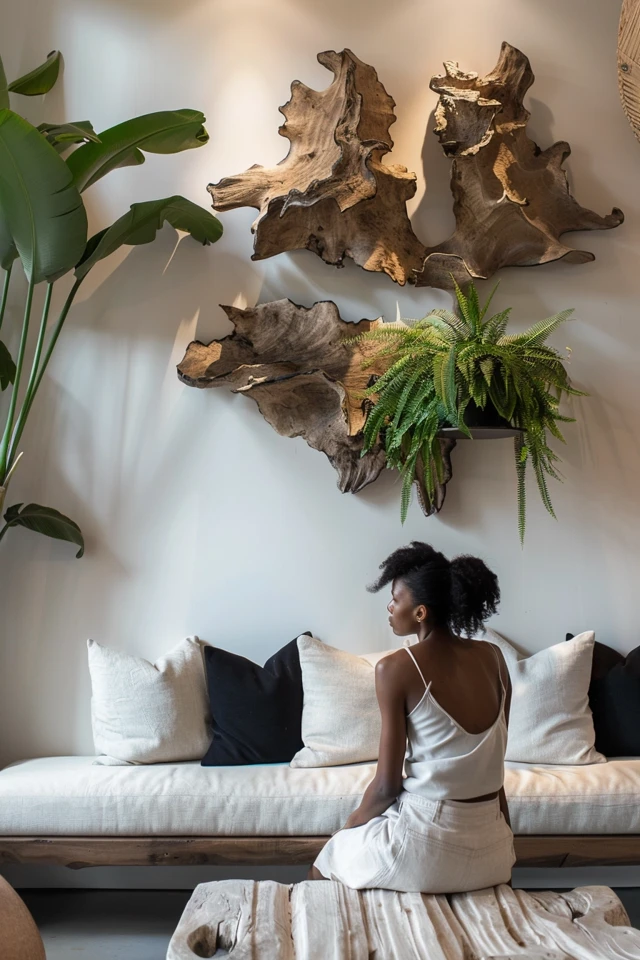
However, moving a staghorn fern from a hanging basket to a wall mount intimidates many homeowners. The process involves more than just aesthetics; it requires understanding the plant’s epiphytic nature to ensure it thrives on a vertical surface. If you are looking for visual inspiration, jump to the Picture Gallery at the end of the blog post to see how these ferns transform a space.
If you execute this correctly, you gain a dramatic focal point that frees up floor space and becomes a conversation starter. In this guide, I will walk you through the professional methods I use to mount, style, and maintain these prehistoric beauties.
Understanding the Anatomy and Needs of Epiphytes
Before we pick up a drill or select a board, you must understand exactly what you are working with. Staghorn ferns are epiphytes, meaning in nature, they grow on tree trunks rather than in soil. This biology dictates every design decision we make, from the backing material to the location in your home.
The plant consists of two distinct types of fronds. The “antler” fronds are the green, reproductive leaves that drape outward and give the plant its name. The “shield” fronds are the round, flat leaves at the base that turn brown and papery as they age.
Designer’s Note: The Shield Frond
One of the most frequent panic calls I get from clients involves the shield frond turning brown. This is completely normal and essential to the plant’s health. In a design context, do not try to trim or remove this brown shield. It protects the root ball and helps anchor the plant to its mount. Embrace the color contrast between the brown shield and the green antlers; it adds visual depth and maturity to the display.
These plants require excellent air circulation and quick drainage. When we mount them, we are essentially mimicking their natural habitat on a tree branch. This is why potting soil is rarely used in mounting; it stays too wet and heavy. Instead, we rely on moss to retain moisture without suffocating the roots.
Selecting Materials for Longevity and Style
The backing board you choose sets the tone for the entire installation. In my projects, I prioritize rot resistance above all else. You will be soaking this entire apparatus in water regularly, so standard pine or plywood will warp and degrade within a year.
I almost exclusively use cedar or redwood for client installations. These woods naturally resist rot and pests, ensuring the mount lasts as long as the fern does. If a client prefers a specific look, like a whitewashed oak, I ensure it is sealed with a marine-grade varnish to prevent water damage.
The Aesthetic of the Board
The shape of the board changes the vibe of the room.
- Live-edge slabs: These create a rustic, organic look that works beautifully in bohemian or farmhouse interiors.
- Geometric squares or hexagons: I use these in mid-century modern or contemporary spaces to create a structured “gallery” feel.
- Oversized circles: A large round backing helps soften the angular lines of the staghorn’s antlers.
Hardware and Fasteners
For large specimens, standard glue is not enough. I use screws arranged in a circle to act as anchor points for the binding material.
- The Binding: I recommend clear monofilament fishing line (20-30 lb test) for a floating, invisible look.
- The Wire Alternative: For a more industrial or rustic aesthetic, copper wire or plastic-coated green wire is acceptable, but be aware that copper can sometimes oxidize on the leaves.
- Anchors: Use stainless steel screws. Standard screws will rust quickly due to the moisture in the moss, leaving unsightly orange streaks on your wood and wall.
Step-by-Step Mounting Process
Mounting a large staghorn is a physical process that is best done on a waist-high table. Cover your surface, as working with wet moss is messy. This specific method ensures the plant is secure enough to handle its own weight once hung vertically.
Step 1: Board Preparation
Determine where the center of the plant will sit. Draw a rough circle on the board about 2 inches wider than the plant’s current root ball. Drive your stainless steel screws into the board along this circle outline. Space the screws about 2 to 3 inches apart. Leave the heads of the screws sticking out about half an inch; these are the cleats for your fishing line.
Step 2: Prepare the Moss
Soak a large brick of Sphagnum moss in a bucket of water until it is fully saturated. Wring it out so it is damp like a sponge, not dripping wet. Pile a bed of this moss in the center of your circle of screws. This acts as the cushion for the root ball.
Step 3: Position the Fern
Remove the fern from its nursery pot. Gently loosen the root ball but do not break it apart. Place the fern on top of the moss bed. Orient the fern so the antler fronds face “up” in a way that looks natural. Add more damp moss around the sides of the root ball to cover any exposed soil, tucking it under the shield fronds if possible.
Step 4: The Secure Wrap
Tie your fishing line to one of the screws. Pull the line across the plant to a screw on the opposite side. Wrap it around that screw, then pull it across to another screw. You are creating a web or a net over the shield frond.
Continue this crisscross pattern. You need to pull tightly. The most common failure is a loose mount that sags when the moss dries out so do not be afraid to apply tension. The shield frond is tough and can handle the pressure.
Step 5: Finishing Touches
Once the plant feels immovable, tie off the line securely at the final screw. Trim any excess line. Tuck in any stray bits of moss to make the mound look neat and rounded. Attach heavy-duty D-rings or a french cleat to the back of the board for hanging.
Common Mistakes + Fixes
Even seasoned DIYers make errors when mounting large ferns. Here are the corrections for the most frequent issues I see in homes.
Mistake: Mounting too high on the wall.
Fix: When hanging art or plants, the center of the piece should be at average eye level, which is roughly 60 to 65 inches from the floor. If you hang a staghorn too high, you only see the underside of the pot and maintenance becomes a chore.
Mistake: Using cotton string or jute twine.
Fix: Natural fibers look great for about three months. Then, they decompose from the constant moisture and snap, causing your fern to crash to the floor. Stick to synthetic fishing line or non-rusting wire.
Mistake: Mounting on a wall with no light.
Fix: Just because it’s on a wall doesn’t mean it’s a picture. It is a living organism. It needs bright, indirect light. Avoid dark hallways or corners unless you have installed specific grow lights.
Design Placement and Styling
Once mounted, the staghorn fern becomes a major architectural feature. The placement should be intentional. I often use large staghorns to bridge the transition between indoor and outdoor spaces, or to bring life to areas where floor space is at a premium.
The Gallery Wall Approach
A single large staghorn is a statement, but a grouping is a showstopper. I like to arrange them in odd numbers—groups of three or five. Vary the size of the backing boards and the maturity of the plants to create rhythm.
- Spacing: Keep 4 to 6 inches of space between the edges of the boards. This allows the fronds to overlap slightly over time, creating a lush, vertical jungle effect.
- Material mix: If your room has a lot of soft textiles, the wood backing and architectural fronds add necessary hardness and structure.
Bathroom Environments
Bathrooms are the holy grail for staghorn ferns due to the high humidity from showers. However, ensure the bathroom actually has a window. A windowless bathroom will kill a staghorn quickly. If you have a skylight or a frosted privacy window, mount the fern on the opposite wall where it can catch the ambient glow.
Renters and Wall Anchors
A soaked staghorn on a hardwood board is heavy. It can easily weigh 15 to 20 pounds. Do not rely on standard picture hooks.
- Drywall: Use toggle bolts or heavy-duty screw-in anchors rated for at least 50 pounds.
- Studs: Whenever possible, locate a stud. This is the only way to be 100% secure.
- Rental Tip: One large hole from a toggle bolt is actually easier to patch and hide upon moving out than ten small holes from failed attempts with nails.
Maintenance for Mounted Specimens
The maintenance of a mounted plant is logistically different than a potted one. You cannot simply pour water onto it while it hangs on the wall; it will run down the board and ruin your baseboards or flooring.
The Soak Method
This is the gold standard for watering. Take the board off the wall. Fill a bathtub, sink, or large basin with room-temperature water. Submerge the moss ball / shield frond face down in the water.
- Duration: Let it soak for 10 to 15 minutes.
- Drip Dry: This is the step people rush. Let the board sit upright in the tub or a drying rack for at least 30 minutes. You want the moss to hold water, but you do not want the board dripping when you re-hang it.
The Shower Method
For very large mounts that are difficult to submerge, place them in the shower. Run a gentle, tepid shower over the fronds and moss block for about 5 minutes. Again, allow adequate drip-dry time before returning to the wall.
Frequency and Feeding
Watering frequency depends on humidity. In a dry winter home, you might soak weekly. In a humid summer, every two weeks might suffice. The best test is to touch the moss at the base. If it is crispy or crunchy, it is thirsty. If it is spongy like a squeezed-out dishrag, it is fine.
For fertilizer, I use a diluted liquid seaweed or fish emulsion added to the soak water once a month during the growing season (spring and summer). Alternatively, you can tuck slow-release fertilizer pellets under the shield frond once a year.
What I’d Do in a Real Project: A Mini Checklist
If I were installing a staghorn fern wall in your home tomorrow, this is exactly how I would execute it to ensure success.
- Check the Light: I would use a light meter app to ensure the wall gets at least 200-400 foot-candles of light. If not, I would install a track light with a grow bulb directed at the wall.
- Prep the Wall: I would install clear rubber bumpers on the back corners of the wood board. This creates a tiny air gap between the wood and your paint, preventing mold growth or paint peeling from trapped moisture.
- Hardware Check: I would use a “French Cleat” hanging system rather than a wire on a nail. French cleats are much more stable and keep the board flush against the wall.
- Rug Coordination: If the fern is above a console table, I would ensure the rug under the console extends at least 24 inches beyond the table legs to balance the visual weight of the heavy plant above.
FAQs
Why are the tips of my antler fronds turning brown?
This is usually a sign of low humidity or underwatering. Mist the fronds daily between soakings, or move the plant to a more humid room. It can also happen if the plant is in the direct path of an HVAC vent—never place them directly under a heat or AC register.
Can I mount a staghorn fern outside?
Yes, but temperature is key. They thrive outdoors in shaded areas (under a porch or tree canopy). However, they are not frost-tolerant. If your temperature drops below 50°F, you must bring them inside. Many of my clients have an “indoor spot” and an “outdoor spot” and move the plant seasonally.
Do I need to clean the leaves?
Yes. Dust blocks the plant’s ability to photosynthesize. Once a month, gently wipe the antler fronds with a damp microfiber cloth. Do not use “leaf shine” products, as these can clog the pores of the fern.
What is the white fuzz on the leaves? Is it mold?
No! Do not wipe this off. The white, felt-like covering on the leaves helps the plant retain moisture and protects it from harsh sunlight. Scrubbing this off damages the plant significantly.
Conclusion
Mounting a large Staghorn Fern is one of the most rewarding interior design projects you can undertake. It requires a bit of upfront effort and a shift in how you think about watering, but the payoff is immense. You get a living, architectural element that adds history and texture to your home.
By choosing the right wood, securing the plant properly with monofilament, and committing to the “soak and dry” watering routine, your staghorn can live for decades. It will grow massive, producing new “pups” that you can eventually propagate and mount on their own boards. Treat it with the care you would give a piece of fine art, and it will return the favor by breathing life into your walls.
Picture Gallery


