
Nautical Landscaping Ideas for Coastal Charm
Bringing the serenity of the ocean to your doorstep is about more than just placing a few anchors in the yard. It is a cohesive design philosophy that blends rugged durability with the airy, relaxed atmosphere of a seaside retreat. Before we dive into the details of deck boards and dune grass, be sure to scroll through to the very bottom where our curated Picture Gallery awaits to inspire your next outdoor renovation.
Nautical landscaping is particularly rewarding because it relies on natural textures and weather-beaten finishes that actually improve with age. Whether you live on the Atlantic coast or in a landlocked suburban neighborhood, these principles will help you create a sanctuary that feels both timeless and refreshing.
At-a-Glance: Key Takeaways
- Prioritize salt-tolerant and wind-resistant plants like ornamental grasses, lavender, and hydrangeas.
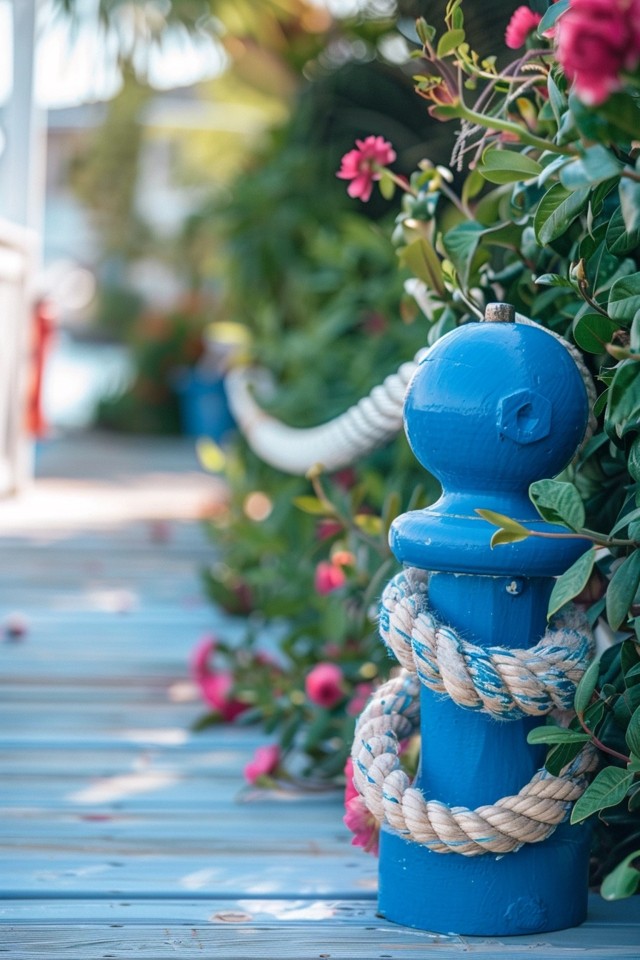
- Use a color palette rooted in navy blue, crisp white, sand beige, and weathered grey.
- Incorporate authentic maritime materials such as manila rope, galvanized steel, and reclaimed wood.
- Focus on drainage and soil quality, especially if you are working with sandy or clay-heavy earth.
- Balance structural elements like boardwalks and pilings with soft, flowing foliage to avoid a rigid look.
What This Style Means (and Who It’s For)
Nautical landscaping is often referred to as “Coastal Chic” or “Cape Cod Style.” At its heart, it is a tribute to the functional beauty of maritime life. It is for the homeowner who values a relaxed lifestyle where the transition between indoors and outdoors is seamless. This style does not demand the manicured perfection of a formal English garden; instead, it embraces the “perfectly imperfect” nature of sun-bleached wood and wind-swept plants.
This aesthetic is ideal for those who want a low-maintenance yard that stands up to the elements. Because many coastal plants are drought-tolerant once established, it is a sustainable choice for many climates. If you find yourself drawn to the sound of wind chimes, the texture of rough-hewn timber, and the sight of billowing grasses, this design language is meant for you.
The Signature Look: Ingredients That Make It Work
To achieve an authentic nautical feel, you must layer specific textures and colors that evoke the sea. It starts with the ground cover. Instead of traditional green turf, consider areas of crushed oyster shells or pea gravel. These materials provide excellent drainage and create a satisfying crunch underfoot that mimics a walk along the shoreline.
Wood choice is the next critical ingredient. Cedar, teak, and Ipe are the gold standards for coastal design because they contain natural oils that prevent rot. When left untreated, these woods silver beautifully over time, matching the grey tones of driftwood. Complement this with “hard” accents like heavy-duty cleats used as drawer pulls on outdoor kitchens or large dock pilings used as sculptural corner markers for a flower bed.
Planting is where the “charm” really enters the picture. You want a mix of structural plants and soft, moving elements. Think of the way sea oats move in a gale. Recreate that with Blue Dune Lyme Grass or Mexican Feather Grass. For pops of color, nothing beats the classic hydrangea, which thrives in the salt air and provides massive clusters of blue or white blooms that define the coastal aesthetic.
Layout & Proportions (Designer Rules of Thumb)
In nautical landscaping, scale is everything. Because the ocean is vast, small, dainty features can get “lost” in the landscape. You want to lean into slightly oversized elements to ground the space.
- Pathways: Main walkways should be at least 48 inches wide. This allows two people to walk side-by-side comfortably, reinforcing the social, relaxed nature of the style.
- Dock Pilings: If using pilings as decorative posts, they should be 6 to 8 inches in diameter. Bury them at least 24 to 30 inches deep to ensure they look like permanent structures rather than temporary props.
- Rope Fencing: When stringing rope between posts, allow for a “swag.” The lowest point of the curve should sit about 18 to 24 inches off the ground for a 36-inch post. This creates a relaxed, rhythmic visual line.
- Furniture Groupings: Arrange seating in a circle or U-shape around a focal point, like a fire pit. Leave at least 18 inches between the edge of the seat and a coffee table or fire pit rim for legroom.
- Lighting Spacing: Path lights should be spaced 6 to 10 feet apart. You want “pools” of light rather than a continuous runway look, which feels too modern for a coastal setting.
Step-by-Step: How to Recreate This Look
Step 1: Analyze Your Environment.
Before planting, check your soil’s pH and drainage capacity. If you have heavy clay, you will need to amend it with sand and organic compost to accommodate coastal plants that prefer well-draining soil. Observe the wind patterns; if you have a “wind tunnel” in your yard, plan for a windbreak using sturdy evergreens or a cedar slat fence.
Step 2: Install Hardscaping First.
Define your zones. Lay down your boardwalks, stone patios, or shell paths before a single plant goes in the ground. If you are building a deck, ensure you use 316-grade stainless steel fasteners. Standard galvanized nails will rust and leave “weeping” streaks on your beautiful wood within a year.
Step 3: Define the Perimeter.
Use larger elements to frame the view. This might mean planting a row of Privet hedges for privacy or installing a series of nautical bollards connected by heavy manila rope. This creates the “container” for your garden.
Step 4: Layer Your Plantings.
Place your tallest plants (like Eastern Red Cedar or Myrtles) at the back or in the center of circular beds. Move to mid-sized shrubs like Rugosa Roses or Hydrangeas. Finally, fill the edges with ground covers like Creeping Thyme or Seaside Goldenrod.
Step 5: Add Functional Lighting.
Install low-voltage LED lighting. Use copper fixtures that will develop a green patina over time. Focus on up-lighting the trunks of trees and down-lighting paths for safety.
Step 6: The Finishing Touches.
This is where you add the personality. A vintage life ring hung on a fence, a few oversized lanterns on the stairs, and weather-resistant navy blue cushions on the furniture will tie the whole look together.
Designer’s Note
In my professional experience, the biggest mistake homeowners make is choosing the wrong rope. Never use yellow nylon rope from a big-box hardware store; it looks cheap and degrades in UV light. Always opt for “Unmanila” (a synthetic that looks like natural fiber but won’t rot) or high-quality natural Manila rope that has been treated for outdoor use. Also, remember that rope shrinks when it gets wet and expands when it dries; always leave extra slack during installation to prevent it from snapping your posts.
Budget Breakdown: Low / Mid / Splurge
Low Budget (The DIY Refresh):
Focus on surface-level changes. A few bags of crushed shells to refresh a garden path, a coat of white paint on existing Adirondack chairs, and a handful of ornamental grass “plugs” can transform a space for under $500. Use found objects like driftwood or smoothed sea glass as mulch accents.
Mid Budget (The Targeted Renovation):
This typically involves professional help for specific tasks. For $2,000 to $5,000, you can install a high-quality rope-and-piling fence, add a small cedar boardwalk section, and invest in mature, 3-gallon shrubs. This budget also allows for a professional low-voltage lighting kit that will make the yard usable at night.
Splurge (The Full Coastal Estate):
At $15,000 and up, you are looking at premium materials. Think Ipe hardwood decking, custom masonry using local fieldstone, and a fully automated irrigation system. This budget allows for large-specimen trees and high-end outdoor kitchens with marine-grade stainless steel appliances.
Common Mistakes (and How to Fix Them)
Mistake: Over-Theming.
Your yard should not look like a miniature golf course or a themed seafood restaurant. Too many anchors, buoys, and “Beach This Way” signs can feel cluttered and tacky.
Fix: Use the “Rule of Three.” Limit your literal nautical props to three high-quality pieces and let the materials (rope, wood, stone) do the rest of the talking.
Mistake: Ignoring Maintenance of “Weathered” Look.
There is a fine line between “weathered” and “neglected.” Wood that turns grey is beautiful; wood that is covered in green algae is not.
Fix: Power wash your decks and boardwalks once a year and apply a clear, breathable sealer. This preserves the silvery color while preventing rot and slip hazards.
Mistake: Using Invasive Species.
Some “coastal” plants, like certain types of bamboo or invasive vines, can take over a yard and choke out local ecology.
Fix: Research native seaside plants for your specific region. Native plants will be more resilient to local pests and weather extremes.
What I’d Do in a Real Project: A Checklist
- Check the “Visual Weight”: Ensure the patio furniture isn’t too “skinny.” Look for chunky wood frames or heavy wrought iron.
- Coordinate Finishes: If the gate hardware is black, make sure the light fixtures and door handles are also black or a matching dark bronze.
- Test the Flow: Walk the paths. If you have to turn sideways to avoid a bush, the path is too narrow or the plant is in the wrong spot.
- Drainage Check: Ensure all water flows away from the house foundation, especially if using non-porous stone for a patio.
- Pet/Kid Safety: Check that your “nautical” elements don’t have splinters. Sand down the edges of all pilings and boardwalk planks.
Room-by-Room Variations (Outdoor Zones)
The Entryway (The “Gangway”)
The front of the house should set the tone. Use a pair of oversized copper lanterns flanking the door. A boardwalk-style path leading from the driveway to the porch creates an immediate sense of arrival. Consider a “Welcome” mat made of woven seagrass or reclaimed lobster rope.
The Dining Area (The “Galley”)
Place your dining table in a spot that catches the breeze but is protected from direct gusts. Use a pergola with a retractable sailcloth shade to provide relief from the sun. For the table, a chunky teak set with navy blue striped runners creates a classic maritime dining experience.
The Lounge (The “Quarterdeck”)
This is your primary relaxation zone. Group comfortable lounge chairs around a central fire pit. Use “stump” side tables made from cedar logs to hold drinks. Ensure there is plenty of soft textures here—outdoor rugs in a sisal weave and plenty of throw blankets for chilly seaside evenings.
The Secret Nook (The “Cove”)
Every garden needs a private corner. Tucked behind a screen of tall grasses, place a single hammock or a hanging “egg” chair. Use subtle wind chimes made of capiz shells or driftwood to create a soothing auditory background.
Finish & Styling Checklist
- Metals: Choose brushed stainless steel, copper, or galvanized zinc. Avoid shiny chrome.
- Fabrics: Use solution-dyed acrylics (like Sunbrella) in solid navy, white, or classic cabana stripes.
- Stone: Look for bluestone, limestone, or light grey granite.
- Plants: Russian Sage, Sea Thrift, Beach Plum, and Bayberry.
- Lighting: 2700K color temperature bulbs for a warm, candle-like glow.
FAQs
How do I stop my nautical rope from rotting?
If using natural Manila rope, make sure it is suspended and not resting directly on the damp ground. You can also coat it with a clear wood preservative. Alternatively, use “ProManila” or “Unmanila,” which is a polypropylene cord designed to look like hemp but is completely waterproof and UV resistant.
Can I have a nautical yard if I live in a desert climate?
Yes! You can use the “Nautical Modern” approach. Use the color palette and hardscaping (gravel, weathered wood) but swap the thirsty coastal plants for succulents that have a similar “sculptural” look, such as Agave or Blue Senecio.
What is the best way to clean oyster shell paths?
Simply hose them down to remove dust and debris. If they begin to look thin, you can “top dress” them with a fresh bag of shells every two to three years. They are naturally alkaline, which can actually help suppress weed growth.
Is nautical landscaping expensive to maintain?
Actually, it is one of the more cost-effective styles. Because it celebrates the “aged” look, you spend less time painting and staining and more time just letting nature take its course. The main task is seasonal pruning of grasses and ensuring your drainage remains clear.
Conclusion
Creating a nautical landscape is an exercise in balancing the rugged with the refined. By focusing on durable materials like cedar and rope, and softened them with the movement of ornamental grasses and the classic beauty of hydrangeas, you create a space that feels like a permanent vacation. Remember that the best designs are those that feel integrated with their surroundings. Whether you are overlooking the Pacific or a suburban cul-de-sac, let the principles of coastal charm guide you toward a yard that is as functional as it is beautiful.
Picture Gallery


