
Title: Optimize Laundry Space: Shelf Over Washer and Dryer Ideas
Introduction
Laundry rooms are often the hardest working spaces in our homes, yet they frequently receive the least amount of design attention. We tend to view them strictly as utilitarian zones, ignoring the potential for both beauty and improved efficiency. I have seen countless laundry closets where the vertical space above the machines is completely wasted or, worse, becomes a cluttered dumping ground.
In my design practice, adding a shelf or countertop above the washer and dryer is one of the highest-impact upgrades a homeowner can make. It unifies the appliances, provides a crucial surface for folding, and offers storage for detergents that keeps them within arm’s reach. Whether you are working with a tight closet or a spacious mudroom, this single addition changes the entire workflow of the room.
However, getting this right involves more than just slapping a plank of wood on the wall. You have to consider machine vibration, plumbing access, and moisture resistance. If you are looking for visual inspiration to spark your renovation, be sure to check out the Picture Gallery at the end of the blog post.
1. The Logistics: Measurements and Clearance Rules
Before we buy materials, we have to talk about numbers. The most common mistake I see in DIY laundry makeovers is failing to account for the machine’s movement and maintenance needs. Washers and dryers are dynamic; they shake, they vibrate, and they need airflow.
You must leave a “breathing gap” between the top of your machines and the bottom of your shelf or countertop. I recommend a minimum vertical clearance of one inch. If the shelf rests directly on the machine, the vibration during the spin cycle will transfer to the shelf, causing everything sitting on top to rattle or fall off.
Depth is equally important. Most standard machines are about 27 to 34 inches deep, but you need to account for the hoses and vents in the back. In my projects, I usually aim for a shelf depth of at least 30 inches to fully cover the machines, but I leave a slight gap at the back wall for ventilation.
Designer’s Note: The Top-Loader Dilemma
If you have a top-loading washer, a fixed shelf immediately above the machine obviously won’t work. In these cases, I install a high shelf at 54 to 60 inches from the floor. Alternatively, we use a hinged countertop section that lifts up, though this requires high-quality heavy-duty hinges.
2. Selecting the Right Materials for a Wet Zone
Laundry rooms are wet zones, similar to bathrooms and kitchens. The humidity fluctuates, and spills are inevitable. The material you choose for your shelf needs to withstand moisture without warping or swelling.
Butcher Block
This is my go-to material for most residential laundry rooms. It brings warmth to a space that is usually full of cold metal and plastic surfaces. You can seal it with a marine-grade polyurethane or a hard-wax oil to make it water-resistant. It is also heavy enough to stay put but easy enough to cut on-site.
Laminate Countertops
For budget-conscious renovations, laminate is a fantastic option. Modern high-pressure laminates can mimic the look of stone or wood convincing. They are lightweight, easy to wipe down, and completely waterproof on the surface. However, you must be careful with the exposed edges; if water seeps into the particleboard core, it will expand.
Stone or Quartz
If you are matching the laundry room to a high-end kitchen, quartz is the gold standard for durability. It is scratch-resistant and non-porous. However, it is extremely heavy. You cannot just float a slab of quartz on standard brackets. This route usually requires building a sturdy plywood sub-frame or having custom steel supports installed into the studs.
Common Mistakes + Fixes
- Mistake: Using raw MDF or untreated pine plywood.
- Fix: These materials act like sponges. If you must use plywood to save money, apply an edge band to the front and seal the entire piece with three coats of exterior-grade paint or poly.
- Mistake: Ignoring weight capacity.
- Fix: A gallon of liquid detergent weighs over eight pounds. Ensure your brackets are rated for at least 50 pounds per linear foot if you plan on storing supplies there.
3. Configuration Styles: Floating vs. Waterfall vs. Brackets
The way you mount the shelf dictates the style of the room. The configuration also solves different structural problems depending on your walls.
The Floating Cleat Method
This is the cleanest look and the one I specify most often for alcoves where the machines are enclosed by three walls. We screw wooden cleats (1×2 or 1×3 inch strips) into the studs on the back and side walls. The shelf or countertop simply sits on top of these cleats. It looks built-in and custom.
The Waterfall Edge
If your washer and dryer are not in an enclosed alcove—perhaps they are on an open wall—the waterfall edge is a stunning solution. This involves having a vertical “leg” on one or both sides of the machines that matches the countertop material. It frames the appliances, making them look like a singular unit rather than freestanding boxes.
Standard Bracket Shelving
If you aren’t doing a full countertop but just want a storage shelf 18 inches above the machines, heavy-duty brackets are the way to go. Look for forged iron or steel brackets for a modern farmhouse or industrial look. This allows you to keep the shelf shallower (around 12 inches deep) so you aren’t reaching too far over the machines.
Designer’s Note: The Renter’s Solution
If you rent your home and cannot drill into the studs, build a “waterfall” table. Construct a simple U-shape table using three pieces of wood (two legs and a top) that slides right over your machines. It is freestanding furniture, so no landlord permission is required, and you can take it with you when you move.
4. Managing Plumbing and Utility Access
The unsexy part of design is usually the most important. You must maintain access to your water shut-off valves and the dryer outlet. I have seen homeowners tile over or box in their shut-off valves, which is a disaster waiting to happen if a hose bursts.
If your shelf height covers the valves, you have two options. The first is to cut a neat access hatch into the countertop. You can buy grommets or flush-mount handles to make this look intentional.
The second, and often easier option, is to ensure the shelf is removable. If you use the cleat method mentioned earlier, gravity will hold the heavy wood shelf in place. You don’t necessarily need to screw it down. This allows you to slide the shelf out if a plumber needs to get behind the machines.
Ventilation Management
Dryers generate significant heat. If you box them in too tightly with shelving, that heat has nowhere to go, which can shorten the lifespan of your appliance. Leave at least two inches of clearance on the sides of the machines if you are building vertical supports. Never block the front air intake of the dryer.
5. Styling and Organization Strategy
Once the structure is safe and sound, we get to the fun part: styling. The goal here is to balance “Instagram-worthy” aesthetics with actual functionality.
The Decanting Debate
You see it everywhere: detergent poured into clear glass jars. Is it practical? In my opinion, yes, but only for powders or pods. Heavy liquid detergent dispensers are messy to refill and often drip. For liquids, I prefer putting the manufacturer’s ugly plastic bottle inside a nice woven basket or a metal bin. It hides the brand label but keeps the dispensing easy.
Basket Logic
I use specific measurements for baskets on laundry shelves. If your shelf is 12 inches deep, look for baskets that are 10 to 11 inches deep. You do not want overhang. Group items by category: one basket for stain removal, one for pet supplies, and one for lost socks.
Lighting the Workspace
Lighting is crucial for spotting stains. A shelf creates a shadow over your machines. I always install a rechargeable, motion-sensor LED strip light on the underside of the shelf. It illuminates the workspace when you are folding or treating clothes, and it requires no hardwiring.
What I’d Do in a Real Project: A Mini Checklist
- Step 1: Measure the machines and add 1 inch to the height. This is the bottom height of the shelf.
- Step 2: Locate every wall stud with a magnetic finder and mark them with blue tape.
- Step 3: Purchase a 1.5-inch thick butcher block countertop.
- Step 4: Cut the block to length, leaving 1/4 inch gaps on the sides for wall expansion.
- Step 5: Install 1×2 pine cleats into the studs on the back and side walls.
- Step 6: Slide the wood top onto the cleats.
- Step 7: Style with two large seagrass baskets and a glass jar for dryer balls.
Final Checklist for Your Laundry Shelf Project
Before you head to the hardware store, run through this final punch list to ensure you haven’t missed a critical detail.
- Clearance Check: Can you fully open the detergent drawer on the washer without it hitting the new shelf?
- Lid Check: If you have a top loader, have you measured the height of the lid when fully open?
- Valve Access: Can you reach the water shut-off valve in an emergency without tools?
- Vibration Gap: Is there at least one inch of air between the machine top and the shelf bottom?
- Finish Quality: Is the wood sealed with a water-resistant finish (polyurethane or oil)?
- Support: If using brackets, are they screwed into studs or heavy-duty toggles?
- Dryer Vent: Is the dryer hose uncrushed and flowing freely behind the machine?
FAQs
What is the standard height for a shelf over a washer and dryer?
There is no single standard because appliance heights vary. However, front-loading machines are typically around 39 inches tall. Therefore, a countertop usually sits at about 40 to 41 inches from the floor. If you are installing a storage shelf (not a counter), I typically place it 18 inches above the top of the machine, putting it at roughly 58 to 60 inches from the floor.
Can I put a shelf over the washer and dryer if they are different heights?
Yes, this is very common. The best approach is to mount the shelf based on the height of the taller machine, plus the required one-inch clearance. This leaves a larger gap above the shorter machine. You can visually hide this gap by placing a shallow tray or a folded towel on top of the shorter appliance.
How do I hide the hoses and outlets?
A “waterfall” counter that goes down to the floor on the sides helps hide side-view clutter. To hide the connections behind the machine, adding a roughly 4-inch high “backsplash” piece of wood at the rear of your shelf can block the view of valves while keeping them accessible. Alternatively, simply placing large baskets on the shelf in front of the plumbing often does the trick.
Is it safe to store heavy detergent bottles on a floating shelf?
Only if the shelf is anchored correctly. A shelf held up by drywall anchors alone cannot support heavy liquid jugs. You must drive your brackets or cleats into the wooden wall studs. If you do this, the shelf can easily hold 50+ pounds. If you cannot find studs, store the heavy items on the counter or floor and keep lighter items like towels on the shelf.
Conclusion
Optimizing your laundry space with a shelf over the washer and dryer is one of the most satisfying weekend projects you can undertake. It reclaims lost square footage and transforms a chaotic chore zone into a calm, organized room. By paying attention to the technical details—like clearance, material choice, and plumbing access—you ensure that your new design is as durable as it is beautiful.
Don’t let the fear of power tools stop you. Whether you choose a simple floating plank or a full waterfall countertop, the result is always worth the effort. Start by measuring your space today, and visualize how much better laundry day will feel with a dedicated surface for folding and sorting.
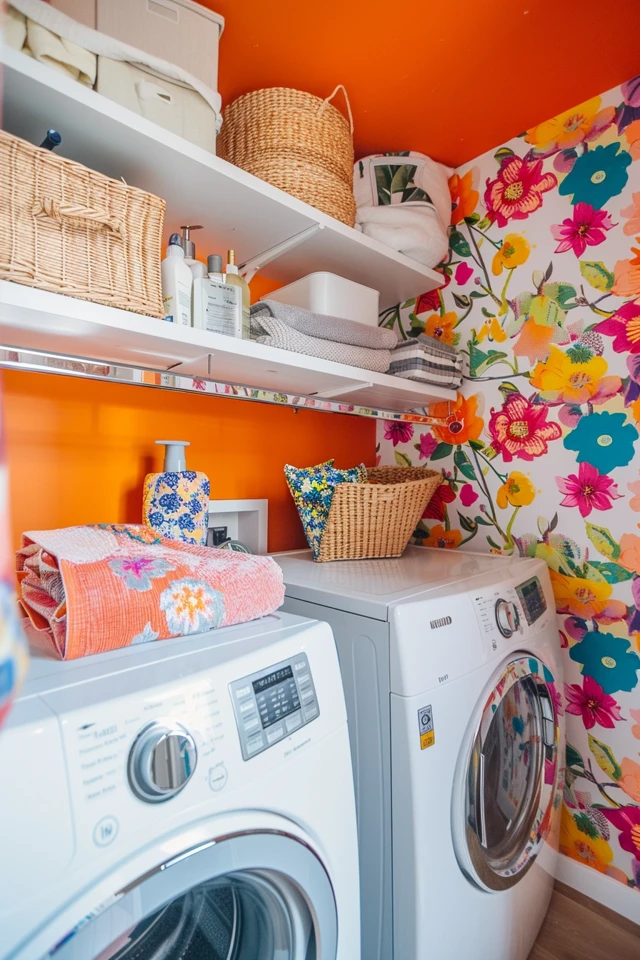
Picture Gallery


