
Perfect Park Party Food Ideas to Wow Guests
There is a unique magic that happens when you take the dining experience out of the formal dining room and into the open air. As a designer, I am constantly looking for ways to merge functionality with aesthetics, and a park party is the ultimate test of those skills. You have to contend with wind, uneven ground, and the lack of a kitchen, all while trying to maintain a high level of style.
However, the constraints of the outdoors often lead to the most creative solutions. A park party allows us to play with casual textures, natural lighting, and a communal atmosphere that stiff dinner parties often lack. The key is treating your patch of grass like a floor plan, ensuring that the food is not just tasty, but also part of the visual decor.
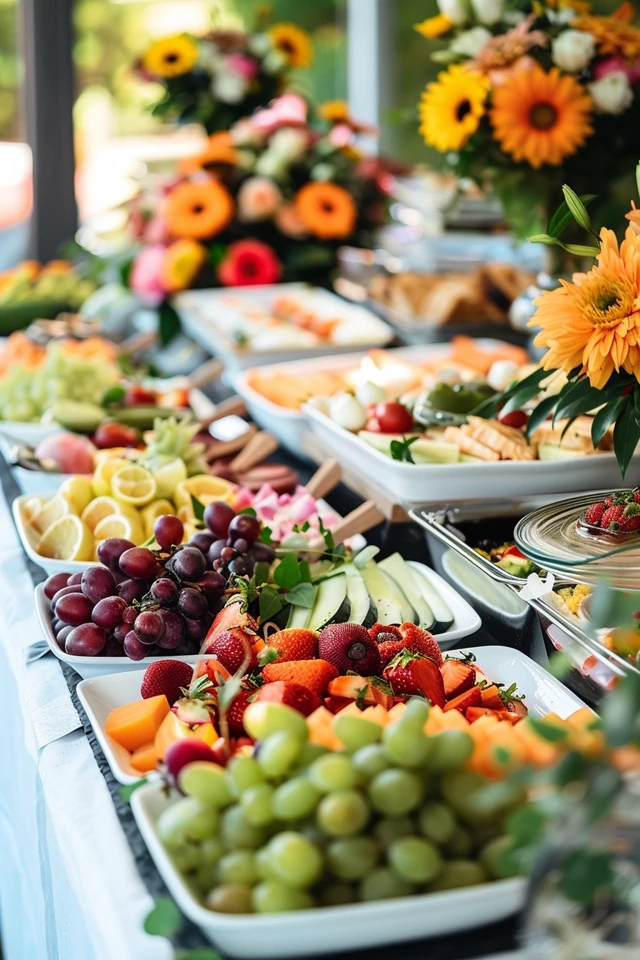
When done correctly, your food spread becomes the focal point of the event, drawing guests in with vibrant colors and smart presentation. For visual inspiration on how to style these setups, be sure to check out the curated Picture Gallery at the end of the blog post.
1. Creating the “Room”: Zoning Your Picnic Spread
Before we even talk about specific food items, we must address the “architecture” of your park setting. In interior design, we define zones using rugs and furniture placement; in a park, you must do the same to create a cohesive dining area.
If you are setting up on the ground, use multiple blankets or rugs to define the perimeter. A standard 5×8 rug fits two people comfortably lying down, but for a party, overlap three or four blankets to create a 10×12 “dining room” base. This prevents guests from feeling like they are falling off the edge of the party.
If you are utilizing a public picnic table, never rely on the table surface alone. Always bring a heavyweight linen or oilcloth tablecloth. The fabric adds immediate softness and hides the often-weathered wood or metal of the park furniture.
Designer’s Note: The Wind Factor
One thing that always goes wrong in outdoor styling is neglecting the wind. Lightweight paper plates and napkins will blow away the second a breeze picks up.
To prevent this, I use “weights” that double as decor. Use heavy stone or wood cutting boards as serving platters. Place a small, decorative stone or a heavy glass tumbler on top of your napkin stack. Functionality must come first, or your design will literally fly away.
2. The Art of the Individual Vessel
The biggest mistake I see hosts make is serving family-style scoops from large Tupperware containers. It looks messy, it encourages cross-contamination, and it is difficult for guests to balance on a paper plate while standing or sitting on the ground.
The designer fix is to focus on pre-portioned, individual vessels. This mimics the “repeating elements” concept we use in design to create rhythm and unity. It instantly elevates the look of the food and makes eating incredibly convenient.
Mason Jar Salads
Layering is a visual tool. Use 8-ounce or 16-ounce wide-mouth mason jars for individual salads. Place the dressing at the very bottom, followed by hearty vegetables, grains, and finally the leafy greens on top. This keeps the salad crisp for hours. When you line 20 of these jars up on a wooden crate, the layers create a beautiful, colorful stripe pattern that acts as decor.
Charcuterie Cones
Instead of a flat board that gets messy, use bamboo cones or small paper cups to serve individual charcuterie portions. Place a few breadsticks, a skewer of salami and cheese, and a sprig of rosemary into each cone. You can display these upright by filling a deep tray with dry beans or rice and nesting the cones inside. This adds vertical height to your table, breaking up the flatness of a standard spread.
Common Mistakes + Fixes
Mistake: Bringing open bowls of dips like hummus or guacamole.
Fix: Use mini disposable cups with lids (like condiment cups) for individual dip portions. Pre-cut veggies can be placed right inside the cup or tied in a bundle next to it. This prevents the “double dip” issue and keeps flies away from the main supply.
3. Skewers: The Ultimate Finger Food Architecture
In design, we look for clean lines and structure. In park food, skewers provide exactly that. They eliminate the need for silverware, which is one less thing to pack and wash.
Skewers also allow you to control the color palette of your food. You can coordinate your ingredients to match the theme of your party. For a summer look, alternate bright red tomatoes with white mozzarella balls. For an autumn feel, use roasted squash and purple onions.
The Caprese Skewer
This is a classic for a reason, but the execution matters. Use cherry tomatoes, bocconcini (small mozzarella balls), and fresh basil. Drizzle them with a balsamic glaze just before serving, or provide a small pipette of balsamic on the side for a high-end catering touch.
Fruit Wands
Avoid the fruit salad bowl, which inevitably turns into a mushy juice at the bottom. Instead, thread firm fruits like melon, pineapple, and grapes onto long bamboo skewers. Place them in a heavy ceramic vase like a bouquet of flowers. This adds height to your picnic styling and keeps the fruit from bruising.
Sandwich Kebabs
Sandwiches often get soggy or squished during transport. Deconstruct them. Fold pieces of turkey, cubes of cheddar, folded spinach leaves, and cubes of hearty bread onto a skewer. It reads as a “sandwich” to the palate but looks like a sculptural appetizer on the plate.
4. The Grazing Board: Material and Composition
If you do opt for a shared platter, treating it like a design composition is crucial. The goal is “abundance without chaos.” You want the board to look full and lush, leaving no visible gaps.
The Foundation
Do not use a standard dinner plate. You need a base with texture. A thick wooden cutting board, a slate tile, or a melamine platter with a stone finish works best. Ensure the board is rigid; flexible plastic trays will bend and spill when carried across uneven grass.
Texture and Color Balancing
Just as I balance textures in a living room (leather, velvet, wool), you must balance food textures. Pair crunchy crackers with soft brie. Place shiny grapes next to matte dried apricots.
- The Rule of Three: Group items in odd numbers. Three types of cheeses, three types of meats, and three types of vehicles (crackers/bread).
- Color Blocking: Keep similar colors together rather than scattering them. A cluster of red strawberries looks more intentional than strawberries sprinkled randomly across the board.
Heat Management
What I’d do in a real project: If the temperature is above 75 degrees, I avoid soft cheeses like Brie or Camembert unless I have a cooling tray. I stick to hard cheeses like Manchero, aged Cheddar, or Gouda. They hold their shape and don’t sweat oil as quickly in the warmth.
5. Hydration Stations with Style
Plastic water bottles are a visual eyesore and bad for the environment. Creating a designated hydration station acts as a focal point and encourages guests to serve themselves.
The Dispenser Rule
Use a large glass or high-quality acrylic dispenser with a spigot. To make it a design feature, elevate it. Place the dispenser on a sturdy wooden box or a galvanized metal stand. This allows guests to fit their glass under the spigot without having to drag the heavy dispenser to the edge of the table.
Infusion as Decor
Plain water looks boring. Infuse the water with sliced citrus, cucumbers, or berries. The floating fruit adds color and movement inside the glass. It makes the water look expensive and thoughtful, even though it costs pennies to execute.
Glassware Logistics
As a designer, I love the feel of real glass, but in a park, it is a liability. High-end acrylic or melamine glassware has come a long way. Look for “hammered” finishes or fluted designs that mimic crystal. They catch the sunlight beautifully but bounce if dropped on the grass.
6. Sweet Endings: durability over Delicacy
Dessert in a park requires durability. Anything with buttercream frosting, whipped cream, or ice cream will result in a melted disaster. You need structures that hold up to ambient heat.
Handheld Pies
Small, individual hand pies are perfect. The crust protects the filling, and they can be eaten without a fork. Apple, cherry, or savory meat pies work well. You can stack them in a wire basket lined with a linen napkin for a rustic, farmhouse aesthetic.
Cookie Stacks
Cookies are heat-resistant and easy to transport. To make them feel special, tie stacks of three cookies together with baker’s twine. This turns a simple cookie into a “gift” for each guest.
Brownie Bites
Brownies are dense and hold their shape well. Cut them into small, uniform squares and dust them with powdered sugar. Serve them on a tiered tray to add height to the dessert station.
Final Checklist: The Designer’s Load-Out
Before you head to the park, run through this checklist. These are the items I keep in my “event kit” to ensure the setup looks professional and functions smoothly.
The Essentials:
- Heavyweight clips: To secure tablecloths to tables.
- Trash bags: Bring more than you think you need. A “leave no trace” policy is mandatory.
- Hand sanitizer and wet wipes: Since running water is rarely accessible.
- A first aid kit: For minor cuts or bug bites.
- Sunscreen and bug spray: Keep these in a nice basket so they look like an amenity, not clutter.
- Bluetooth speaker: Music sets the mood (keep volume respectful of neighbors).
- Solar lanterns: If the party goes into the evening, lighting is critical for safety and ambiance.
The Styling Kit:
- Wooden crates: For elevation and transport.
- Linen napkins: They handle messes better than paper and look 100 times better.
- Fresh flowers: A simple jar of wildflowers ties the dining area to the natural surroundings.
- Throw pillows: If sitting on the ground, pillows are necessary for comfort. Choose outdoor fabrics that resist stains.
FAQs
Q: How do I keep food cold without a refrigerator?
A: Freeze water bottles and use them as ice packs in your cooler. They keep the food cold and provide cold drinking water as they melt. For serving, fill a large tray with ice and nestle your serving bowls inside it.
Q: What is the best way to transport everything?
A: Use a wagon. Carrying heavy bags across a grassy field is exhausting and looks unpolished. A collapsible utility wagon allows you to transport rugs, coolers, and decor in one trip.
Q: How do I handle seating for older guests?
A: Never assume everyone can sit on the ground. Always bring at least two folding camp chairs. Look for chairs with wood or canvas details rather than neon polyester to maintain your aesthetic.
Q: What lighting should I use for a sunset picnic?
A: Battery-operated fairy lights are lightweight and magical. Drape them over the picnic table or bundle them inside a glass jar to create a lantern. Avoid open flame candles due to wind and fire safety.
Conclusion
Planning the perfect park party is about balancing the beauty of interior design with the rugged reality of the outdoors. By focusing on individual portions, sturdy serving vessels, and creating a defined “zone” for your guests, you elevate a simple picnic into a memorable event.
The food doesn’t just need to taste good; it needs to work with the environment. When you remove the stress of melting cheese, flying napkins, and soggy sandwiches, you are free to actually enjoy the company of your guests. That is the ultimate goal of any successful design: to facilitate connection and joy.
Picture Gallery


