
Title: Record Player Room Ideas for a Vintage Vibe
Introduction
There is a distinct ritual to playing vinyl that digital streaming simply cannot replicate. It requires intention. You have to physically sift through your collection, slide the record out of its sleeve, and gently drop the needle into the groove. Because this is a tactile experience, the environment where you listen matters just as much as the speakers you use.
Creating a dedicated listening space—or even just a dedicated corner—is about merging acoustic function with a specific aesthetic mood. We want to capture that warm, nostalgic feeling without making the room look like a movie set or a dusty antique shop. It is about balancing the clean lines of Mid-Century Modern design with the coziness of the 1970s.
In my design practice, I treat the record player setup as a focal point, similar to a fireplace. It draws people in and encourages them to slow down. For plenty of visual inspiration on how to style these spaces, check out the curated Picture Gallery at the end of this post.
1. The Foundation: Acoustics and Layout
Before we pick out velvet armchairs or vintage posters, we have to talk about the layout. A record player room is useless if the sound quality is terrible. The most common mistake I see in DIY projects is placing style over acoustics.
The “Golden Triangle” Rule
For the best stereo imaging, your speakers and your head should form an equilateral triangle. If your speakers are 6 feet apart, your listening chair should be 6 feet back from the center point between them.
In a real-world living room, you might not hit these measurements perfectly, but try to get close. Avoid shoving speakers into corners, as this causes “boomy” bass that muddies the sound. Pull them at least 12 to 18 inches away from the wall if space permits.
Softening the Surfaces
Vintage vinyl sound is warm, but modern rooms with drywall and hardwood floors are “bright” and echoey. You need absorption to stop sound waves from bouncing around aggressively.
Start with a large area rug. It should be thick enough to absorb sound. I often layer a vintage Persian rug over a larger jute or sisal rug. This adds texture and dampens the room. If you have high ceilings, heavy velvet drapes are functionally excellent and fit the vintage vibe perfectly.
Designer’s Note: Vibration Control
A lesson I learned the hard way involved a custom floating shelf. We placed the turntable on the same shelf as the bookshelf speakers. As soon as the volume went up, the bass vibrations traveled through the wood and back into the turntable needle, causing a low-frequency hum (feedback).
The Fix: Always isolate your components. Ideally, speakers go on heavy stands on the floor. If they must be on the same surface as the turntable, use high-quality isolation pads or “pucks” under the speakers to decouple them from the furniture.
2. The Console: Selecting the Right Furniture
The media console or credenza is the anchor of your record player room. To achieve that vintage look, you generally want something low and long. Mid-Century Modern credenzas (real or reproduction) are the standard choice because their tapered legs and wood tones pair beautifully with audio equipment.
Understanding Dimensions and Weight
Vinyl is heavy. A full row of records weighs roughly 35 pounds per linear foot. Do not use flimsy particle board shelving found at budget big-box stores; it will bow and eventually collapse. You need solid wood or high-grade plywood with a sturdy veneer.
When sourcing a vintage piece, ensure the depth is at least 16 to 18 inches. Many vintage turntables have dust covers that require clearance to open fully. You also need space behind the unit for the mess of RCA cables and power cords.
Storage Logistics
If you are keeping your collection in the console, measure the interior height. A 12-inch LP is actually about 12.5 inches tall in its sleeve. You need at least 13.5 inches of vertical clearance to flip through them comfortably.
Common Mistakes + Fixes
Mistake: Stacking records flat on top of each other.
Fix: Always store records vertically like books. Stacking them flat warps the vinyl over time. Use bookends or built-in dividers inside your cabinet to keep them upright if the shelf isn’t full.
3. Seating: Creating the Listening Lounge
The furniture layout should encourage conversation and relaxation. Unlike a TV room where everyone faces a screen, a listening room focuses on the audio equipment or faces inward toward other people.
The Solo Listening Chair
If you have a small nook, invest in one high-quality lounge chair. The Eames Lounge Chair is the cliché for a reason, but it is expensive. Look for designs with a similar reclined pitch and an ottoman.
Material selection is key for the vibe. Worn cognac leather is timeless and durable. For a softer, 70s-inspired look, opt for corduroy or velvet in deep tones like olive green, mustard yellow, or burnt orange.
The Social Setup
If this is a larger room, consider two chairs facing a sofa. I recommend low-profile sofas with deep seats. A “tuxedo” style sofa (where the arms and back are the same height) looks very structured and vintage.
Keep the coffee table low—around 14 to 16 inches high—so it doesn’t block the sound waves traveling from the speakers to your ears.
What I’d Do in a Real Project
If I were designing a listening room for a client with a moderate budget today, here is my mini-checklist:
- Flooring: Keep existing hardwoods but add a thick wool rug (8×10 minimum).
- Seating: Two vintage-style swivel armchairs in boucle fabric. Swivels allow you to turn toward the music or toward the rest of the room.
- Side Tables: A heavy ceramic or marble side table next to the chair. It needs to be stable so a drink doesn’t wobble when the bass hits.
- Lighting: A floor lamp with a drum shade positioned slightly behind the chair to reduce glare.
4. Lighting: Setting the Analog Mood
You cannot enjoy an analog experience under harsh, cool-white LED downlights. The lighting needs to be warm, moody, and layered.
Color Temperature Matters
Swap out your bulbs for those rated at 2700K (Kelvin). This provides a warm, yellow-hued light that mimics the glow of incandescent bulbs from the mid-20th century. Anything over 3000K will look too clinical and modern for a vintage-inspired room.
The Necessity of Dimmers
Put every light source on a dimmer. Listening to an album often feels better in low light. If you are a renter, you can buy smart bulbs that allow you to dim via your phone without changing wall switches.
Task Lighting for the Turntable
You need to see where you are dropping the needle. A small, articulated desk lamp or a dedicated “picture light” mounted above the turntable is essential.
I prefer a brass or matte black finish for this fixture. It allows you to read the liner notes and tracklist without flooding the whole room with light.
5. Styling: Decor that Isn’t Kitsch
The goal is a “vintage vibe,” not a costume party. Avoid filling the room with neon signs or oversized novelty items unless that is truly your personality. The decor should feel collected over time.
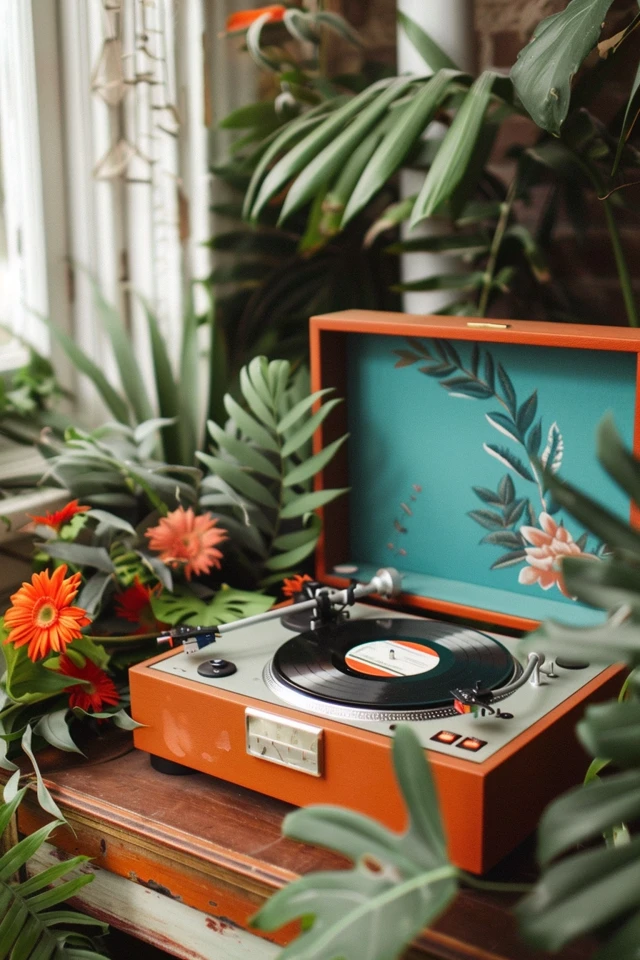
Plants and Greenery
Plants are excellent for both aesthetics and acoustics. Their irregular leaves help diffuse sound waves. Large-leaf plants like a Monstera Deliciosa or a Fiddle Leaf Fig look period-correct for a 1970s aesthetic. Place a large plant in the corner behind the turntable to soften the hard edges of the electronics.
Art and Wall Decor
Instead of buying generic “music” art, frame your actual vinyl. There are “play and display” frames that allow you to easily pop the record out to listen to it while keeping the cover on the wall as art.
Create a gallery wall using a mix of concert posters, abstract art, and textile hangings. A macramé wall hanging is a great nod to the 70s and, again, adds soft texture to help with sound dampening.
Cable Management
Nothing kills a vintage illusion faster than a tangle of modern white HDMI and power cables.
- Use velcro ties to bundle cords together behind the console.
- Use cable raceways painted the same color as your wall to hide wires running to speakers.
- If you are renting, use a “cable management box” on the floor to hide the power strip and excess wire length.
6. Durability and Maintenance for the Collector
Design is not just about how it looks on day one; it is about how it lives. A listening room involves delicate equipment and fragile media.
Protecting the Equipment
If you have cats, a dust cover is non-negotiable. A spinning turntable is fascinating to a cat, and a single paw swipe can destroy a $300 stylus.
If you have toddlers, consider mounting the turntable on a floating wall shelf or a high credenza. Keep the speakers stable. I often use Blu-Tack or museum putty under speakers to stick them to the stands so they don’t tip over if bumped.
Surface Selection
You will be handling covers and placing them on surfaces. Avoid rough, reclaimed wood for the surface where you lay your records down “on deck.” It can scratch the sleeves.
I recommend a smooth lacquer, glass, or polished wood surface. Keep a microfiber cloth nearby to dust the area frequently. Dust is the enemy of vinyl playback.
Final Checklist: Designing Your Space
Before you start buying, run through this summary to ensure you have covered the basics of function and form.
- Measure the receiver and turntable: Do they fit side-by-side on your target console?
- Check the depth: Is the console at least 18 inches deep?
- Verify weight limits: Can the shelf hold 35 lbs per foot of records?
- Speaker placement: Can you form a triangle with the listening position?
- Isolation: Do you have pads or stands to separate speakers from the turntable?
- Rug size: Is the rug large enough to anchor the furniture and dampen sound?
- Lighting: Do you have a task light near the player?
- Power: Is there an outlet nearby to avoid running extension cords across the room?
FAQs
Can I put my turntable on top of my receiver?
It is generally better not to. Receivers generate heat, which can warp records or damage the turntable’s belt over time. Additionally, the transformer in the receiver can sometimes cause electromagnetic interference (hum) in the turntable cartridge. Side-by-side is best.
How do I handle a small apartment living room?
Go vertical. Use wall-mounted shelving for your record storage to save floor space. Use a compact amplifier or powered speakers (which don’t need a separate amp) to reduce the gear footprint. A small “now playing” stand can hold the jacket while you listen, taking up only a few inches of space.
What is the best wall color for a vintage vibe?
For a moody, 70s feel, look at warm earth tones. Terracotta, sage green, and warm beige are excellent. If you prefer the Mid-Century Modern look, a crisp white wall allows teak furniture and colorful album art to pop, but consider painting one accent wall in a deep navy or charcoal to anchor the audio gear.
Conclusion
Designing a room for a record player is about honoring the mechanical nature of the music. It is a space designed for slowing down. By focusing on the “Golden Triangle” of speaker placement, choosing heavy furniture that can support the weight of vinyl, and layering warm lighting, you create a sanctuary.
Don’t worry about getting everything perfect immediately. The best listening rooms evolve as your record collection grows. Start with the console and the speakers, and let the art and accessories follow.
Picture Gallery


