
Rocky Charm: Unique Downspout Ideas with Rocks
Standard aluminum downspouts are a functional necessity, but they rarely add to the curb appeal of a home. In my design work, I often see beautiful exterior renovations marred by ugly, plastic splash blocks or corrugated tubing snaking across a manicured lawn. The transition from your roofline to the ground is an opportunity, not just a plumbing requirement.
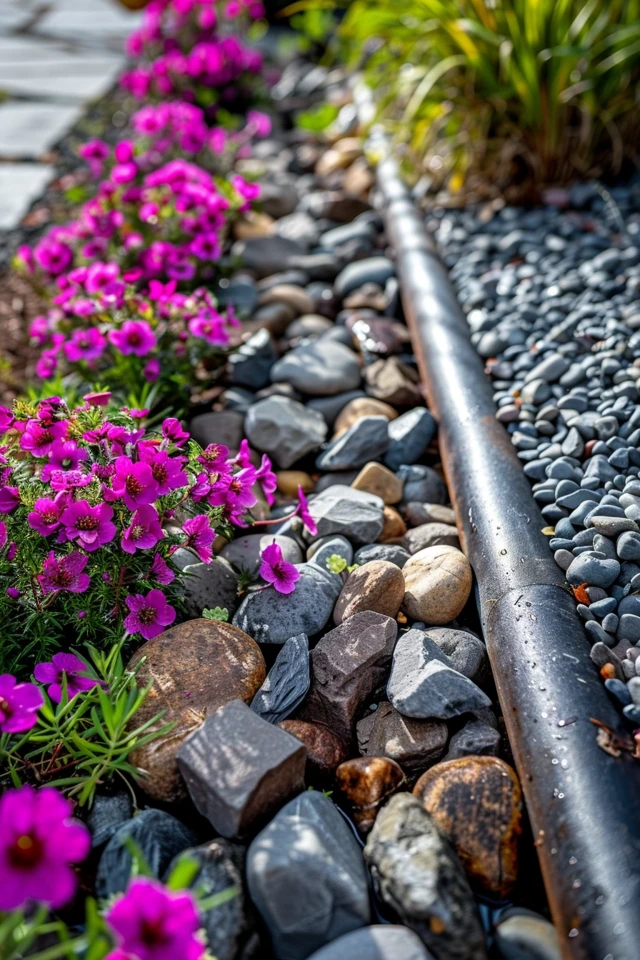
Using rocks to manage water runoff is one of the most effective ways to blend hardscaping with water management. It creates texture, manages flow velocity, and prevents the soil erosion that threatens your foundation. If you want to skip straight to the visual inspiration, check out the Picture Gallery at the end of the blog post.
Whether you are looking to create a dry creek bed or a simple decorative catch basin, rock features solve drainage issues with style. Below, I will walk you through professional methods for styling downspouts with stone, ensuring your home remains dry and beautiful.
Understanding Flow and Friction: Why Rocks Work
Before we start digging, it is important to understand why we use rocks at the base of a downspout. Water coming off a roof during a storm hits the ground with significant force. If that energy is not dissipated, it gouges holes in the soil and splashes mud onto your siding.
Rocks act as a passive energy dissipater. The irregular surfaces break up the stream of water, slowing it down and allowing it to percolate gently into the surrounding soil. From a design perspective, this mimics nature; think of how water flows over a riverbed rather than cutting a straight line through dirt.
Choosing the Right Stone Size
Size matters immensely here. A common mistake I see homeowners make is buying pea gravel for a high-flow downspout. Pea gravel is too light; a heavy rain will pick it up and wash it into your yard, leaving you with a mess to rake up.
For direct impact zones (where the water hits), I recommend using “riprap” or river stones that are at least 3 to 5 inches in diameter. These are heavy enough to stay put. You can transition to smaller 1-2 inch gravel as you move further away from the high-velocity zone.
Designer’s Note: The “Splash Zone” Rule
In my projects, I always measure the “splash zone” before buying materials. Turn a hose on full blast at the downspout height to see how far the water naturally wants to travel. Usually, you need a rock pad that extends at least 24 inches from the wall to prevent backsplash on your siding.
Designing a Dry Creek Bed
A dry creek bed is arguably the most attractive way to channel water away from a foundation. It serves as a permanent landscape feature that looks good wet or dry. Unlike a buried pipe, it adds visual interest and texture to the yard year-round.
The goal here is to guide water at least 10 feet away from your home’s foundation. To do this, we create a shallow swale lined with stones that meanders through the landscape.
The Layout and Slope
Nature rarely moves in straight lines, and neither should your dry creek. I always layout the path using a garden hose first to create gentle, organic curves. This looks more natural and slows the water down slightly, reducing erosion.
You need a positive slope away from the house. The golden rule in landscape grading is a drop of at least 1/4 inch per foot. Over a 10-foot span, the end of your creek bed should be 2.5 inches lower than the start.
Layering Materials for Longevity
Step 1: Excavation
Dig out your path about 12 to 15 inches deep. The shape should be roughly concave, like a shallow bowl.
Step 2: Fabric Barrier
Never skip this step. Line the entire trench with heavy-duty non-woven landscape fabric. This prevents heavy rocks from sinking into the mud over time and stops weeds from growing through your feature.
Step 3: Stone Placement
Place your largest boulders (10-12 inches) along the edges and at the “turns” of the creek to direct water. Fill the center with medium river rock (3-5 inches). Fill the gaps with smaller gravel. This graduation in size looks the most realistic.
Rain Chains and Catch Basins
If you are tight on horizontal space or want a more architectural look, rain chains paired with a rock catch basin are a stunning option. This replaces the traditional aluminum downspout entirely.
Rain chains guide water down through cups or links, creating a pleasant auditory experience during light rains. However, they do not direct water away from the house on their own. You must build a catch basin at the bottom.
Constructing the Basin
The basin sits directly below the chain. I usually specify a basin that is at least 18 to 24 inches wide. If the basin is too small, water will splash out onto your foundation during heavy downpours.
What I’d do in a real project:
- Excavate: Dig a hole 2 feet deep and 2 feet wide under the chain.
- Drainage Pipe: Install a 4-inch PVC pipe at the bottom of the pit that leads away from the house to a safe discharge point.
- Fill: Fill the pit with coarse gravel to within 6 inches of the surface.
- Top Dress: Arrange decorative stones (cobbles or Mexican beach pebbles) on top to hide the pit. The water disappears into the stones instantly.
Visual Weight and Scale
When choosing a rain chain and rock basin, consider the scale of your home. A delicate copper chain looks lost on a massive, heavy masonry home. Conversely, giant chunky boulders can overwhelm a small cottage. Match the “weight” of the rocks to the visual weight of your siding and architecture.
Using Flagstone Splash Blocks
For a simpler, budget-friendly approach that still beats plastic, consider creating custom splash blocks using flagstone or slate. This is excellent for renters or those not ready to dig trenches.
A plastic splash block is light and often gets kicked out of place by landscapers or dogs. A slab of flagstone is heavy, durable, and blends into the landscape.
Installation for Functionality
Simply dropping a stone under the spout isn’t enough. You need to ensure the stone is pitched correctly. I usually dig out a small depression and fill it with sand or crushed stone dust first. This allows me to level the flagstone so it angles strictly away from the house.
If you use a flat stone, water might pool and run back toward the wall. Use a bubble level to ensure you have that critical 2% grade (1/4 inch drop per foot) sloping away from the foundation.
Material Coordination
Try to coordinate the stone with other hardscaping elements. If you have a brick walkway, look for flagstones with reddish or warm hues. If you have a grey concrete patio, opt for blue stone or slate. This makes the drainage solution look like an intentional design choice rather than a patch.
Hidden Drainage: The French Drain Topped with Stone
Sometimes, you need to move a high volume of water, but you don’t want a visible creek bed. In these cases, a French drain disguised by a decorative rock border is the professional solution.
This involves digging a trench, installing a perforated pipe, and covering it with gravel. Unlike a standard French drain covered with grass, we top this with decorative river rock. This creates a “border” around the house that doubles as a drainage system.
The “Burrito” Method
To prevent clogging, use the “burrito wrap” method. Lay your landscape fabric in the trench with enough excess on the sides to fold over the top. Place a few inches of gravel, then your pipe, then more gravel. Wrap the fabric over the top of the gravel/pipe bundle.
Finally, place your decorative stones on top of the folded fabric. This keeps soil out of the pipe while allowing surface water to drain down through the pretty rocks and be carried away.
Common Mistakes + Fixes
Mistake: Using limestone gravel near acid-loving plants (like Azaleas or Hydrangeas).
Fix: Limestone alters soil pH, making it more alkaline. Use granite or river rock in garden beds with sensitive plantings.
Mistake: Placing rocks directly on soil without a border.
Fix: Grass will creep into your rocks within weeks. Always use a barrier edging—steel, brick, or pressure-treated wood—to separate your rock feature from the lawn.
Maintenance and Real-World Constraints
While rocks are low maintenance, they are not “no maintenance.” In my experience with clients, the biggest complaint regarding rock features involves leaf litter.
If you have large deciduous trees (maples, oaks) directly over your downspouts, cleaning leaves out of rough rocks is a nightmare. A blower often sends the leaves deeper into the crevices.
The Leaf Solution
For heavily wooded lots, I recommend using larger, smoother river stones (3-5 inches). Their smooth surface makes it easier to blow leaves off the top without trapping them. Avoid crushed gravel with jagged edges in these areas, as it acts like Velcro for debris.
Freezing Weather Considerations
If you live in a climate with freeze-thaw cycles, avoid porous rocks like soft sandstone or terracotta in areas that stay wet. They can crack when water freezes inside them. Harder stones like granite, river rock, and basalt are incredibly durable and will survive harsh winters.
Designer’s Checklist: What I’d Do in a Real Project
If I were consulting on your home exterior today, this is the checklist I would run through before buying a single bag of rocks.
1. Calculate the Volume
Don’t guess. Measure the length, width, and depth of your proposed area. One cubic yard of rock covers roughly 100 square feet at a 3-inch depth. Buying in bulk from a landscape supply yard is significantly cheaper than buying bags at a big-box store.
2. Check the Grade
Use a string level or a laser level. Ensure the ground slopes away from the foundation. Rocks camouflage the ground, but they don’t change gravity. The dirt underneath must slope correctly.
3. Color Coordination
Bring a sample of the rock home and hold it against your siding and brick. Rocks change color when wet. Spray the sample with a hose to see if the wet color clashes with your house paint.
4. Edging Strategy
Decide how you will stop the mower. I prefer steel edging for a modern look or a trench edge for a natural look. You need a physical stop for the rocks.
5. Safety Check
If the area is a high-traffic walkway, use flat stones or stabilize round stones with grit. Round river rocks can roll underfoot like marbles, creating a slip hazard.
Frequently Asked Questions
Will standing water in the rocks breed mosquitoes?
Not if designed correctly. The rocks are just a top dressing; the water should drain into the soil or a pipe below. If water stands for more than 24 hours, your soil is too compacted or the slope is wrong.
Can I use rocks if I rent my home?
Yes. Splash blocks or simple surface arrangements are reversible. Avoid digging deep trenches or installing permanent pipes without landlord permission. A simple extension hidden by surface stones is usually fine.
How do I keep weeds out of the rocks?
A high-quality, non-woven geotextile fabric is your best defense. Do not use black plastic sheeting; it traps water and creates a swamp. If weeds eventually grow in the dust that settles on top, a quick spot treatment or hand pulling is easy if the fabric barrier is intact below.
Do rain chains work in heavy storms?
They can handle moderate flow, but in a torrential downpour, some splashing is inevitable. This is why the rock basin below is critical—it catches the overflow and protects the foundation.
Conclusion
Treating your downspouts as a design opportunity rather than a utility problem can dramatically improve your home’s curb appeal. Whether you choose a meandering dry creek bed, a sleek rain chain basin, or a simple flagstone splash block, the key is combining aesthetics with engineering.
Remember that water management is the priority. The most beautiful rock feature is a failure if it allows water to seep into your basement. Always prioritize slope, distance from the foundation, and proper material layering.
With the right stones and a little bit of sweat equity, you can turn a muddy problem into a rocky charm that frames your home beautifully.
Picture Gallery


