
Title: Rope Deck Railing Ideas for Stylish Outdoor Spaces
Introduction
There is something inherently relaxing about a rope deck railing. It immediately signals that a space is meant for leisure, bringing to mind breezy coastal cottages, rustic lake houses, or high-end dockside dining. Unlike traditional wood balusters or industrial glass, rope offers a tactile softness and a visual openness that keeps your view unobstructed.
However, choosing this style is not just about aesthetics; it requires a good understanding of materials and safety. If you are looking for visual inspiration, you can skip straight to our Picture Gallery at the end of this post. For everyone else planning a renovation, we need to dig into the details that make these railings safe, durable, and code-compliant.
In my years designing outdoor living spaces, I have seen rope railings transform stiff, formal decks into inviting hangouts. But I have also seen them sag, rot, and fail inspections because they were installed without foresight. This guide will walk you through exactly how to get the look right while ensuring your deck stands the test of time.
1. The Design Appeal: Why Choose Rope?
Rope railings serve a specific architectural purpose: they reduce visual clutter. When you sit down on a deck chair, thick wooden balusters can chop up your view of the garden or water. Rope is thinner and often spaced horizontally, allowing the eye to travel through the barrier rather than stopping at it.
This material also introduces texture. In outdoor design, we often deal with hard surfaces like composite decking, stone pavers, and metal furniture. Adding a twisted fiber element softens the entire vignette. It feels organic and warm to the touch.
From a style perspective, rope is surprisingly versatile. While the nautical theme is the most obvious application, it works beautifully in “Modern Farmhouse” exteriors when paired with crisp white posts. It also fits seamless into “Bohemian” or “Organic Modern” spaces where natural materials take center stage.
Designer’s Note:
One thing I always tell clients is to consider the “lean factor.” People love to lean on railings. Thick rope (1.5 to 2 inches in diameter) is comfortable to lean against or grab onto, unlike thin cable wire which can dig into your skin. If comfort is a priority, rope wins over cable every time.
2. Selecting the Right Material: It’s Not Just “Rope”
The biggest mistake DIYers make is buying standard manila rope from a hardware store and threading it through their posts. Within a year, that rope will likely be gray, splintery, and possibly rotting from the inside out. You must choose the right fiber for outdoor exposure.
Natural Manila Rope
This is the traditional choice. It has a beautiful, golden-brown color and a distinct texture. However, it absorbs water. When it gets wet, it tightens; when it dries, it goes slack. Over time, it will rot and degrade in UV light. I generally advise against natural manila for uncovered decks unless you are willing to replace it every few years.
Pro-Manila (Unmanila)
This is what I use in 90% of my projects. It is a synthetic polypropylene rope designed to look exactly like natural manila. It does not rot, shrink, or fade significantly. It is smoother to the touch, meaning no splinters for curious toddlers. It costs more upfront but saves you money on replacements later.
Nylon and Polyester
If you want a modern look, you can buy twisted nylon rope in white or black. White rope gives a very crisp, yacht-club aesthetic. Black rope disappears into the background, similar to hog wire or cable rail, giving you the best view. Just be aware that white nylon can show dirt and algae over time.
Wire Core Rope
For structural integrity, some manufacturers offer rope with a steel wire core. This prevents the rope from being cut easily and eliminates sagging. This is the most expensive option but the safest for high decks.
3. Posts, Hardware, and Structural Layout
The rope is only the infill; the posts are the skeleton of your railing. Because rope is flexible, your posts must be rigid and securely anchored.
Post Selection
I recommend 4×4 or 6×6 posts. A 6×6 post adds a sense of grandeur and permanence that fits well with the chunky aesthetic of heavy rope.
Pressure-Treated Pine: Cost-effective but prone to warping. Needs to be stained or painted.
Cedar or Redwood: Naturally rot-resistant and beautiful, but softer.
Composite Sleeves: Low maintenance. If you use these, you need to ensure you can drill through them cleanly without cracking the shell.
Drilling vs. Hardware Mounting
You have two main ways to attach the rope:
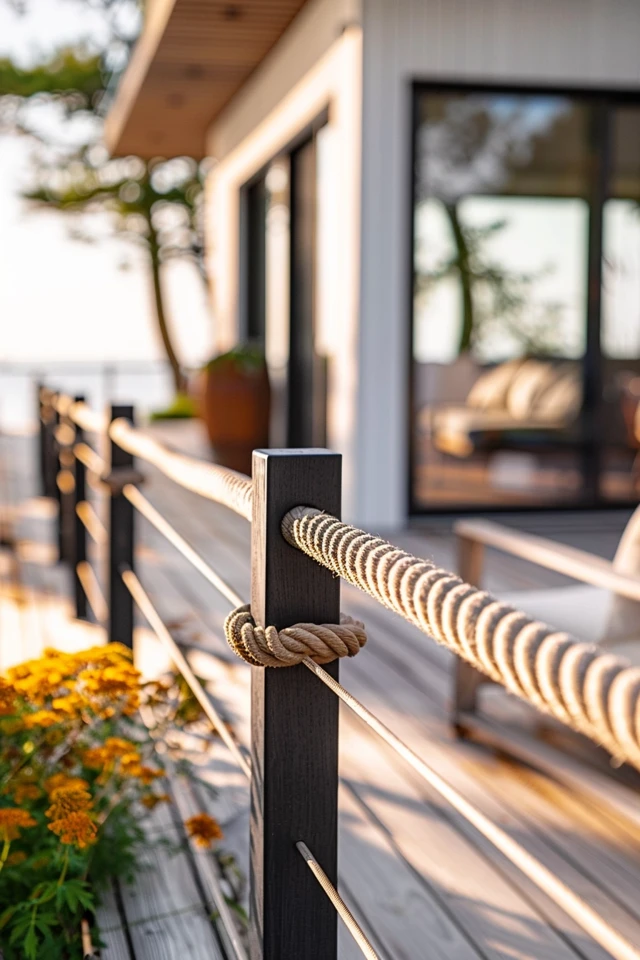
1. Through-Post: You drill a hole through the center of the post and thread the rope. This is the cleanest look. You must use a spade bit slightly larger than your rope diameter (e.g., a 1 3/4″ hole for 1 1/2″ rope).
2. Surface Mount: You use heavy-duty metal fittings (cleats, ring latches, or shackles) attached to the side of the post. This looks very nautical and allows you to replace the rope without dismantling the railing.
Spacing Rules
For rope railings, I never space posts more than 4 feet apart. Rope is heavy. If the span is too wide, the weight of the rope will cause it to droop significantly in the middle, ruining the clean lines you are trying to achieve.
4. Installation and Safety Codes
This is the most critical section of this blog. Before you buy a single foot of rope, you must check your local building codes.
The “Ladder Effect”
Horizontal railings of any kind (rope, cable, horizontal wood slats) create a ladder that children can climb. Many rigorous municipal codes ban horizontal infill for decks that are more than 30 inches off the ground.
The 4-Inch Sphere Rule
In the US, the International Residential Code (IRC) generally dictates that a 4-inch sphere (roughly a baby’s head) cannot pass through any opening in the railing. To achieve this with rope, you need to space your rows very tightly, or pull the rope extremely tight.
Common Mistakes + Fixes:
Mistake: The rope sags after a week, creating gaps larger than 4 inches.
Fix: Pre-stretch your rope. Before installation, pull the rope taut between two trees or cars and let it sit for a day. Alternatively, use a turnbuckle system hidden at the end of the run to retighten the rope periodically.
What I’d Do in a Real Project:
If the deck is high (over 30 inches from grade), I often install a subtle “hog wire” or clear plexiglass barrier on the
5. Styling Your Rope Railing Deck
Once the sawdust settles and the railing is up, you need to style the space to complement the rustic-nautical vibe. The railing sets the tone, so your furniture and decor should listen to it.
Furniture Selection
Avoid ornate wrought iron; it clashes with the casual nature of rope.
Wicker/Rattan: Choose chunky weaves. A grey-wash wicker sofa looks incredible against a backdrop of cedar posts and hemp-colored rope.
Low Profile: Since you preserved the view with rope, don’t block it with high-back chairs. Choose lounge seating with a lower profile.
Lighting the Perimeter
Rope railings offer a unique lighting opportunity.
Post Cap Lights: Use solar caps on your 4x4s to illuminate the perimeter downwards.
String Lights: You can loosely wrap bistro lights around the top rail rope for a magical evening glow.
Uplighting: If you have planters near the posts, place small puck lights in the soil shining up at the rope texture.
Textiles and Rugs
Because rope is a neutral, textural element, you can go bold with fabrics. Navy blue and white stripes are the classic “yacht” pairing. For a more modern farmhouse look, stick to charcoal grays and creams. Ensure your outdoor rug is sized correctly—at least the front legs of your furniture groupings should sit on the rug to ground the space.
Final Checklist: Planning Your Rope Railing
Before you head to the lumber yard, run through this quick checklist to ensure you haven’t missed a step.
Check Local Code: strictly verify if horizontal infill is allowed in your area.
Measure Total Footage: Add 10-15% extra length for knots and swags.
Choose Diameter: 1.5-inch or 2-inch rope provides the best visual scale.
Select Material: Choose “Pro-Manila” (synthetic) for longevity.
Plan Post Spacing: Maximum 4 feet center-to-center.
Hardware Check: Galvanized or stainless steel only to prevent rust stains.
Tool Prep: Sharp knife, heavy-duty tape (to wrap ends before cutting), spade bits, drill.
* End Treatment: Plan how you will stop the rope ends (knots, lashings, or metal caps).
FAQs
How do I stop the rope from fraying when I cut it?
Before you make a cut, wrap the area tightly with heavy-duty electrical tape or masking tape. Cut through the middle of the tape. If you are using synthetic rope, use a lighter or heat gun to melt the ends together immediately. For natural rope, you will need to “whip” the ends with twine.
Can I paint the rope?
Technically, yes, but I do not recommend it. Paint will crack and peel as the rope flexes and stretches. It is much better to buy rope pre-dyed in the color you want (like black or white nylon).
How much does rope railing cost compared to wood?
It is often comparable or slightly more expensive than standard pressure-treated lumber due to the cost of high-quality synthetic rope and hardware. However, it is generally cheaper than glass or cable railing systems.
Will the rope get moldy?
Natural manila rope will eventually harbor mold and algae, especially in humid climates. Synthetic Pro-Manila is resistant to mold, but surface dirt can still accumulate. You can wash synthetic rope with a gentle soap and a hose.
Conclusion
Installing a rope deck railing is one of the most effective ways to change the personality of your outdoor space. It shifts the atmosphere from rigid and structural to relaxed and inviting. It frames your view rather than blocking it, connecting your home to the landscape beyond.
By choosing the right synthetic materials and adhering to safety spacing, you can build a railing that looks great on day one and stays that way for years. Whether you are renovating a seaside balcony or a backyard patio, rope adds that perfect touch of effortless style.
Picture Gallery


