
Rustic Cabin Backsplash Ideas for Cozy Kitchens
Designing a cabin kitchen requires a delicate balance between rugged durability and inviting warmth. You want materials that can withstand muddy boots and wet dogs while still looking elegant enough for a holiday dinner. The backsplash is often the focal point where these elements converge, setting the tone for the entire room.
I have spent years renovating mountain homes and lakeside retreats, and I have learned that texture is the secret ingredient to a successful rustic aesthetic. If you are looking for visual inspiration, you can jump right to the Picture Gallery at the end of this blog post. Otherwise, stick with me as we break down the materials, layouts, and practical considerations for your backsplash.
In this guide, we will move beyond standard white subway tile. We will explore materials that tell a story, from reclaimed barn wood to hand-cut stone. We will also cover the nitty-gritty installation details that prevent moisture damage and ensure your kitchen lasts for decades.
1. Bringing the Outdoors In with Natural Stone
Nothing says “cabin” quite like natural stone. It anchors the kitchen and provides an immediate connection to the landscape outside. However, the type of stone you choose significantly impacts both the look and the maintenance level of the kitchen.
Stacked Stone Ledger Panels
Stacked stone offers a heavily textured, three-dimensional look that mimics a fireplace hearth. It works beautifully in large kitchens with high ceilings because the visual weight of the stone can hold its own against heavy timber beams. I usually recommend using this in “dry” areas of the kitchen, such as a coffee bar or a baking station, rather than behind the main sink.
River Rock and Pebbles
For a softer, lakeside cottage feel, sliced river rock mosaics are excellent. Because the stones are sliced flat, you get the visual variation of the round stones without the difficult uneven surface. These pair exceptionally well with butcher block countertops and creamy white cabinetry.
Slate and Soapstone Slabs
If you want a moody, darker aesthetic, consider a solid slab backsplash of slate or soapstone. This eliminates grout lines entirely, which is a massive functional benefit. Soapstone is non-porous and withstands heat incredibly well, making it a favorite for serious cooks.
Designer’s Note: The Grease Trap Reality
While rough-stacked stone looks incredible, it is a nightmare to clean behind a stove. Spaghetti sauce splatters do not wipe off rough sandstone easily.
The Fix: If you love the stone look, install a 4-inch to 6-inch “upstand” of your countertop material (like quartz or granite) first. Then, start your rough stone backsplash on top of that. This keeps the heaviest mess on a wipeable surface.
2. Warmth and History with Wood Alternatives
Wood backsplashes are controversial in the design world due to fire codes and water damage risks. However, in a rustic cabin, wood adds necessary warmth that cold tile cannot replicate. The key is knowing where to use it and how to seal it.
Shiplap and Tongue-and-Groove
Horizontal shiplap is a staple for the “modern farmhouse” or cottage cabin. It elongates the room, making small galley kitchens feel wider. For a more authentic cabin vibe, I prefer leaving the wood stained rather than painted white. Use a marine-grade varnish if you plan to install this near a sink to prevent warping or mold growth.
Reclaimed Barn Wood
Authentic barn wood brings gray and brown patinas that you simply cannot buy in a box store. However, the texture is often rough and splintery. I recommend planing the wood slightly to smooth it out while keeping the color variation.
Ceramic “Wood” Tile
If this is a rental property or a high-traffic family home, skip the real wood. Use high-quality porcelain tile that looks like wood. The printing technology has improved drastically. You can get the look of distressed oak with the waterproofing of ceramic.
Common Mistakes + Fixes
Mistake: Installing wood directly behind a gas range.
Fix: Most building codes require a specific clearance to combustible materials. I always install a stainless steel or tempered glass “heat shield” directly behind the cooktop if we are using wood walls. Alternatively, use a non-combustible material for the 30 inches directly behind the range and transition to wood for the rest of the wall.
3. Metallic Accents for Industrial Rusticity
Metal backsplashes reflect light, which is crucial in cabins that often suffer from small windows or dark corners. They add a bit of shine that breaks up the monotony of wood walls and stone floors.
Copper Sheeting
Copper is a “living finish.” This means it will change color, oxidize, and develop a patina over time. In a rustic cabin, this is a positive feature. It looks lived-in and historical. If you want it to stay shiny and new, you must seal it with a heavy lacquer, but I advise letting it age naturally.
Corrugated Metal
For a budget-friendly and rugged look, galvanized corrugated metal is a fun choice. It costs a fraction of the price of tile. It works particularly well in “barndominium” styles or hunting lodges. Install the ridges vertically to help water run down and to make the ceiling feel higher.
Hammered Tin
Pressed tin panels, often used on ceilings, make for a charming vintage backsplash. They come in various patterns and finishes, including oil-rubbed bronze and pewter. They are easy to wipe down and heat resistant.
What I’d Do in a Real Project: Metal Guidelines
Edges: Raw metal edges are razor sharp. I always use J-trim or a wood scribe molding to cover the exposed sides of the metal sheet.
4. Handcrafted Tile: The Zellige and Terra Cotta Look
If you prefer the hygiene and function of tile but don’t want a “suburban” look, choose tiles that feel handmade. Uniformity is the enemy of rustic design. You want tiles that have slight variations in shape, thickness, and glaze color.
Zellige Tiles
Originating from Morocco, these clay tiles are cut by hand. No two are identical. When installed, they create a shimmering, textured surface that reflects light beautifully. In a cabin, earthy tones like sage green, amber, or warm cream look stunning against wood cabinets.
Terra Cotta
Terra cotta tiles bring deep reds and oranges into the space. They feel grounded and earthy. You can find them in square cuts or more intricate arabesque shapes. Note that terra cotta is very porous; it must be sealed properly before grouting, or the grout color will bleed into the tile.
Glazed Brick
Exposed brick is a classic industrial-rustic look. However, raw brick absorbs grease. Glazed thin brick offers the same texture but with a glossy, sealed surface that is easy to clean. White glazed brick is a timeless choice that brightens up dark log cabins.
Pro Rule of Thumb: Grout Spacing
For rustic tiles like Zellige or tumbled travertine, avoid tiny 1/16-inch grout lines.
Color: Never use bright white grout in a cabin. It looks too clinical and shows dirt immediately. Use “Warm Gray,” “Sand,” or “Charcoal.”
5. Layout, Lighting, and Transitions
The material is only half the battle. How you install the backsplash determines the final polish of the kitchen. In cabins, we often deal with quirky architecture, exposed logs, or uneven floors, making layout tricky.
Where to Start and Stop
A common question is where to end the backsplash if the cabinets don’t go all the way to a wall.
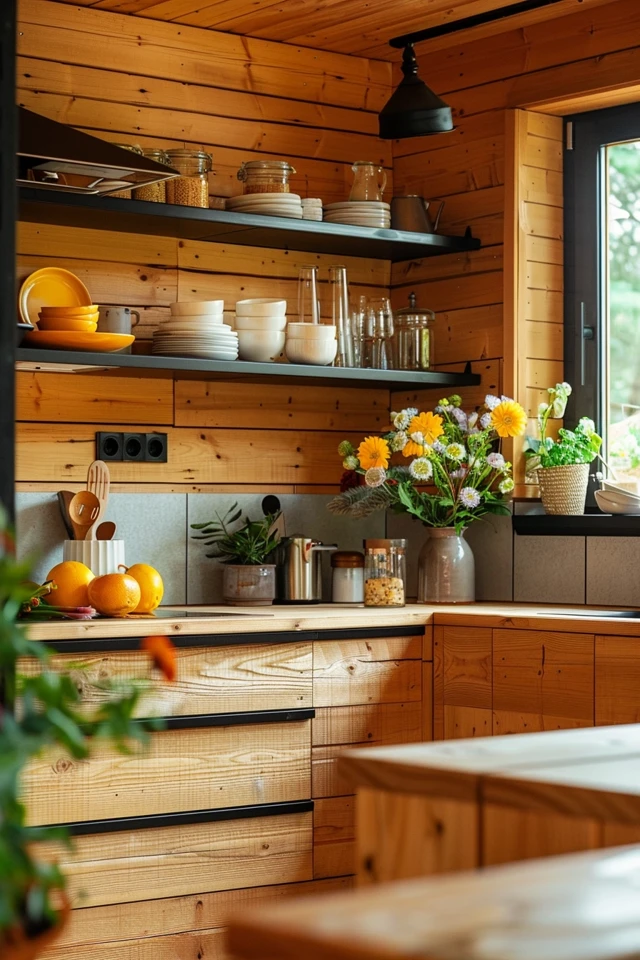
Exception: If you have open shelving, I love taking the tile all the way to the ceiling. It draws the eye up and makes the room feel grander.
Handling Corners and Edges
In a modern house, we use metal Schluter strips to hide raw tile edges. In a rustic cabin, chrome strips look out of place.
Lighting the Texture
You spent money on textured stone or wavy tile; now you need to show it off. Under-cabinet lighting is non-negotiable.
Color Temperature: Use LED strips in the 2700K to 3000K range. This creates a warm, golden glow. Anything over 3500K will look blue and sterile, killing the cozy cabin vibe.
Placement: Place the light strip toward the front of the cabinet bottom to reduce glare on the counter, but angle it slightly back to wash light down the backsplash.
Final Checklist: The “What I’d Do” Strategy
If I were designing a cabin kitchen today, this is the mental checklist I would run through to ensure success.
1. Assess the “Wet Zone”
Is the sink under a window? If so, you only need a small 4-inch splash or a sill.
If the sink is against a wall, I need 18 inches of waterproof coverage minimum.
2. Check the Scale
Small cabin (under 1000 sq ft)? I would use reflective Zellige tile or light-colored shiplap to bounce light.
Large lodge? I would use large-format slate or stacked stone to fill the volume.
3. Verify the Substrate
Are we tiling over drywall or logs? Logs move and shrink. You cannot tile directly onto logs. You must build a floating stud wall or use slip-joints to allow the house to settle without cracking your tile.
4. Select the Grout
I would choose an epoxy grout. It is more expensive and harder to apply, but it is stain-proof and waterproof. In a rental or vacation home, this saves huge maintenance headaches later.
Frequently Asked Questions
Can I install a backsplash over existing drywall?
Yes, for most areas. However, if the drywall is behind a sink, I recommend cutting it out and replacing it with cement backer board. This prevents moisture from turning the drywall to mush if your grout fails.
What is the best backsplash for a budget cabin renovation?
Peel-and-stick tiles have come a long way, but for a permanent solution, beadboard panels are unbeatable. A 4×8 sheet costs very little. Paint it with semi-gloss exterior paint for durability. It looks classic and cleans up easily.
How do I mix metal and wood without it looking cluttered?
Stick to the “60-30-10” rule. Let wood be the dominant material (60% – floors/cabinets). Let the backsplash be the secondary material (30% – stone or tile). Use metal as the accent (10% – hardware, faucets, or a feature focal point behind the stove).
Is it okay to have no upper cabinets?
Absolutely. This is a very popular look in cabins to make them feel airier. If you do this, I highly recommend running the backsplash material up to the first open shelf or even to the ceiling. It defines the kitchen zone within an open floor plan.
Conclusion
Choosing the right backsplash for your rustic cabin is about marrying the rugged beauty of nature with the practical needs of a modern kitchen. Whether you opt for the dramatic texture of stacked stone, the vintage charm of copper, or the humble warmth of shiplap, the goal is to create a space that feels inviting.
Remember to prioritize maintenance if you cook often, and never underestimate the power of good lighting to highlight your materials. A cabin kitchen should be a place where guests want to linger, coffee in hand, enjoying the warmth of the space you have created.
Picture Gallery


