
Rustic Cabin Backsplash Ideas for Cozy Kitchens
Designing a kitchen for a cabin, whether it is a true mountain getaway or a rustic-inspired home in the suburbs, requires a shift in mindset. You aren’t looking for the sterile perfection of a modern showroom. You are looking for texture, warmth, and materials that tell a story.
I remember one of my first cabin renovation projects in the Pacific Northwest. The client wanted the kitchen to feel like it had been there for a hundred years, yet it needed to function for a modern family of five. We chose a rough-hewn slate backsplash that looked incredible but taught me a valuable lesson about grout width and cleaning grease splatters. If you are looking for visual inspiration, feel free to skip ahead to the curated Picture Gallery at the end of this blog post.
In this guide, I will walk you through the materials, layouts, and practical considerations for creating a rustic backsplash. We will move beyond basic aesthetics into the nitty-gritty of installation, maintenance, and how to mix raw materials without making the room feel heavy or dark.
1. The Enduring Appeal of Natural Stone
Nothing says “cabin” quite like natural stone. It grounds the space and connects the interior to the landscape outside. However, not all stone is created equal when it comes to kitchen utility.
Stacked Stone and Ledger Panels
Stacked stone offers significant depth and shadow play. It creates a focal point that feels structural, almost like an exposed foundation wall. For a rugged look, I often use split-face ledger panels, which come in 6×24 inch sections for easier installation.
However, the texture is a double-edged sword. Deep crevices love to trap tomato sauce and grease. If you cook frequently, I recommend limiting rough stacked stone to areas away from the range, such as a coffee station or a wet bar.
River Rock and Pebbles
River rock provides a softer, organic aesthetic. It works beautifully in lake houses or cottages where you want to echo water elements. When installing pebble mosaics, the grout is just as important as the stone.
You need to use a sanded grout that closely matches the stone color to make the gaps disappear. If the grout contrasts too much, the wall will look busy and polka-dotted.
Designer’s Note: The Weight Factor
Real stone is heavy. Before you start gluing ledger panels to your drywall, push on the wall. If there is flex, you need to reinforce it.
For heavy stone backsplashes, I always require the contractor to install cement board (Durock or HardieBacker) screwed directly into the studs. Drywall alone cannot support the weight of thick stacked stone over time.
Cleaning and Sealing Protocols
Stone is porous. It will absorb oil faster than you can wipe it up.
- You must use a high-quality penetrating sealer.
- Apply the sealer before grouting (to prevent grout haze) and again after the grout cures.
- Reseal every 12 to 18 months. To test if it is sealed, splash water on it; if the water darkens the stone, it needs to be resealed.
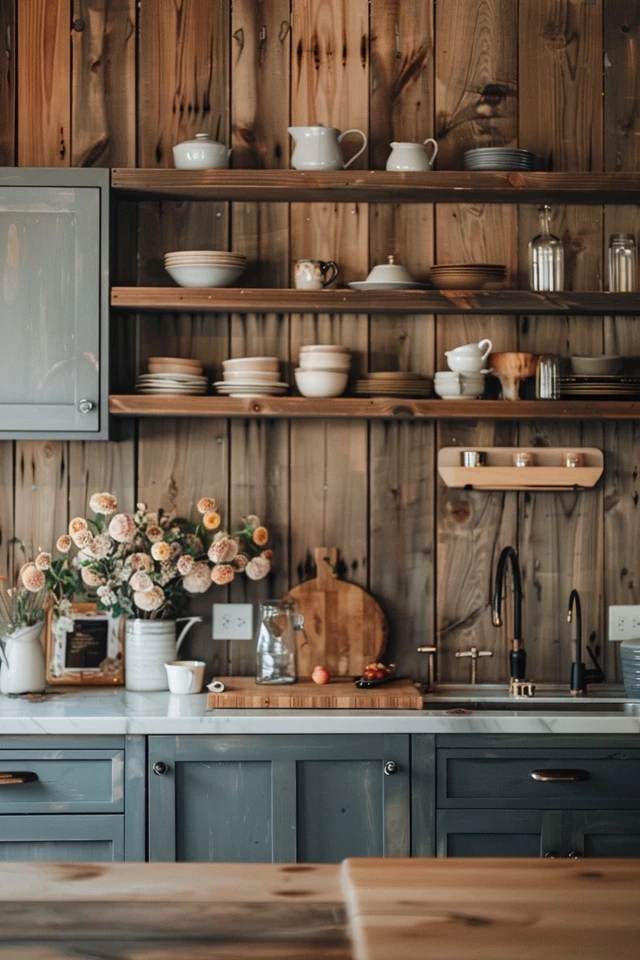
2. Wood Elements: Shiplap and Reclaimed Timber
Wood backsplashes are the epitome of cozy. They soften the hard surfaces of countertops and appliances. But putting wood next to water and fire scares many homeowners, and rightfully so.
Safety Behind the Range
This is the number one code violation I see in DIY cabin kitchens. You generally cannot put combustible wood material directly behind a gas range without a specific clearance, usually 30 inches to the combustible surface, or a backguard.
What I’d Do in a Real Project:
If I want the look of wood behind a stove, I install a stainless steel or copper “riser” or backguard that goes up about 6 to 10 inches depending on the range model. Alternatively, I will tile the area directly behind the range (the “splash zone”) and transition to wood shiplap for the rest of the kitchen runs.
Reclaimed Wood Planks
Using reclaimed barn wood adds instant history. The variation in color—grays, browns, and faded reds—hides dust and wear exceptionally well.
Ensure the wood has been kiln-dried before installation. Barn wood often houses dormant insects or fungi. Kiln drying kills these pests and stabilizes the moisture content so the wood doesn’t warp in your humidity-controlled home.
Shiplap Orientation
Horizontal shiplap widens a room, making a small cabin kitchen feel more expansive. Vertical shiplap (or beadboard) draws the eye up, which is excellent for cabins with low ceilings.
For a modern rustic twist, I often specify a 6-inch nickel gap board painted in a deep forest green or charcoal. This gives the texture of wood but the durability of a painted surface that can be wiped down.
Common Mistake: Rot and Mold
Do not run wood raw right down to the countertop behind a sink. Water sits there.
The Fix:
Install a 4-inch stone or quartz backsplash “kerf” or riser that matches your countertop. Start the wood installation above that stone border. This keeps the wood out of the standing water zone.
3. Metals that Age Gracefully
Metal backsplashes reflect light, which is crucial in cabins that can sometimes feel dark due to wood ceilings and floors. The goal here isn’t high-polish chrome; it’s living finishes that patina.
Copper Sheeting
Copper is traditional and warm. It starts bright and creates a “living finish,” turning rich browns and eventually verdigris greens over time.
If you want the color to stay consistent, you must buy pre-sealed copper. However, most of my cabin clients love the evolving nature of raw copper. It heals itself; scratches eventually blend into the patina.
Corrugated Metal
For a more industrial or ranch-style rustic look, galvanized corrugated metal is affordable and durable. It’s a favorite for budget-conscious renovations.
Cut the sheets to fit the space between the counter and upper cabinets (standard is 18 inches). Be very careful with the edges. I always recommend using a J-channel trim to cap the sharp raw edges of the metal so you don’t slice your hand while wiping the counters.
Hammered Zinc and Tin
Pressed tin tiles, often seen in Victorian ceilings, work well as backsplashes in vintage-style cabins. They usually come in 24×24 inch panels.
Because these panels have a repeating pattern, layout is critical. Center the pattern on your range or sink. It drives me crazy when I see a beautiful medallion pattern cut in half awkwardly at the corner.
Installation Tip: Adhesives
Don’t just nail metal sheets up; they will rattle when you close the cabinet doors. Use a construction adhesive (like Liquid Nails) in a squiggle pattern on the back, combined with small finishing nails in the corners, to ensure a solid, sound-deadening bond.
4. Ceramic and Terracotta with a Handcrafted Touch
If you want the durability of tile but the vibe of a cabin, avoid standard white subway tile. It looks too sterile and mass-produced. You want tiles that look like they were made by a human hand.
Zellige and Handmade Clay
Zellige tiles from Morocco are trending, but they fit perfectly in rustic design. Each tile is slightly different in thickness and shade.
When installed, they create a shimmering, textured surface that reflects firelight beautifully. Stick to earthy tones: moss greens, deep watery blues, creams, or unglazed terracottas.
Grout Spacing for Rustic Tiles
With handmade tile, don’t aim for perfect 1/8-inch grout lines. The edges are chipped and irregular.
I usually specify a “tight joint” or 1/16-inch spacing. This allows the tile variation to shine rather than the grid pattern of the grout. Use a grout color that blends with the tile rather than contrasting it. High contrast grids look too modern.
Terracotta Pavers
Using floor tiles on the wall is a bold, authentic move. Star-and-cross patterns or simple square terracotta pavers add immense warmth.
Because terracotta is extremely porous, you must seal these tiles before grouting. If you don’t, the grout will stain the face of the tile permanently. I like to use a matte sealer to keep the dusty, old-world look.
Designer’s Note: Lighting
Texture relies on lighting. If you install beautiful handmade tile or stone, you must have under-cabinet lighting.
Without it, the texture is lost in the shadows of the upper cabinets. I recommend LED tape lights with a temperature of 2700K to 3000K. Anything higher (4000K+) will look too blue and clinical for a rustic cabin.
5. Blending Materials for Custom Charm
The best rustic kitchens often mix materials. This breaks up the visual monotony and allows you to use durable materials where needed and aesthetic materials where safe.
The “Range Feature” Strategy
A common layout I use involves tiling the area behind the range all the way to the ceiling or hood, and then using a shorter backsplash or a different material for the rest of the counters.
For example, use a durable slab of soapstone or granite behind the range for heat resistance. Then, use horizontal wood shiplap for the flanking walls. This creates a hierarchy in the design and saves money on expensive stone.
Integrating Shelving
Open shelving is a staple in cabin kitchens. When tiling a backsplash, you have to decide: tile around the brackets or install brackets over the tile?
The Rule of Thumb:
Always install the brackets over the tile if possible. It looks cleaner and allows you to change the shelf height later.
However, this requires planning. You need blocking (wood supports) in the wall before the tile goes up so the heavy shelf screws have something to bite into. Do not rely on drywall anchors for heavy plate-laden shelves.
The Short Backsplash (The 4-Inch Curb)
There is a misconception that you must tile up to the upper cabinets. In historical cabins, a simple 4-inch or 6-inch beadboard or soapstone curb was common.
This is a great budget saver. You can paint the wall above the curb with a washable kitchen-grade paint. It feels airy and authentic to older cottage styles.
Final Checklist: Planning Your Rustic Backsplash
Before you order materials, run through this checklist to ensure your project stays on track and within code.
- Measure Twice: Calculate the square footage (Width x Height) and add 15% for waste and cuts. For diagonal patterns, add 20%.
- Check Depths: If you are using thick stone (1-2 inches), check that your faucet handle won’t hit the stone when turned back. This is a common oversight.
- Outlet Extenders: Thick rustic tile means your electrical outlets will sit too deep in the wall. Buy “box extenders” to bring the outlets flush with the new stone surface.
- Surface Prep: Is the drywall sound? If it is crumbling, replace it. If the stone is heavy, install cement board.
- Visualizing Layout: “Dry lay” your tile or stone on the floor before putting it on the wall to check for color distribution and weird gaps.
- Edge Treatment: How will the backsplash end? If it doesn’t run into a wall, you need a finished edge. Use a pencil liner, a bullnose tile, or a metal Schluter strip (in bronze or black) to hide the raw edge.
FAQs
Can I use peel-and-stick tile in a cabin?
Yes, but be selective. There are high-quality vinyl options that mimic slate or wood realistically. They are great for renters or quick makeovers. However, avoid using them directly behind a gas range, as the heat can melt the adhesive and cause them to peel or curl.
How do I clean grease off rough stone?
This is the hardest part of rustic stone. If sealed properly, warm water and mild dish soap usually work. For stubborn grease on unsealed stone, you may need a poultice (a paste made of baking soda and water) to draw the oil out. Scrubbing with a stiff nylon brush helps get into the crevices.
What is the best backsplash for a dark cabin kitchen?
Go with glazed Zellige tile in a cream or light gray, or a hammered copper that reflects light. Avoid black slate or dark stained wood, as they will suck the light out of the room. Also, consider adding a mirror integrated into the backsplash behind a sink to bounce light around.
Is it expensive to install a stone backsplash?
Material costs vary wildly. River rock sheets are affordable ($10-$15 sq/ft), while high-end slate ledger panels can be pricey. The real cost is labor. Grouting irregular stone takes twice as long as grouting flat subway tile. If you are hiring a pro, expect labor costs to be higher than a standard tile job.
Conclusion
Creating a rustic cabin backsplash is about balancing the raw beauty of nature with the demands of a working kitchen. Whether you choose the rugged texture of stacked stone, the warmth of reclaimed wood, or the shimmer of hand-cut tile, the key is proper preparation and scaling.
Don’t be afraid to embrace imperfections. In a cabin, a little bit of wear, a slight variation in grout lines, or a patina on copper only adds to the charm. It makes the space feel lived-in and welcoming, which is exactly what a cabin kitchen should be.
Picture Gallery


