
Shiplap Bathroom Wall – Ideas for Stylish Decor
I recently worked with a client who had a standard builder-grade powder room. It was perfectly functional, but it felt sterile and cold, echoing every sound and lacking any real character. We needed a solution that added texture and warmth without shrinking the already tight footprint of the room.
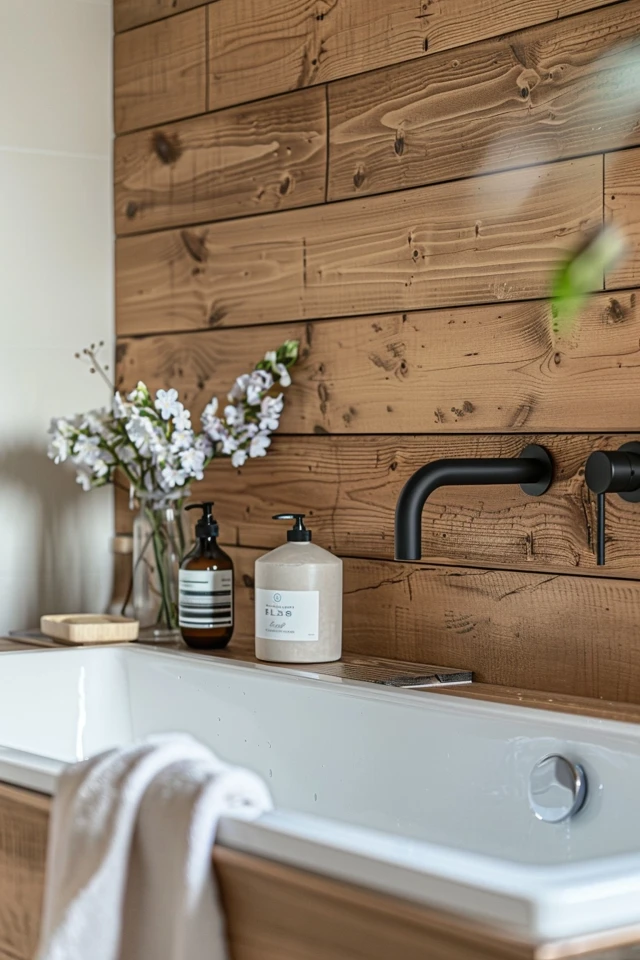
The answer, as it often is for creating instant architectural interest, was shiplap. It completely transformed the acoustics and the visual depth of the space. While some trends come and go, horizontal or vertical wood paneling has cemented itself as a timeless way to elevate a bathroom.
Whether you are looking for a coastal vibe, a modern farmhouse aesthetic, or just a touch of organic texture, shiplap is incredibly versatile. For a comprehensive look at how these concepts come together, be sure to check out the Picture Gallery at the end of this blog post.
Deciding on Orientation and Scale
One of the first decisions you need to make is the direction of the boards. This is not just an aesthetic choice; it is a spatial trick that designers use to manipulate how big a room feels.
If your bathroom has low ceilings, typical of many basements or older homes, vertical shiplap is your best friend. By drawing the eye upward, you create an illusion of height. I generally recommend a narrower board width, around 4 to 5 inches, for vertical applications to create a sense of rhythm.
Conversely, horizontal shiplap is excellent for expanding a narrow room visually. It pushes the walls out, making a cramped powder room feel wider. For horizontal layouts, a wider board—usually 6 to 8 inches—looks more modern and less busy.
Designer’s Note:
Scale is critical in small spaces like bathrooms. A common mistake I see is using wide 10-inch planks in a tiny 5×8 bathroom. It disrupts the scale and makes the room look smaller. Stick to a 6-inch “nickel gap” board for the best balance in standard bathrooms.
Selecting the Right Material for Moisture
Bathrooms present a unique challenge that living rooms do not: humidity. This is the most critical technical aspect of your project. If you install the wrong material, you will end up with warped walls and peeling paint within a year.
Standard pine boards are risky in full bathrooms with showers. Wood is porous; it expands and contracts with humidity changes. If you are dead set on real wood, it must be sealed on all sides—front, back, and edges—before installation.
For bathrooms with tubs or showers, I almost exclusively specify PVC or moisture-resistant composite shiplap. It looks identical to wood once painted but is completely impervious to water. It will not rot, warp, or feed mold.
Common Mistakes + Fixes:
- Mistake: Using standard MDF (Medium Density Fiberboard) near a shower or directly behind a sink.
- Correction: MDF acts like a sponge. Even “moisture-resistant” MDF can swell if the paint barrier is scratched. If you are on a budget and must use MDF, keep it to dry powder rooms only, and use a high-quality oil-based primer.
Color Palettes and Paint Sheens
The color you choose for your shiplap dictates the mood of the bathroom. White is the classic choice for a reason. It feels clean, sanitary, and reflects light, which is usually at a premium in bathrooms.
However, don’t be afraid of the dark side. Deep charcoal, navy, or forest green shiplap creates a moody, high-end “jewel box” effect, especially in powder rooms. Dark colors obscure shadows, making corners disappear and actually helping a small room feel larger than you might expect.
Regardless of color, the finish (sheen) is non-negotiable. Do not use flat or matte paint on bathroom shiplap. It is too difficult to wipe down and absorbs moisture.
My Recommended Finishes:
- Satin: The sweet spot. It has a soft glow but seals the surface enough for wiping.
- Semi-Gloss: Highly durable and very traditional for trim and wainscoting. It reflects more light, highlighting the texture of the boards.
- Eggshell: Only acceptable in powder rooms with no shower humidity.
Wainscoting vs. Full Wall Application
You don’t always have to cover the entire wall. In fact, doing so in a large master bathroom can sometimes feel overwhelming. A popular and cost-effective approach is the “half-wall” or wainscoting style.
The standard rule of thumb for wainscoting height is roughly one-third or two-thirds of the wall height. In a bathroom with 8-foot ceilings, I typically install shiplap up to 42 inches or 48 inches. This protects the lower wall from splashes and scuffs while leaving the upper wall open for wallpaper or a contrasting paint color.
If you choose a full wall application, treat it as an accent. The wall behind the vanity or the wall behind a freestanding tub are prime locations. It anchors the fixture and creates a focal point.
What I’d do in a real project:
If installing wainscoting, I always ensure the top cap rail clears the vanity backsplash. If your vanity is 34 inches high with a 4-inch backsplash (total 38 inches), I would set the shiplap height at 42 to 46 inches to give the mirror and faucet breathing room.
Integrating Lighting and Mirrors
Installing fixtures over shiplap requires a little more planning than standard drywall. Because the boards add depth (usually 1/2 inch to 3/4 inch), your electrical boxes need to be adjusted.
When installing wall sconces, you must use a box extender so the light fixture sits flush against the wood surface, not sunken into it. If you try to mount a sconce partially on a board and partially on a gap, it will wobble.
Mirrors look fantastic against the linear texture of shiplap. I prefer pivot mirrors or round mirrors to break up the straight horizontal lines of the boards. The curve creates a pleasing geometric contrast.
Designer’s Note:
Watch your measurements for “floating” fixtures. If you are installing a pedestal sink against shiplap, install the wood first, then the sink. This ensures a tight fit. If you are installing a vanity, it is often easier to install the vanity first and run the shiplap up to the sides of the cabinet for a built-in look.
Final Checklist: The Project Roadmap
If you are planning to execute this design, here is the mental checklist I run through before any contractors swing a hammer. This ensures the finish looks professional rather than DIY.
1. Check your depth
Remove the baseboards before starting. Shiplap should sit behind the baseboard, or on top of a spacer, not overhang it. If your door casings are thin, the shiplap might stick out past the door trim. You may need to replace door trim with thicker stock to accommodate the new wall depth.
2. Prime the edges
If you are painting the shiplap yourself, paint the “tongue” and the inside of the groove before you nail it to the wall. Once the boards are up, it is incredibly difficult to get paint into those tiny gaps without it pooling and dripping.
3. Locate the studs
Shiplap is heavy. While you can use construction adhesive, nailing into studs is mandatory for safety. Mark your vertical stud lines on the floor or ceiling with painter’s tape so you know where to aim your nail gun as you progress.
4. Plan the “rip”
Measure the total height of the wall and divide by the width of your board. You don’t want to end up with a tiny 1-inch sliver of wood at the ceiling. If the math results in a sliver, cut the bottom board (the starter board) narrower to ensure the top board is a substantial width.
5. Caulk perfectly
In a bathroom, corners must be caulked to prevent moisture ingress. Use a high-quality, paintable silicone-acrylic hybrid caulk. Run a bead of caulk where the shiplap meets the ceiling, the baseboard, and the corners. Do not caulk the horizontal gaps between boards; those are meant to be open shadows.
Frequently Asked Questions
Can I use shiplap inside a shower stall?
Generally, no. Traditional wood or MDF shiplap cannot withstand direct water spray. However, you can achieve the look using large-format porcelain tiles that mimic wood planks, or specific PVC products designed for shower surrounds. Unless you are using tile, keep the wood paneling in the “dry” zones of the bathroom.
Is shiplap hard to clean behind the toilet?
This is a valid concern. The horizontal grooves can collect dust. In a bathroom, hairspray and humidity can make that dust sticky. I recommend using a vacuum with a brush attachment once a month. Because we use semi-gloss or satin paint, a quick wipe with a damp microfiber cloth usually does the trick.
Does shiplap make a small bathroom feel claustrophobic?
On the contrary. Texture adds depth. Flat drywall in a small room defines the box clearly. Shiplap blurs the edges and adds interest. White or light grey shiplap reflects light and creates shadow lines that actually make the walls feel wider (horizontal) or taller (vertical).
Is this trend over?
While the “Fixer Upper” craze made it ubiquitous, wood paneling has been around for centuries. It is a classic architectural element. To keep it timeless and avoid the “2015 Farmhouse” look, avoid distressed finishes. Go for clean, crisp paint colors and modern board widths.
Conclusion
Adding shiplap to a bathroom is one of the highest-impact upgrades you can make. It bridges the gap between construction and decoration, providing a finished, tailored look that paint alone simply cannot achieve.
Whether you opt for a dramatic, moody half-wall in a powder room or a crisp, all-white coastal master bath, the key is in the details. Respect the moisture levels of the room, choose the right material, and pay close attention to how your lighting and mirrors interact with the grid.
When done correctly, it provides a durable, washable surface that adds immediate value and comfort to your home. It turns a utilitarian space into a room you actually want to spend time in.
Picture Gallery


