
Shiplap TV Wall Ideas for Stylish Viewing
You might think shiplap had its peak moment a decade ago, but in the professional design world, it has evolved rather than disappeared. It is no longer just about the rustic, distressed white farmhouse aesthetic. Today, we treat shiplap as a sophisticated architectural texture that adds depth to flat drywall.
When designed correctly, a shiplap TV wall anchors a living space, provides acoustic dampening, and solves the visual problem of the “black box” television. If you are looking for visual inspiration, please scroll down to the bottom as our curated Picture Gallery is at the end of the blog post. However, before you start buying boards, we need to discuss the mechanics of scale, finish, and installation.
A successful media wall is 20% aesthetic and 80% planning. If you do not account for cable management or blocking behind the boards, you will end up with a messy, unsafe installation. Let’s walk through the design logic I use for client projects to create a seamless, high-end look.
1. Establishing Direction and Scale
The first decision involves the orientation of the boards. Most homeowners default to horizontal installation, which is classic and helps widen a room visually. However, if you have standard eight-foot ceilings, horizontal lines can sometimes make the ceiling feel lower.
For rooms with low ceilings, I often recommend vertical shiplap (sometimes called V-groove, though the profile is slightly different). Vertical lines draw the eye upward, creating an illusion of height. This is particularly effective in basements or mid-century modern homes where height is a luxury.
Board Width Matters
The width of the board dictates the “busy-ness” of the wall.
- 6-inch boards: This is the standard size. It fits most average-sized living rooms (12×14 feet) well.
- 8-inch or 10-inch boards: I prefer these for larger, open-concept spaces or walls with high vaulted ceilings. Wider planks feel more modern and less “cottage.”
- Skinny boards (2-4 inches): These create a very textural, almost reed-like appearance. This is trendy right now but can be visually overwhelming on a large wall. Use this for smaller accents or niche insets.
The Gap Profile
True “shiplap” has a rabbet joint that allows boards to overlap, creating a gap. In modern design, we usually aim for a “nickel gap”—literally the width of a nickel (about 1/8 inch). This creates a crisp, clean shadow line. Avoid wide 1/4 inch gaps unless you are specifically aiming for a very rustic, exterior-siding look.
2. Integrated Storage and Built-ins
A TV floating alone on a shiplap wall can look unfinished. To make the design look intentional, we need to integrate it with the rest of the room’s architecture. This usually means pairing the wood paneling with cabinetry.
The Base Cabinet
I almost always recommend a low, linear console or built-in cabinet beneath the TV. This grounds the television so it doesn’t look like it is floating in outer space.
- Height: The cabinet should be 20 to 24 inches high.
- Depth: Aim for 18 to 20 inches deep to house AV equipment.
- Width: The cabinet should be at least 25% wider than the TV on both sides. If your TV is 60 inches wide, your cabinet needs to be at least 90 inches wide to look balanced.
Floating Shelves
If you are flanking the TV with shelves, the shiplap serves as a beautiful backdrop. However, the spacing is critical.
- Vertical Spacing: Keep 12 to 15 inches of clear space between shelves.
- Depth: Shelves should be shallower than your base cabinet—usually 10 to 12 inches deep.
- Thickness: Thin shelves look cheap on shiplap. Use shelving that is at least 2 inches thick to stand up to the visual weight of the wood boards.
3. Selecting the Right Finish and Color
The “all-white” shiplap wall is tricky with televisions. High contrast between a bright white wall and a black TV screen can cause eye strain. It also highlights the TV as a black void when it is turned off.
Dark and Moody
I love painting media walls in dark, saturated colors. Charcoal, navy, forest green, or even black are excellent choices.
- Camouflage: A dark wall helps the TV blend in when it is off.
- Immersion: When watching movies, a dark wall fades away, making the screen appear brighter and sharper.
- Finish: This is the most important rule. Use a matte or eggshell finish. Do not use semi-gloss or high-gloss paint on a TV wall. The glare from lamps and windows will reflect off the ridges of the shiplap and be distracting.
Natural Wood Tones
Leaving the wood natural (stained or sealed) adds immense warmth. White Oak is the current gold standard for a Scandinavian or organic modern look.
- Sealer: Use a water-based matte polyurethane. Oil-based finishes will yellow over time, turning your nice oak orange.
- Knots: For a modern look, select “clear” grade wood with few to no knots. Knotty pine reads very rustic/cabin.
4. Managing Tech: The Invisible Infrastructure
Nothing ruins a shiplap wall faster than dangling HDMI cables. Because shiplap is a physical layer added to your wall, it actually gives you a unique advantage for hiding wires.
The Recessed Media Box
You cannot just have a power outlet behind a flush-mounted TV. The plug head will hit the back of the TV, preventing it from sitting flat.
- The Solution: Install a recessed media box (like the Legrand On-Q) before the shiplap goes up.
- Placement: This box sits between the studs and creates a cavity for the plugs and excess cable slack.
- Conduit: Run a 2-inch PVC tube or “smurf tube” from the recessed box behind the TV down to the base cabinet area. This allows you to fish new HDMI cables through later without ripping off the boards.
The Samsung Frame Factor
If you are using a Samsung Frame TV or similar art-mode television, you have a separate “One Connect” box to deal with. You need to plan where that box goes. If it’s going in the cabinet below, you need an in-wall rated cable to run through your conduit.
5. Lighting the Wall Correctly
Lighting texture is different than lighting a flat wall. If you shine a downlight (recessed can light) directly onto shiplap, it will cast harsh shadows in every single gap. It can make the wall look jagged if the carpentry isn’t perfect.
Wall Grazing vs. Washing
Avoid “grazing” the wall (lights very close to the surface) unless your installer is a master carpenter. Any slight bow in the wood will be exaggerated by the shadows.
Instead, place recessed lights at least 24 to 30 inches away from the wall to wash it with softer light.
Sconces
Wall sconces add a layer of sophistication.
- Placement: Ideally, sconces should be mounted halfway between the edge of the TV and the corner of the wall.
- Height: The center of the sconce backplate should be roughly 60 to 66 inches from the floor, depending on ceiling height.
- Dimmers: These are non-negotiable for a TV room. You want a soft glow, not stadium lighting.
Bias Lighting
For the best viewing experience, install an LED strip on the back of the TV facing the shiplap. This “bias lighting” reduces eye strain and looks incredible against the texture of the wood boards.
Designer’s Note: The “Blocking” Lesson
Here is a lesson I learned the hard way early in my career. We installed a beautiful vertical shiplap wall using 1/2-inch MDF boards. When the AV team came to hang the 75-inch TV, they realized the stud spacing didn’t align with the TV mount bracket.
The shiplap itself was not strong enough to hold the lag bolts. We had to carefully remove boards, cut open the drywall, and install 2×4 blocking between the studs.
The Fix: Before installing any shiplap, map out exactly where the TV mount will go. Install a sheet of 3/4-inch plywood or horizontal 2×4 blocking flush with the drywall in that area. This gives you a solid wood surface to screw into, regardless of where the studs are.
Common Mistakes + Fixes
Mistake 1: The “Zebra Stripe” Effect
The Problem: You paint the shiplap white, but as the wood expands and contracts with humidity, the paint in the gaps cracks, revealing the raw wood or dark shadows underneath.
The Fix: If you are painting the shiplap a light color, you must paint the “tongue” or the wall behind the gap before you nail the next board up. Better yet, prime the edges of the boards before installation.
Mistake 2: Poor Corner Transitions
The Problem: The shiplap ends at an outside corner, and the raw cut edge is visible.
The Fix: You have two professional options.
1. Miter the corners: Cut the boards at 45-degree angles so they wrap the corner seamlessly (hardest to do).
2. Corner trim: Use a sleek L-shaped corner molding (1×1 inch) to cover the rough edges (clean and modern). Avoid bulky quarter-round.
Mistake 3: The TV is Too High
The Problem: In an effort to center the TV vertically on the wall, people hang it way too high.
The Fix: Forget the wall height. Focus on eye level. When seated on your sofa, your eyes should hit the center of the screen or slightly below. This usually places the center of the TV about 42 to 48 inches off the floor.
What I’d Do in a Real Project: A Checklist
If I were managing your renovation, this is the order of operations we would follow:
1. Determine Layout: Measure the wall and decide on the TV size first.
2. Electrical Rough-in: Move outlets and install the recessed media box and conduit tube.
3. Blocking: Install plywood backing or 2×4 blocking where the mount will go.
4. Board Prep: Acclimate the wood boards in the room for 48 hours so they shrink/expand to the room’s humidity.
5. Installation: Install boards from the bottom up (or top down if ceiling line is critical). Use a nickel or spacer to ensure consistent gaps.
6. Prime the Gaps: Paint the grooves as you go if the color is drastically different from the raw wood.
7. Cutouts: Jigsaw out the openings for the electrical boxes.
8. Trim & Paint: Add corner trim, fill nail holes, and spray or roll the final paint finish.
9. Mount: Hang the bracket and TV.
Final Checklist
- Material: Did you choose the right material (MDF for paint, Poplar/Oak for stain)?
- Depth: Is the TV mount slim enough so the TV doesn’t stick out too far?
- Power: Is the recessed box installed?
- Cable Path: Is there a conduit for future HDMI cables?
- Support: Is there blocking behind the wall to hold the heavy TV?
- Glare: Did you buy matte or eggshell paint?
FAQs
Can I use shiplap in a rental?
Yes, but you need a “removable” solution. I recommend using “peel and stick” wood paneling designed for renters. Alternatively, you can build a “false wall” panel that hangs on a heavy-duty French cleat. This allows you to take the whole shiplap assembly with you when you move.
Does shiplap insulate the room?
Slightly. While it isn’t insulation material, adding a layer of wood over drywall does add thermal mass and, more importantly, acoustic dampening. It helps reduce the echo in a room, which improves sound quality for your home theater.
How do I clean the dust in the gaps?
This is the one downside of shiplap. Dust settles in the horizontal grooves. I recommend using a vacuum cleaner with a soft brush attachment once a month. If you install vertical shiplap, this issue is virtually non-existent.
Should I paint the baseboards the same color as the shiplap?
For a modern look, yes. Painting the baseboards, the shiplap, and the crown molding all the same color (color-drenching) makes the ceiling feel higher and the millwork look more expensive. If you keep white baseboards with a dark shiplap wall, it creates a distracting racing stripe at the bottom.
Conclusion
A shiplap TV wall is one of the most practical upgrades you can make to a living space. It bridges the gap between technology and comfort, turning a cold electronic appliance into part of a warm, furnished room. By focusing on the correct scale, managing your cables properly, and choosing a finish that reduces glare, you can create a viewing area that looks just as good with the TV off as it does with the TV on.
Remember, the goal is not just to cover the wall in wood; it is to create a structured backdrop that elevates the entire room. Take your time with the planning phase, especially the electrical rough-in, and the result will be a polished, professional feature wall that lasts for years.
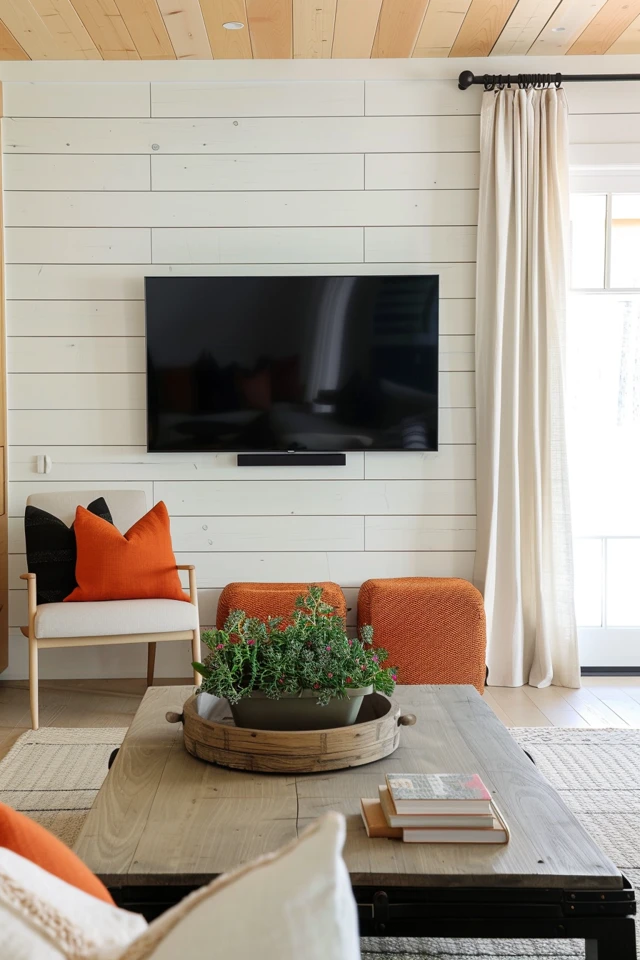
Picture Gallery


