
Side of Garage Landscape Ideas: Transform Your Space
The strip of land along the side of the garage is often the most neglected part of a property. In my design projects, I often see this area treated as a dumping ground for old potting soil, trash bins, and tangles of weeds. It essentially becomes a “dead zone” that you rush through rather than enjoy.
However, this narrow corridor holds immense potential to become a functional service area or a secret garden retreat. With the right layout and hardscaping, you can turn a muddy alley into a beautiful connection point between your front and back yards. You can find a curated Picture Gallery at the end of this blog post to spark your imagination.
Here is how to reclaim that space with professional landscape design principles that prioritize both aesthetics and utility.
Assess Your Microclimate and Utilities
Before you buy a single paver or plant, you must understand what is happening in this specific zone. Side yards create unique microclimates because they are usually sandwiched between two structures or a structure and a fence.
This creates a “wind tunnel” effect or a heat trap, depending on the orientation. If the side of your garage faces south or west, the reflected heat from the wall can cook delicate plants. If it faces north, it likely remains damp and deeply shaded year-round.
You also need to locate your utility lines. This is where you usually find gas meters, air conditioning condensers, and dryer vents.
Designer’s Note:
One of the most common mistakes I see is planting large shrubs directly in front of utility meters. You must leave at least 36 inches of clearance for utility workers to access meters. If you block them, the utility company has the right to hack your bushes back without asking.
The Drainage Test
Before laying hardscape, check the slope. The ground should slope away from your garage foundation at a rate of roughly 6 inches for every 10 feet.
If water pools here, you need to address it first. In narrow side yards, I often recommend installing a French drain or a dry creek bed lined with river rock to direct water away from the structure.
Hardscaping: The Backbone of the Side Yard
Because side yards are high-traffic transition zones, grass is rarely the right choice. It usually struggles to grow due to lack of light and becomes a muddy mess when walked on.
For a professional finish, you need distinct hardscaping. The material you choose depends on your budget and how you use the space.
Pathways and Walkway Dimensions
If this is a path you use to carry groceries or haul trash bins, the width is non-negotiable.
Standard Walkway: Minimum 36 inches wide. This accommodates a standard wheelbarrow or a large trash bin.
Comfortable Walkway: 42 to 48 inches wide. This allows two people to walk side-by-side or walk past each other without turning sideways.
Material Selection
Decomposed Granite (DG):
This is a budget-friendly option that looks high-end. It compacts well, providing a firm surface for rolling trash bins. It creates a rustic, Tuscan feel.
Pavers or Flagstone:
For a cleaner, more modern look, use 24×24 inch concrete pavers. To soften the look, space them 4 to 6 inches apart and fill the gaps with creeping thyme or dwarf mondo grass.
Pea Gravel:
I love the sound of gravel, but I generally avoid it if you need to roll heavy trash bins. Wheels sink into loose gravel, making it a chore to move heavy loads. If you choose gravel, use a stabilizing grid underneath to keep it in place.
Vertical Gardening and Privacy Screens
When you are working with a narrow footprint, usually 5 to 10 feet wide, you cannot build “out,” so you must build “up.” Vertical elements draw the eye upward and make tight spaces feel like intentional garden rooms.
Trellising
Install wire trellis kits or wooden lattice directly onto the garage wall or the facing fence. This is the perfect spot for climbing vines which add greenery without eating up floor space.
If you are renting, look for freestanding trellis planters. They give you height and greenery without requiring you to drill into the exterior siding.
Camouflaging the Ugly Stuff
We all have AC units and trash bins. The goal isn’t to pretend they don’t exist, but to screen them effectively.
I frequently design L-shaped slat fences around AC units.
Rule of Thumb: Maintain at least 24 inches of clearance around the AC unit for proper airflow. If you crowd the condenser, you risk overheating the unit and increasing your energy bills.
For trash bins, a simple cedar screen or a dense hedge of evergreen shrubs (like Yew or Boxwood) keeps them out of sight but easily accessible.
Plant Palette: Right Plant, Right Place
The side of the garage is tough on plants. You need hardy varieties that can handle the specific light conditions and potential neglect.
For Deep Shade (North/East Facing)
If your side yard feels like a cave, lean into woodland plants.
Ferns: Autumn Ferns provide evergreen color in warmer climates.
Japanese Maples: If you have the width, a dwarf Japanese maple adds a stunning focal point and architectural shape.
For Blazing Sun (South/West Facing)
The reflected heat from the garage wall can scorch leaves. Choose plants that love heat and have low water needs.
Ornamental Grasses: Karl Foerster grass grows vertically (up to 5 feet) but stays narrow, making it perfect for tight paths.
Coneflowers (Echinacea): Rugged, colorful, and heat-tolerant.
Espaliered Fruit Trees: If you want a “wow” factor, train an apple or pear tree flat against the wall. It takes time, but it creates a high-end estate look.
Common Mistake + Fix:
Mistake: Planting too close to the path.
Fix: Account for the mature size of the plant. If a lavender bush grows to 3 feet wide, plant it 18 inches from the edge of your walkway. Otherwise, you will be constantly pruning it to keep it off your shoes.
Lighting and Functional Touches
Lighting is what takes a side yard from “scary alley” to “welcoming entrance.” Since this area is often dark, safety is the primary concern, followed by ambiance.
Lighting Layers
Path Lights: Place these every 6 to 8 feet along the walkway. Avoid the “airport runway” look by staggering them if possible.
Wall Sconces: If you have electrical access on the garage wall, a downlight sconce provides excellent general illumination.
String Lights: For a whimsical touch, zig-zag string lights overhead. This works exceptionally well if you are trying to create a bistro vibe in a narrow side patio.
The Potting Bench
If you enjoy gardening but lack space, the side of the garage is the ideal location for a potting station. A narrow console table or a dedicated potting bench (18 to 24 inches deep) fits perfectly against the wall.
This keeps the mess out of the main patio and utilizes vertical space for storing pots and soil.
What I’d Do: A Real Project Mini-Checklist
If I were consulting on your side yard renovation today, this is the exact order of operations I would follow.
1. Clear and Demo: Remove all weeds, debris, and existing overgrown plants. Get down to bare soil.
2. Check Water Management: Run a hose. Does water pool against the foundation? If yes, regrade the soil or install a drain pipe.
3. Define the Hardscape: Mark out your 36-inch (or wider) path with spray paint.
4. Install Edging: Whether you use steel, brick, or plastic, edging is vital to keep gravel or mulch from migrating onto the path.
5. Run Wiring: If you are installing low-voltage lighting, bury the wires now before planting.
6. Planting: Place the largest shrubs first, then fill in with perennials and ground cover.
7. Top Dress: Add 2 to 3 inches of mulch to retain moisture and suppress weeds.
FAQs
Can I landscape the side of my garage if I rent?
Absolutely. Focus on temporary solutions. Use heavy planters for bamboo or tall grasses to create privacy. Use solar path lights that stake into the ground, and lay down a simple path of stepping stones over existing dirt or mulch. Avoid pouring concrete or attaching heavy trellis structures to the walls.
How much does it cost to landscape a side yard?
It varies wildly, but it is often cheaper than a full backyard redo because the square footage is low. A DIY gravel path with simple plantings can be done for $500–$1,000. Professional installation with pavers, drainage, and lighting typically ranges from $3,000 to $8,000 depending on materials and labor rates in your area.
How do I stop weeds from growing in my gravel path?
The secret is a geotextile landscape fabric placed under the gravel. Do not use cheap black plastic; it traps water and creates puddles. Use a permeable heavy-duty weed barrier fabric. Also, ensure your gravel layer is at least 2 to 3 inches thick to block sunlight from reaching the soil.
What is the best ground cover for high traffic?
If you want something living that you can step on occasionally, look at ‘Elfin’ Thyme or Scotch Moss. However, for a daily-use path (like taking out the trash), living ground cover will eventually wear out. Stick to stone or pavers for the main track.
Conclusion
Transforming the side of your garage is one of the most satisfying weekend projects you can undertake. It solves practical problems like mud and storage while adding a surprising amount of curb appeal to your home.
By respecting the constraints of the space—specifically the width and the light conditions—you can create a functional jewel box of a garden. Stop treating it like a leftovers pile and start treating it like the entryway it deserves to be.
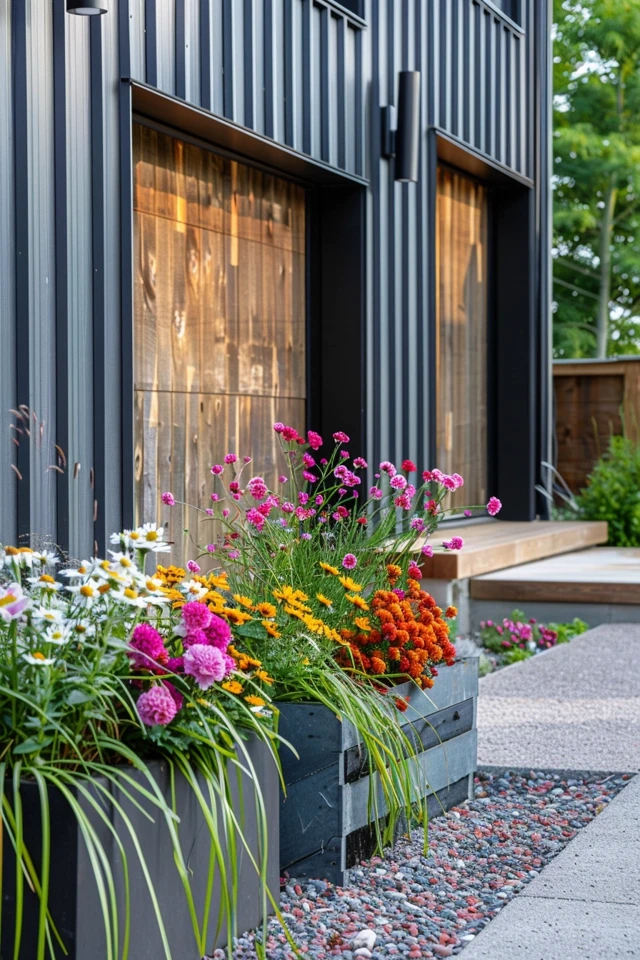
Picture Gallery


