
Slope Fire Pit Ideas for Stunning Backyards
Designing a backyard when the ground isn’t level can feel like a headache. Many homeowners look at a sloping lawn and see unusable space, assuming they are limited to a small deck or a steep hill of grass that is hard to mow. However, as a designer, I see a slope as an opportunity to create dimension, distinct zones, and dramatic focal points that flat yards simply cannot achieve.
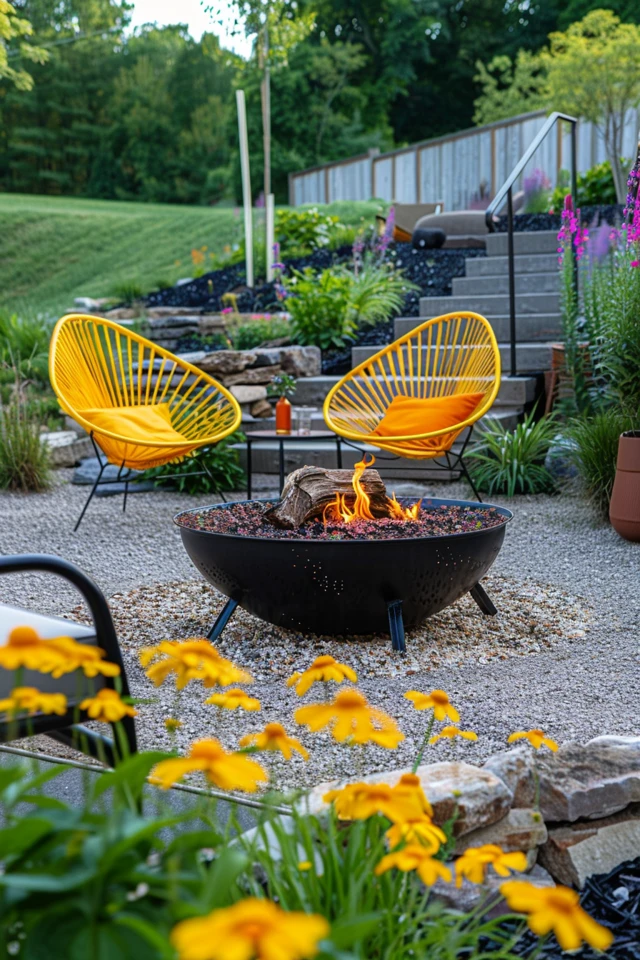
A hillside fire pit offers a natural sense of enclosure and intimacy that is difficult to replicate on a flat lot. By carving into the landscape, you can create a destination that draws guests out of the house and down into the garden. For plenty of visual inspiration on how to conquer gravity, keep reading because I have curated a stunning Picture Gallery at the end of the blog post.
In this guide, we will cover the structural and aesthetic strategies for building a fire pit into a slope. From retaining wall engineering to the perfect seat heights, we are diving deep into the details you need to know.
1. The Cut-and-Fill Strategy: Carving Out Space
The most common method for managing a slope is the “cut-and-fill” technique. This involves digging into the slope (cutting) and moving that soil to the lower side (filling) to create a level terrace. This is the foundational step for almost any hillside fire pit.
When you cut into a hillside, you immediately create a need for a retaining wall. This wall isn’t just structural; it defines the vibe of the space. In my projects, I often use this retaining wall as the backrest for built-in bench seating.
If you use the retaining wall for seating, aim for a height of 18 to 21 inches from the finished patio floor. This is the standard comfort range for lounging. If the wall is higher, you will feel dwarfed; if it is lower, it becomes a tripping hazard.
For the “fill” side (the downhill edge), you have a choice. you can install a second retaining wall to hold the patio up, or you can let the landscape gently slope away if the grade allows. If you choose a hard edge, install a safety railing if the drop-off exceeds 30 inches.
Designer’s Note: Dealing with Drainage
I learned this lesson the hard way early in my career. We carved out a beautiful sunken fire pit for a client but underestimated the sheer volume of water flowing down the hill during a storm. The fire pit turned into a muddy pond within weeks.
The Fix: Now, I never design a slope project without a French drain system behind the retaining wall. You must create a path for hydrostatic pressure to escape. We also grade the patio floor slightly (about 1/4 inch per foot) away from the house or the uphill wall to ensure water runs off rather than pooling around the fire feature.
2. The Sunken “Conversation Pit” Effect
Sunken fire pits are having a major design moment, and a sloped yard is the perfect excuse to build one. By digging down, you create a windbreak that keeps the fire steady and the guests warm. This creates a cozy “nest” effect that feels private and protected.
The key to a successful sunken pit is scale. You need a minimum diameter of 12 to 14 feet for the entire patio circle. This allows for the fire pit itself (usually 3 to 4 feet wide) plus 4 to 5 feet of clearance on all sides for movement and legroom.
If you are building fixed seating into the perimeter, pay attention to the seat depth. A depth of 18 inches is standard, but for a lounge-style fire pit, I prefer 20 to 24 inches. This allows space for thick outdoor cushions and throw pillows without pushing the guest off the bench.
Flooring materials matter immensely in a sunken pit. I avoid loose gravel here because it tends to migrate and is hard to clean if leaves blow in. Instead, use flagstone with permeable joints or large-format pavers.
3. Multi-Tiered Zoning: Dining Up, Fire Down
If your slope is significant, fighting it to create one massive flat area is expensive and often looks unnatural. A better approach is terracing. This involves creating separate “rooms” at different elevations, connected by stairs.
I typically place the dining area on the upper tier, closer to the kitchen. This makes carrying food and heavy platters easier. The fire pit zone goes on the lower tier, creating a destination that you have to journey to.
The transition between these levels is a major design element. Steps should be wide and inviting, not steep and utilitarian. I recommend a riser height of 6 inches and a tread depth of at least 14 inches.
Lighting is non-negotiable for tiered landscapes. You must integrate step lights into the risers or path lights along the edges. Imagine carrying a tray of drinks down stone steps in the dark; without proper lighting, your beautiful design becomes a liability.
4. Cantilevered Decks for Steep Slopes
Sometimes, the earth is too steep to move, or the soil is too unstable for heavy retaining walls. In these cases, a deck structure is the smartest solution. A cantilevered or post-supported deck floats above the slope, giving you a level platform without massive excavation.
However, putting a fire feature on a wood or composite deck requires strict safety adherence. Wood burning is generally a bad idea here due to flying embers. I almost exclusively specify gas or propane fire tables for decks.
If you must have wood burning, the fire pit needs to be on a non-combustible pad (like stone or concrete tile) placed on top of the deck structure. Check your local building codes, as many municipalities ban wood burning on combustible structures entirely.
Wind is a bigger factor on an elevated deck than in a sunken pit. I suggest installing glass wind guards around the fire element. This keeps the flame vertical and prevents it from blowing out or causing heat damage to nearby furniture.
5. Material Selection: Blending with the Grade
The materials you choose should help the hardscaping blend into the natural slope rather than looking like a foreign object dropped on a hill. I love using natural boulders to retain soil. They look less engineered than a concrete block wall and soften the transition between the patio and the garden.
Corten Steel: This is a favorite for modern slopes. The rusted orange patina contrasts beautifully against green grass and requires zero maintenance. We use thin Corten sheets to create retaining walls that save space compared to bulky stone.
Board-Formed Concrete: For a clean, architectural look, board-formed concrete is unbeatable. It has the texture of wood grain but the strength of concrete. It creates a very structural, deliberate look that works well in contemporary homes.
Dry-Stacked Stone: For traditional or farmhouse aesthetics, dry-stacked fieldstone is timeless. Just ensure a mason installs it with a hidden mortar core or geogrid reinforcement if the wall is holding back significant soil weight.
Common Mistakes + Fixes
Mistake 1: Ignoring the “Smoke Line”
The Problem: On a slope, wind currents often move differently. If you place a wood-burning pit directly upwind of your house’s open windows or the upper patio, you will smoke everyone out.
The Fix: Monitor the prevailing wind direction before digging. If wind is unpredictable, switch to a gas fire pit, which produces heat and ambiance without the smoke.
Mistake 2: Seating That is Too Tight
The Problem: People underestimate how hot a fire gets. Placing built-in benches 2 feet from the flame sounds cozy, but it will roast your guests.
The Fix: Maintain a distance of 36 to 48 inches from the edge of the fire feature to the front of the seat. This allows people to lean in for warmth or lean back to cool off.
Mistake 3: Forgetting Maintenance Access
The Problem: You build a stunning terraced fire pit at the bottom of a steep hill, but the only access is a narrow spiral staircase. How will you get firewood down there? How will you carry trash up?
The Fix: Ensure there is a secondary path, perhaps a ramp or a wider gentle slope, for wheelbarrows or service carts. If that isn’t possible, plan for built-in storage at the fire pit level for wood, covers, and cleaning supplies.
Real-Project “What I’d Do” Checklist
If I were consulting on your sloped backyard today, this is the exact mental checklist I would run through to ensure the project is viable and beautiful.
1. Assess the Grade: I would measure the rise and run. If the slope is greater than 30 degrees, I immediately call a structural engineer. Below that, a landscape contractor can usually handle it.
2. Determine Fuel Source: If you want gas, where is the meter? Trenching a gas line through a rocky slope is expensive. I would check if we can run the line easily or if we need to hide a propane tank near the pit.
3. Choose the “Walls”: I look at the house’s architecture. If the house is siding, I might use stone for the walls to add weight. If the house is brick, I might use smooth stucco for the walls to provide visual relief.
4. Plan the “Ceiling”: In a backyard, the tree canopy is your ceiling. I check for overhanging branches. You need at least 10 to 15 feet of vertical clearance for a wood fire. Pruning is usually required.
5. Layer the Lighting: I would specify three layers: under-cap lights on the retaining walls (for mood), path lights on the stairs (for safety), and uplights on nearby trees (for drama).
Final Checklist for Your Project
Before you break ground, ensure you have ticked these boxes.
Permits: Have you checked local setbacks? Fire pits often need to be 10+ feet from property lines.
Call Before You Dig: Have you located underground utilities? Slopes are often where utility easements run.
Water Management: Do you have a plan for where the rain goes? (Pipes, drains, swales).
Furniture Scale: Have you measured your chairs? Adirondack chairs take up a massive footprint (about 3 feet deep). Ensure your patio is deep enough to accommodate them plus circulation space behind them.
* Material Heat Check: Are you using metal furniture? Metal gets dangerously hot near a fire. I recommend heavy teak or concrete composite furniture for fire pit zones.
FAQs
How much more does it cost to build a fire pit on a slope vs. flat ground?
Expect to pay 30% to 50% more for a slope project. The cost driver isn’t the fire pit itself; it is the excavation, hauling of soil, and construction of retaining walls. Engineering for proper drainage also adds to the budget but is essential for longevity.
Can I DIY a retaining wall fire pit?
If the retaining wall is under 3 feet tall, an experienced DIYer can tackle it using interlocking block systems. However, if the wall exceeds 3 or 4 feet, most municipalities require an engineer’s stamp. One mistake with drainage behind a wall can cause a catastrophic blowout during heavy rain.
What is the best surface for a fire pit area?
For slopes, I prefer permeable pavers or flagstone set in grit. Poured concrete is risky on shifting slopes because it cracks easily if the ground settles. Pavers are flexible; if the ground moves slightly, you can lift and relevel them.
Should I use a round or square fire pit?
Let the shape of your patio dictate this. If you have a curved retaining wall (which is stronger against soil pressure), go with a round pit. If you are doing a modern, rectangular cantilevered deck, a linear or square fire table looks more cohesive.
Conclusion
A sloped backyard should never be viewed as a limitation. In fact, the most memorable landscapes are often those that embrace the terrain rather than fighting it. Whether you carve out a sunken conversation lounge or float a deck above the garden, the result is a dynamic, multi-level experience that flat yards simply can’t compete with.
By focusing on the engineering first—drainage, retention, and safety—you create a foundation that allows the design to shine. Remember to prioritize scale and comfort in your seating arrangements and always respect the power of water and gravity. With careful planning, your hillside can transform from a “problem area” into the most coveted seat in the house.
Picture Gallery


