
Small Bunkhouse Ideas for Cozy Cabin Living
There is something inherently nostalgic about a bunkhouse. Whether it is a detached structure sitting just off the main cabin or a renovated attic space, these rooms evoke memories of summer camps, late-night whispers, and family reunions. However, designing them requires a delicate balance between cramming in as many beds as possible and maintaining a comfortable, livable environment.
When clients come to me with a bunkhouse project, their primary goal is almost always occupancy. They want to know how many grandkids, cousins, or fishing buddies they can fit into a 200-square-foot footprint. To see some incredible examples of how we have solved this puzzle, be sure to check out the Picture Gallery at the end of the blog post.
But occupancy isn’t just about stacking beds; it is about circulation, air quality, and privacy. A well-designed bunkhouse feels like a boutique hotel suite, while a poorly planned one feels like a submarine. In this guide, I will walk you through the specific layouts, measurements, and design choices that turn a small shed into a beloved guest retreat.
1. Layout and Traffic Flow in Tight Spaces
The biggest mistake I see in DIY bunkhouse projects is a failure to account for human movement. You might technically fit four beds in a room, but if there is no room to stand up and change clothes, the space will feel claustrophobic immediately.
In a small bunkhouse, the layout usually falls into one of two categories: the “Galley” or the “Barracks.” The Galley layout places bunks along one long wall, leaving a clear corridor on the other side. This is ideal for narrow structures (under 10 feet wide). The Barracks layout places bunks perpendicular to the wall, protruding into the center of the room. This requires a wider footprint but offers more privacy for each sleeper.
Designer’s Note: The 30-Inch Rule
In professional design, we have a hard rule about clearance. You need a minimum of 30 inches of clear walking space between the edge of a bunk bed and the opposite wall or furniture. If you can manage 36 inches, that is even better. Anything less than 30 inches creates a “pinch point” where guests have to turn sideways to pass one another, which significantly downgrades the feeling of luxury.
Common Mistakes + Fixes
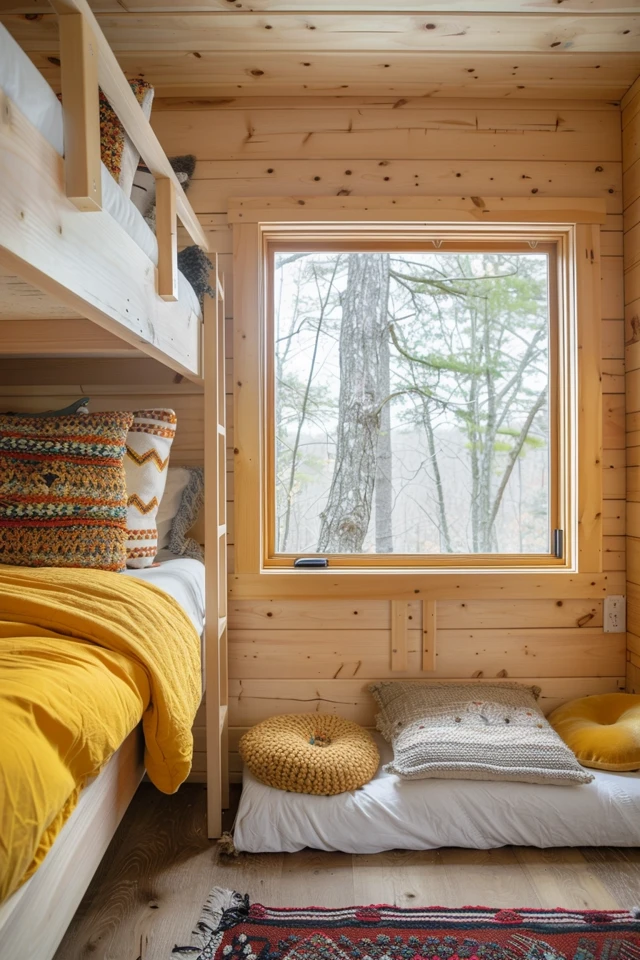
Mistake: Blocking the windows with built-ins.
Fix: If your room has only one window, do not build a bunk across it. It creates a fire safety hazard and makes the room feel like a cave. Instead, flank the window with bunks on either side and build a window seat with storage underneath in the center. This connects the two sleeping zones while keeping natural light accessible.
2. The Art of the Built-In Bunk
While freestanding metal or wood bunk beds are fine for a temporary fix, a true bunkhouse relies on built-ins. Built-in bunks are sturdier, quieter (no squeaking when someone rolls over), and allow you to utilize every inch of vertical space.
When framing built-ins, standard twin mattresses (38″ x 75″) are often too short for adult guests. If you have the space, I always recommend designing for Twin XL mattresses (38″ x 80″). That extra five inches makes a massive difference for anyone over six feet tall.
You also need to calculate your vertical “headspace” carefully. In a room with standard 8-foot ceilings, you have 96 inches to work with.
- Bottom bunk height: 18 inches (including mattress).
- Clearance for bottom sleeper: 40 inches (enough to sit up).
- Support structure for top bunk: 6 inches.
- Top mattress thickness: 8-10 inches.
- Remaining clearance: Roughly 22-24 inches.
As you can see, 8-foot ceilings are tight for adult bunk beds. If you are building from scratch, aim for 9 or 10-foot ceilings. If you are stuck with 8-foot ceilings, consider a “train car” layout where beds are end-to-end rather than stacked, or ensure the top bunk is reserved strictly for children.
What I’d do in a real project:
I always line the interior walls of the bunk with shiplap or tongue-and-groove paneling horizontally. This isn’t just aesthetic; it protects the drywall from scuffs. Kids kick walls in their sleep. Wood paneling painted in a semi-gloss or satin finish can be wiped down easily; drywall cannot.
3. Storage Strategies for High Occupancy
In a bunkhouse, you generally do not need large dressers. Guests are usually staying for a weekend, not a month. However, you absolutely need a place for “stuff”—phones, glasses, water bottles, and wet towels.
The most efficient use of space is under-bed storage. I prefer large drawers on heavy-duty casters rather than open cubbies. Cubbies tend to look messy very quickly. Drawers hide the chaos. If you are building custom bunks, integrate these drawers into the base trim so they look seamless when closed.
Vertical storage is your best friend. In narrow bunkhouses, floor space is premium real estate. I install continuous peg rails along the perimeter of the room, about 60 inches off the floor. This provides a designated spot for every guest to hang a towel, a toiletry bag, and a jacket. It keeps damp items off the beds and off the floor.
Designer’s Note: The Niche Necessity
Every single bunk needs a recessed niche. This is a small box framed into the wall cavity (usually between the studs) inside the bunk area. It serves as a nightstand. It should be large enough to hold a phone and a glass of water. If you don’t build this in, guests will end up sleeping with their phones in the bed, or glasses of water will get knocked over onto the floor.
Common Mistakes + Fixes
Mistake: Providing hangers but no closet.
Fix: In a small cabin, closet doors take up swing space. Skip the traditional closet. Use wall-mounted hooks or a simple open rod tucked into a corner. Guests prefer seeing their items so they don’t leave anything behind.
4. Rugged Finishes and Durable Materials
A bunkhouse often serves as a transition zone between the outdoors and the main home. It sees muddy boots, wet swimsuits, and potentially snow gear. The materials you choose must be bomb-proof.
For flooring, I steer clients away from wall-to-wall carpet. It traps moisture and smells, especially in a small, detached building that might not be climate-controlled year-round. Instead, opt for Luxury Vinyl Plank (LVP) or engineered hardwood with a high Janka hardness rating (like Hickory or Oak). LVP is particularly good for unheated bunkhouses because it doesn’t expand and contract as drastically as real wood with temperature changes.
To add warmth, use area rugs. However, sizing is critical. A common error is using a “postage stamp” rug floating in the middle of the room.
- The Rule: Leave 12 to 18 inches of bare floor exposed around the perimeter of the room.
- The Anchor: If you have a sitting area in the bunkhouse, the front legs of the sofa or chairs must sit on the rug. This anchors the furniture and prevents the rug from becoming a tripping hazard.
Designer’s Note: Bedding Choice
Avoid complicated bedding. I use “fitted duvets” or bunk-specific bedding systems (like Beddy’s) for top bunks. Making a top bunk is physically difficult. Zippered bedding allows kids to make their own beds easily and keeps the room looking tidy. If using traditional linens, stick to pattern-heavy quilts rather than solid white duvets. A patterned quilt hides dirt and lint much better than hotel-white bedding.
5. Lighting and Electrical Planning
Lighting can make or break the “cozy” factor. The harsh “interrogation room” effect happens when you rely on a single overhead flush mount fixture. In a bunkhouse, you need layered lighting.
Each bunk needs its own reading light. This is non-negotiable. It allows one person to read while others sleep. I prefer hardwired sconces because plug-in cords can get tangled or pulled by children. Position the sconce so the guest can reach it easily while lying down, but not so close that they hit their head on it.
For ambient lighting, avoid pot lights (recessed cans) directly over the top bunks. Looking up into a bright LED bulb while lying in bed is unpleasant. Instead, use a central fixture with a diffuser or shade, or rely on wall sconces placed in the corridor areas.
Electrical Checklist:
- Outlets: Every bunk needs a power source. Integrate USB outlets into the recessed niche mentioned earlier.
- Switches: Install 3-way switches. You should be able to turn the main overhead lights on/off from the entry door and from the sleeping area. No one wants to walk across a dark room to get to bed.
- Exterior: Don’t forget a motion-sensor light outside the front door. Bunkhouses are often detached, and navigating the path to the main house at night requires good visibility.
Final Checklist: What I’d Do in a Real Project
If I were building a small bunkhouse for a client today, this is the exact mini-checklist I would run through before finalizing the design:
- Soundproofing: Insulate the interior walls between the bunkhouse and any bathroom or mechanical room. I would also hang heavy velvet or wool curtains on the bunk openings. This creates visual privacy and dampens sound.
- Ventilation: Small rooms get stuffy fast with multiple sleepers. If central HVAC isn’t an option, I would install a high-quality ceiling fan and ensure windows have operational screens for cross-breeze.
- The “Landing Strip”: Designate a 3-foot area right inside the door for shoe removal. Use a durable slate or tile here, distinct from the main sleeping area flooring.
- Safety Rails: Ensure the top bunk rail extends at least 5 inches above the top of the mattress. I would bolt the ladder to the frame so it cannot slide.
- Color Palette: I would stick to a dark, moody ceiling (navy or forest green) with warm wood walls. Dark ceilings make the room feel wrapped and cozy, which aids sleep.
FAQs
How do I heat a detached bunkhouse efficiently?
For detached spaces without ductwork, a ductless mini-split system is the gold standard. They provide both heating and cooling, are incredibly quiet, and are energy efficient. They can be mounted high on a wall, out of the way of furniture. If you are in a very cold climate, supplement this with electric baseboard heaters as a backup.
Does a bunkhouse need a bathroom?
Ideally, yes. Even a half-bath (toilet and sink) significantly increases the comfort level, especially for older guests or young children who might need the restroom at night. If plumbing isn’t feasible due to budget or terrain, consider a high-end composting toilet or simply ensure the path to the main house is very well-lit and short.
What is the minimum width for a bunk bed ladder?
A ladder should be at least 16 inches wide. Any narrower and it becomes difficult for adults to navigate safely. Flat rungs are much easier on bare feet than round dowels. I always specify flat wooden treads with a non-slip grit tape or texture applied.
Can I use a bunkhouse for rentals?
Yes, bunkhouses are high-value additions for Airbnb or VRBO listings. However, you must verify local building codes regarding “accessory dwelling units” (ADUs). Some municipalities have strict rules about stoves or full kitchens in detached structures, but sleeping quarters are often permissible.
Conclusion
A small bunkhouse is more than just overflow sleeping; it is an adventure. It transforms a standard cabin trip into a memorable experience for guests. By focusing on the flow of traffic, the durability of materials, and the intimacy of the lighting, you can create a space that feels intentional and high-end, regardless of the square footage.
The key is to respect the constraints of the space. Do not try to force a King-sized experience into a bunk-sized room. Embrace the coziness, prioritize the privacy of the individual bunks, and build with materials that will look better with age and wear. With the right planning, your bunkhouse will likely become the most requested room on the property.
Picture Gallery


