
Title: Space-Saving Shelf Over Washer and Dryer Ideas
Introduction
Laundry rooms are notoriously difficult to design because they usually lack square footage. I once worked on a project where the laundry “room” was actually a glorified closet in a hallway, and the homeowner had to step over a basket just to open the dryer door. If you are looking for visual inspiration, we have curated a comprehensive Picture Gallery at the end of this blog post.
The biggest missed opportunity in these tight spaces is the vertical area directly above the machines. Whether you have a side-by-side setup or a single unit, that empty wall space is prime real estate for storage. Installing shelves here does not just add functionality; it actually makes the room feel finished and intentional.
In this guide, I will walk you through the structural and aesthetic considerations for adding shelving over your washer and dryer. We will cover everything from weight limits and moisture protection to styling tricks that hide the ugly plumbing.
Assessing Your Space and Measurements
Before you buy lumber or brackets, you need to understand the constraints of your specific appliances. The type of machine you own dictates exactly where your shelf can go.
For front-loading machines, you have the luxury of installing a shelf or countertop directly above the units. However, you must leave a “breathing gap.” I always recommend leaving at least one inch of clearance between the top of the machine and the bottom of the shelf to account for vibration during the spin cycle.
For top-loading machines, the math changes completely. You need to measure the height of the washer lid when it is fully open. Add at least two inches of clearance above that open lid height to ensure you do not scrape your knuckles every time you load a wash.
You also need to locate your water shut-off valves and dryer vent. A permanent shelf should never block access to emergency shut-offs. If your valves are low, you might need a hinged section or a shelf depth that stops short of the plumbing.
Key Measurements to Know:
- Standard Machine Width: Most units are 27 inches wide, meaning a side-by-side setup requires roughly 54 inches plus gaps.
- Depth Considerations: Standard machines are about 30-34 inches deep. Your shelf should not be deeper than the machines, or you will hit your head while reaching for controls.
- Height Standard: A standard counter height is 36 inches, but washers are often taller (38-42 inches). Your shelf will likely sit higher than a standard kitchen counter.
The Floating Shelf Strategy
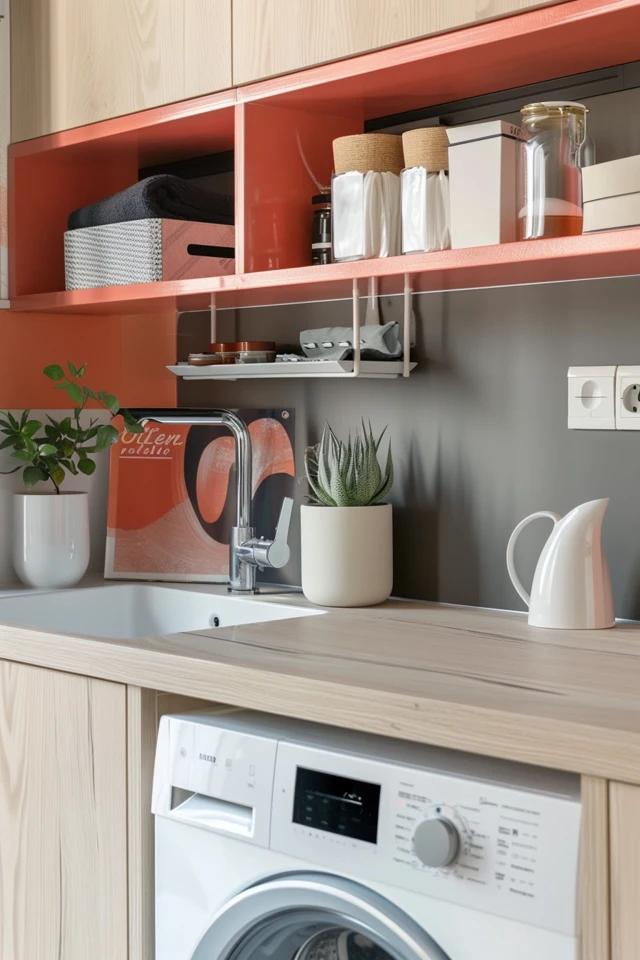
Floating shelves are the most popular choice for modern laundry rooms because they reduce visual clutter. They make a small room feel airier because you don’t see heavy brackets or legs. However, laundry detergent is heavy, so structural support is non-negotiable.
You cannot rely on drywall anchors alone for this application. A gallon of liquid detergent weighs about nine pounds. If you have three bottles, a jar of scent beads, and a glass jar of pods, you are easily exceeding 40 pounds on a single span.
I always insist on drilling into studs for laundry shelves. If your studs are spaced irregularly, use a French cleat system. This distributes the weight across the entire length of the wall and allows for a much heavier load capacity.
Material Selection:
- Solid Wood: White Oak or Maple are excellent hardwoods that resist sagging.
- Plywood with Edge Banding: This is a budget-friendly option that is more stable than solid wood in humid environments.
- Avoid MDF: Medium-density fiberboard acts like a sponge. In a high-humidity laundry room, it will swell and warp over time.
The “Waterfall” Countertop Solution
If you have front-loaders, creating a “waterfall” counter that spans across the top of both machines is a game-changer. This provides a flat surface for folding clothes immediately as they come out of the dryer. It also prevents socks from falling into the abyss behind the machines.
To achieve this look without building a full cabinet, you can use a butcher block slab. You can often find pre-cut islands at hardware stores that are roughly the right depth. You will need to cut the length to fit your alcove.
Support is the main challenge here. If you have walls on three sides, install wooden cleats (1×2 inch strips of wood) into the studs on the back and side walls. The countertop simply rests on these cleats.
If you have an open side, you will need to build a “leg” or side panel to support that end of the counter. This creates the “waterfall” effect where the wood material turns 90 degrees and goes down to the floor.
Designer’s Note: Managing Vibration
One lesson I learned the hard way involved a client who wanted the countertop to sit flush on the machines. When the washer hit the spin cycle, the entire counter rattled against the wall, creating unbearable noise. Always use small rubber bumper pads between the machine and the wood, or ensure the wood floats completely independently of the machines.
Renter-Friendly and Wire Shelving Solutions
Not everyone can drill into studs or build custom carpentry. If you are renting, or if you have metal studs that are difficult to work with, wire shelving or tension-based systems are valid options. The goal here is to elevate the look so it doesn’t feel temporary.
Standard wire shelving is practical because it allows airflow, which prevents mold behind items. However, small bottles tend to tip over on the wire slats. To fix this, buy clear acrylic shelf liners specifically cut for wire racks.
Another option is a freestanding “over-the-washer” storage unit. These look like shelving units with long legs. To make these look built-in, try to find one that is the exact width of your machine.
Styling Wire Shelves:
- Use Bins: Hide the visual clutter of branded detergent bottles inside matching opaque bins.
- Hang Items: Use S-hooks on the underside of the wire shelf to hang mesh laundry bags or lint brushes.
- Color Coordination: If the rack is white, use white bins. Monochromatic schemes reduce visual noise in small spaces.
Styling and Functional Storage
Once the shelf is up, the styling determines how functional the space actually is. I follow a “zones” approach even on a single shelf. Keep the items you use every load (detergent, dryer sheets) on the lowest, most accessible shelf or the side closest to your dominant hand.
Decanting is controversial, but in laundry rooms, it serves a purpose. Large plastic detergent jugs are ugly and often drip. Pouring liquid detergent into a beverage dispenser with a spigot can make dosing easier and cleaner. Just be sure to label everything clearly if you have children or pets.
For lighting, a single overhead light is often blocked by your body when you lean in to work. I recommend adding rechargeable, motion-sensor puck lights to the underside of your new shelf. This illuminates the washer tub so you don’t miss that one red sock hiding in a load of whites.
Rug Sizing Logic:
While we are discussing the area around the machines, a rug is essential for comfort. Avoid small doormat-sized rugs. You want a runner that spans the width of both machines (usually 2.5 feet by 5 feet or longer). This visually anchors the laundry zone and provides cushion for long folding sessions.
Common Mistakes + Fixes
Mistake 1: Mounting shelves too deep.
If your shelf is 20 inches deep and mounted high, you will never reach the items at the back.
The Fix: Keep upper shelves (those above eye level) to a maximum depth of 12 inches. Deep storage is only useful if it is low enough to reach.
Mistake 2: Ignoring the dryer vent path.
Rigid dryer ducts need space. Crushing the duct with a low shelf creates a fire hazard and reduces dryer efficiency.
The Fix: Measure the vent clearance first. If the vent goes up the wall, design a cutout in the shelf or use a shallower shelf that sits in front of the duct.
Mistake 3: Unsealed wood surfaces.
Laundry rooms see high humidity and chemical spills. Raw wood will stain immediately if bleach drips on it.
The Fix: Seal any wood shelves with at least three coats of water-based polyurethane. A matte finish looks natural but provides the necessary protection.
What I’d Do in a Real Project
If I were designing a laundry nook for a client today, here is my exact mental checklist:
1. Check the plumbing height: If the valves are exposed, I plan a removable panel or a hinged shelf section.
2. Material Choice: I would select White Oak plywood for the shelf. It is stable, takes stain well, and matches most modern interiors.
3. Support System: I would use solid steel floating shelf brackets that bolt into the studs before the drywall is finished (if a renovation) or heavy-duty iron brackets for a retrofit.
4. Lighting: I would route a channel in the bottom of the shelf for an LED strip light hardwired to a switch.
5. Access: I would keep a folding step stool stored in a narrow gap between the washer and the wall (if space permits) to ensure the top shelves are usable.
Final Checklist
Before you start drilling, run through this summary to ensure your project goes smoothly.
- Measure Twice: Confirm width, depth, and height clearance for machine lids.
- Locate Studs: Use a magnetic stud finder to mark every stud in the wall.
- Check Utilities: Identify water lines, electrical outlets, and dryer vents.
- Select Hardware: Buy anchors or brackets rated for at least 50 lbs per linear foot.
- Pre-Finish Wood: Sand and seal your wood before installing it to avoid fumes in the small room.
- Plan for Vibration: Buy rubber pads or felt strips to separate wood from machines.
FAQs
Can I put a shelf directly on top of my washer and dryer?
Technically, yes, but you should not let the wood rest directly on the metal metal top of the machine. The vibration will cause noise and eventually damage the finish of the machine. Always use rubber feet or mount the shelf to the wall with a slight gap above the machines.
How much weight can a laundry shelf hold?
This depends entirely on your installation method. A shelf screwed into drywall anchors might hold 20-30 pounds. A shelf mounted into wall studs with heavy-duty steel brackets can hold 100+ pounds. Always assume you will need more weight capacity than you think.
What is the best depth for a shelf over the washer?
For a functional countertop over front loaders, match the depth of the machines (usually 30-34 inches). For upper storage shelves mounted on the wall, 10 to 12 inches is the sweet spot. Anything deeper becomes a “black hole” where items get lost.
How do I hide the water hoses?
You can build a “waterfall” shelf with a back panel, or simply arrange tall baskets or artwork on the shelf in front of the connection points. Just ensure you can still reach the valves quickly in an emergency.
Conclusion
Adding a shelf over your washer and dryer is one of the highest-impact upgrades you can make in a home. It solves the issue of wasted vertical space and provides a dedicated zone for the chaotic task of laundry.
Whether you opt for a sleek floating shelf or a robust folding counter, the key is accurate measurement and proper structural support. Don’t be afraid to mix utility with style; a lamp, a plant, or a nice rug can make the chore of washing clothes significantly more pleasant.
Take the time to plan your clearances and choose materials that can withstand moisture. With the right approach, your laundry area can be just as designed and beautiful as the rest of your home.
Picture Gallery


