
Spaces That Speak: Storytelling Through Online Interior Design
We have all walked into a home that feels like a showroom. The furniture is beautiful, the colors are coordinated, and everything is perfectly placed, yet it feels strangely hollow. It lacks a pulse. The most memorable spaces are not the ones that strictly follow trends, but the ones that narrate the lives of the people who inhabit them.
Interior design is shifting rapidly from an exclusive luxury to an accessible digital experience. Online interior design, or e-design, provides the blueprint, but the soul of the project still comes from you. It is about translating your travels, your heritage, and your daily quirks into a physical environment that holds space for your life.
In this guide, I will walk you through the process of using digital design tools to create a home with a narrative. For those seeking visual inspiration to spark their own creativity, please note that a comprehensive Picture Gallery is available at the end of this blog post. Let’s move beyond “copy and paste” design and build a space that speaks.
1. The Narrative Arc: Defining Your Design Identity
Before you open a single shopping tab or look at a color wheel, you must define the story you want to tell. In online design, we don’t have the luxury of walking through your home to pick up on subtle cues, so you have to be vocal and specific. A “modern farmhouse” label is not a story; it is a marketing term.
Start by auditing your memories rather than your Pinterest board. Think about the last hotel, restaurant, or friend’s home where you felt completely at ease. Was it dark and moody? Was it flooded with light? Did it smell like old books or fresh linen? These sensory details are the foundation of your narrative.
Your home should also reflect your reality, not just your aspirations. If you are a renter with two large dogs, your story involves durability and flexibility, not silk rugs and white linen sofas. Acknowledging these constraints early on ensures the final design is livable, not just photogenic.
Designer’s Note: The “One-Word” Exercise
I ask every client to choose one feeling word for their room. Not “blue” or “industrial,” but words like “sanctuary,” “energizing,” or “grounded.” If your word is “grounded,” we look for earth tones, heavy textures, and low-profile furniture. If it is “energizing,” we look for high contrast and vertical lines. This single word acts as your compass throughout the online design process.
Common Mistakes + Fixes
- Mistake: Designing for a fantasy life (e.g., buying a formal dining table for 12 when you eat on the sofa).
- Fix: Design for your Tuesday night, not your Thanksgiving dinner. Invest in a high-quality coffee table and a smaller, expandable dining table.
- Mistake: Confusing “clutter” with “personality.”
- Fix: Edit your collections. Display meaningful items in groups of three or five, and store the rest to rotate later.
2. Translating Memories into Digital Mood Boards
Once you have your narrative, you need to translate it visually. In the world of online interior design, the mood board is your primary communication tool. It bridges the gap between the vague idea in your head and the concrete reality of furniture selection.
Begin by gathering images of non-furniture items that evoke your chosen feeling. Look for textures in nature, fashion photography, or architectural details. If you love the coast, don’t just pin pictures of seashells; pin images of weathered wood, grey-blue storm clouds, and coarse sand. This creates a palette based on atmosphere rather than literal themes.
When using digital tools like Canva, Spoak, or even PowerPoint, layering is key. Do not just place images side-by-side. Overlay the rug swatch with the sofa fabric and the paint chip. This mimics the physical material tray we use in a studio and helps you catch clashing undertones that you might miss if the images are separated.
What I’d Do in a Real Project: The Digital Mockup Checklist
- Background check: I always set the background color of the digital board to the intended wall color. White backgrounds skew how you perceive contrast.
- Scale reference: I include a silhouette of a person or a standard door frame in the collage. It instantly grounds the furniture pieces in reality.
- Lighting check: I add images of the lighting fixtures turned on and off. A lamp looks very different when illuminated, and it changes the color of the surrounding objects.
3. Sourcing with Soul: The Art of Mixing
A room that tells a story never looks like it was purchased entirely from a single catalog page. The narrative comes from the tension between old and new, rough and polished, high and low. In online design, sourcing requires patience and a discerning eye for dimensions and materials.
The “80/20 Rule” is my go-to for sourcing. Ideally, 80% of your large pieces (sofa, bed frame, dining table) should be new, reliable, and functional. The remaining 20% should be vintage, handmade, or heirlooms. That 20% carries 100% of the emotional weight in the room.
When shopping online for that 20%, you must be a detective. Read the specifications sheet, not just the marketing copy. Look for keywords like “kiln-dried hardwood” for durability or “hand-knotted” for rugs. Avoid “wood composite” or “printed texture” if you want pieces that age gracefully.
Pro-Level Rules of Thumb for Sourcing
- Sofa Depth: For a lounging “story,” look for a seat depth of at least 24 inches (interior measurement). Standard formal sofas are often 21-22 inches, which feels upright and stiff.
- Rug Sizing: A rug that is too small makes the room look cheap and disjointed. In a living room, the front legs of all furniture should sit on the rug. Ideally, leave 12 to 18 inches of bare floor around the perimeter of the room.
- Wood Tones: You can mix wood tones, but keep the undertones consistent. Mix warm walnuts with warm oaks. Avoid mixing red-toned cherry wood with cool, grey-toned driftwoods unless you are highly experienced in color theory.
Designer’s Note: The Texture Protocol
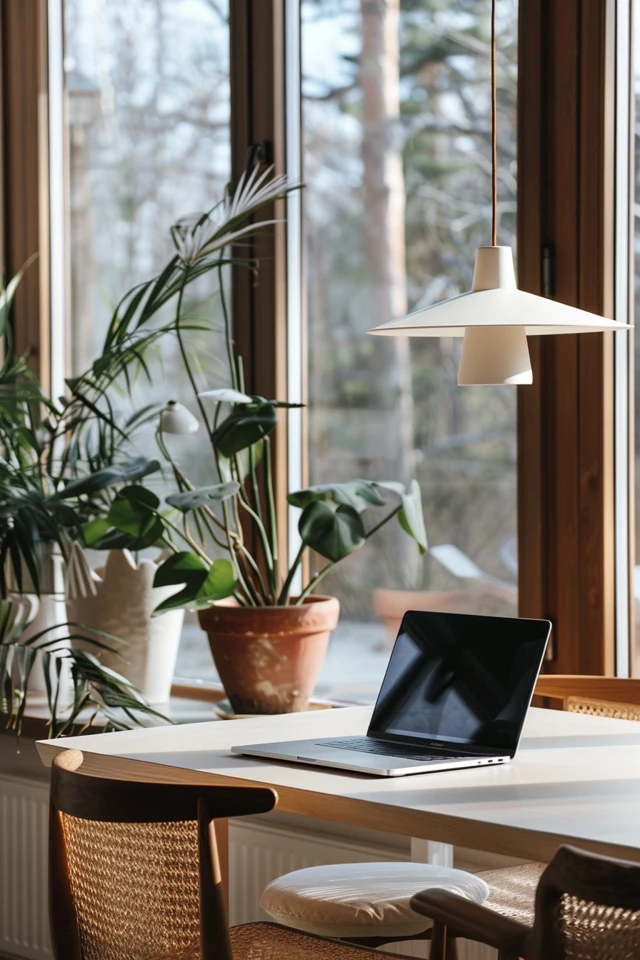
One of the biggest failures in DIY online design is a lack of texture. A room with a velvet sofa, a silk rug, and glass tables will feel slippery and cold. You need “friction.” I always ensure every room has at least three distinct textures: something soft (boucle, velvet), something rough (jute, raw wood, linen), and something shiny (brass, glass, ceramic). This tactile variety subconsciously tells a story of depth and complexity.
4. The Layout Script: Flow, Function, and Scale
If the furniture styles are the characters in your story, the layout is the plot. No matter how beautiful your pieces are, if the layout is awkward, the story falls apart. Online design requires you to be meticulous with measurements because you cannot physically test the flow before buying.
The most important tool in your arsenal is blue painter’s tape. Before you finalize any online purchase, tape the outline of the furniture on your floor. Walk around it. carry a laundry basket through the “walkways.” Does it feel tight? Visualizing volume is difficult; checking the footprint is easy.
You must also consider the “sightlines.” Stand at the entrance of the room. What is the first thing you see? It should be a focal point—a fireplace, a piece of art, or a beautiful window view. It should never be the back of a television set or a tangled mess of cords.
Key Measurements for a Functional Layout
- Coffee Table Distance: Keep 16 to 18 inches between the edge of the sofa and the coffee table. This is close enough to set down a drink but wide enough to walk through without hitting your shins.
- Walkways: Major traffic paths need 30 to 36 inches of clearance. Minor paths (like between a chair and a side table) can be 24 inches.
- Dining Clearance: You need a minimum of 36 inches from the edge of your dining table to the nearest wall or piece of furniture to pull a chair out comfortably. 42 to 48 inches is preferred for main thoroughfares.
- Curtain Height: To make ceilings look higher and the room grander, mount your curtain rod at least 4 to 6 inches above the window frame (or all the way to the ceiling molding). Extend the rod 6 to 10 inches past the sides of the window so the curtains don’t block the glass when open.
Common Mistakes + Fixes
- Mistake: The “Wall-Hugging” syndrome. Pushing all furniture against the walls creates a dead zone in the center of the room.
- Fix: Float your furniture. Pull the sofa off the wall by even three or four inches to create shadow and depth. If space allows, place the sofa in the center of the room with a console table behind it.
- Mistake: Ignoring vertical scale. Having all low-profile furniture makes a room look bottom-heavy.
- Fix: Vary heights. If you have a low sofa, pair it with a tall floor lamp or a high-backed armchair. Use bookshelves or tall artwork to draw the eye upward.
5. The Final Edit: Layering Light and Personal Artifacts
The final chapter of your design story is written in light and layers. This is where a house truly becomes a home. In online design packages, we often specify lighting fixtures, but the quality of the light bulb is something the client controls. It is the single most impactful factor in how a room feels.
Avoid the “interrogation room” effect caused by relying solely on overhead recessed lighting. Your goal is to create pools of light. You need three layers: ambient (overhead), task (reading lamps, under-cabinet), and accent (picture lights, sconces). This allows you to change the mood of the room from “work mode” to “story mode” with the flip of a switch.
When it comes to accessories, personal artifacts are essential. However, there is a fine line between curation and clutter. Group items by a common thread—color, material, or history. A shelf filled with random trinkets is noise; a shelf dedicated to white ceramics or vintage cameras is a statement.
Lighting Rules for Storytelling
- Color Temperature: Stick to 2700K to 3000K (Kelvin) bulbs for living spaces and bedrooms. This emits a warm, inviting glow. Anything above 3500K will look blue and clinical, killing the cozy narrative instantly.
- Dimmers: Put every single light source on a dimmer. It is the cheapest upgrade with the highest return on investment.
- Lampshade Lining: Check the inside of lampshades before buying. Gold or fabric linings create a warm glow; silver or white linings create a cooler, brighter light.
What I’d Do in a Real Project: The Art Placement Logic
Art should relate to the furniture it hangs near, not just the wall. A common error is hanging art too high. The center of the artwork (or the center of a gallery wall arrangement) should be 57 to 60 inches from the floor. If hanging above a piece of furniture, leave 4 to 8 inches of space between the bottom of the frame and the top of the furniture. This visually connects the two items.
Final Checklist: From Screen to Sanctuary
Before you commit to your online design plan, run through this final checklist to ensure your story is cohesive and your logistics are sound.
- The “Feeling” Check: Look at your mood board. Does it evoke the one-word emotion you selected in step one?
- The Tape Test: Have you taped out every single piece of furniture on your floor to verify traffic flow?
- The Material Mix: Do you have at least three distinct textures (wood, metal, fabric) in the room?
- The Light Plan: Do you have at least three sources of light (overhead, table, floor/sconces)?
- The Sample Verification: Did you order physical fabric and rug swatches? (Never rely on computer screen color accuracy).
- The Entry Measurement: Did you measure your front door, hallways, and elevator to ensure the furniture can physically fit into your home?
- The Personal Touch: Is there at least one item in the room that has a personal history or vintage origin?
FAQs
How do I mix furniture styles without it looking messy?
The key to mixing styles is a consistent color palette and repetition. If you have a modern sofa and a vintage chair, try to find a common color thread in the rug or pillows to tie them together. Also, repeat shapes. If your vintage table has curved legs, add a round mirror or a curved lamp to echo that geometry.
Is online interior design suitable for total renovations or just decorating?
Online design is best suited for furnishing, decor, and cosmetic updates (paint, lighting, window treatments). For major structural renovations involving moving walls, plumbing, or electrical work, you need a local architect or general contractor to ensure code compliance and safety.
How do I handle returns with online furniture shopping?
Always read the return policy before buying. Many large furniture items have “restocking fees” ranging from 15% to 25%, plus the cost of return shipping. This is why ordering fabric swatches and taping out measurements is critical—it minimizes the risk of expensive returns.
Can I use online design if I have a very small budget?
Absolutely. In fact, it is often more budget-friendly. You can hire a designer for a flat fee to create a plan, and then execute the purchasing over time as your budget allows. You are paying for the roadmap, not necessarily the project management.
Conclusion
Creating a space that speaks is not about buying the most expensive furniture or adhering strictly to a specific design dogma. It is about the thoughtful layering of your life’s experiences against a backdrop of functional design. Online interior design tools have democratized this process, placing the power of visualization directly into your hands.
By defining your narrative, respecting the rules of scale, and mixing the old with the new, you can transcend the digital screen. You can turn a house full of “add to cart” items into a home that tells the unique story of the people who live there. Start with your story, measure twice, and let your space do the talking.
Picture Gallery


