
Title: Speakeasy Basement Bar Ideas for Chic Hideaways
Introduction
There is something undeniably magnetic about a speakeasy. The concept transports us back to the Prohibition era, invoking images of hushed conversations, dimly lit corners, and the clinking of heavy crystal glasses. Bringing this aesthetic into your home is one of the most effective ways to transform a standard basement into a destination rather than just a storage area.
I vividly remember a project where a client felt their basement was a “concrete dungeon” with low ceilings and no natural light. Instead of fighting those constraints, we leaned into them to create a moody, intimate jazz lounge that became the most popular room in the house. The lack of windows actually works in your favor here, allowing you to completely control the atmosphere and lighting.
If you are looking for visual inspiration to guide your renovation, make sure to check out the curated Picture Gallery at the end of the blog post for real-world examples. Now, let’s dive into the structural and stylistic elements required to build your own chic hideaway.
1. Creating the “Secret” Entrance and Setting the Mood
The hallmark of any great speakeasy is the element of surprise. In a residential setting, you want to create a psychological transition from the bright, open-concept spaces upstairs to the darker, more mysterious vibe downstairs.
Consider hiding the entrance to the bar area behind a “hidden” door. Millwork companies now offer pre-hung bookcase doors that function beautifully as secret passages. If a hidden door isn’t in the budget, you can achieve a similar effect by painting the hallway leading to the bar a deep, moody color that signals a shift in atmosphere.
Color Drenching
The most effective way to handle low basement ceilings and boxy layouts is a technique called color drenching. This involves painting the walls, baseboards, crown molding, and even the ceiling the same color.
- Why it works: It blurs the harsh lines where the wall meets the ceiling, making the ceiling feel infinite rather than low.
- Colors to try: Think beyond black. Deep navy, charcoal, forest green, or aubergine create a luxurious backdrop.
- Finish matters: Use a matte or eggshell finish for walls to absorb light, but use a semi-gloss or satin in the exact same shade for the trim to add texture.
2. Lighting: The Jewelry of the Dark
In a dark room, lighting is not just functional; it is the primary mood setter. The biggest mistake homeowners make in basements is relying on a grid of recessed “can” lights. This creates a clinical, airport-terminal feel that kills the speakeasy vibe instantly.
The Golden Rules of Speakeasy Lighting
As a designer, I rarely use overhead lighting in these spaces except for specific task areas. Instead, I rely on layers of light at eye level.
- Temperature is non-negotiable: Ensure every bulb is 2700 Kelvin (warm white). Anything higher (3000K-4000K) will look blue and sterile against dark walls.
- Dimmers are mandatory: Every light source must be on a dimmer switch. You want a glow, not a beam.
- Sconce placement: Wall sconces should be mounted approximately 60 to 66 inches from the finished floor to the center of the fixture. This keeps the light flattering to the face.
Undershelf and Bar Lighting
Use LED tape lighting under the front lip of the bar top and under floating shelves. This highlights the texture of your glassware and stone without flooding the room with light.
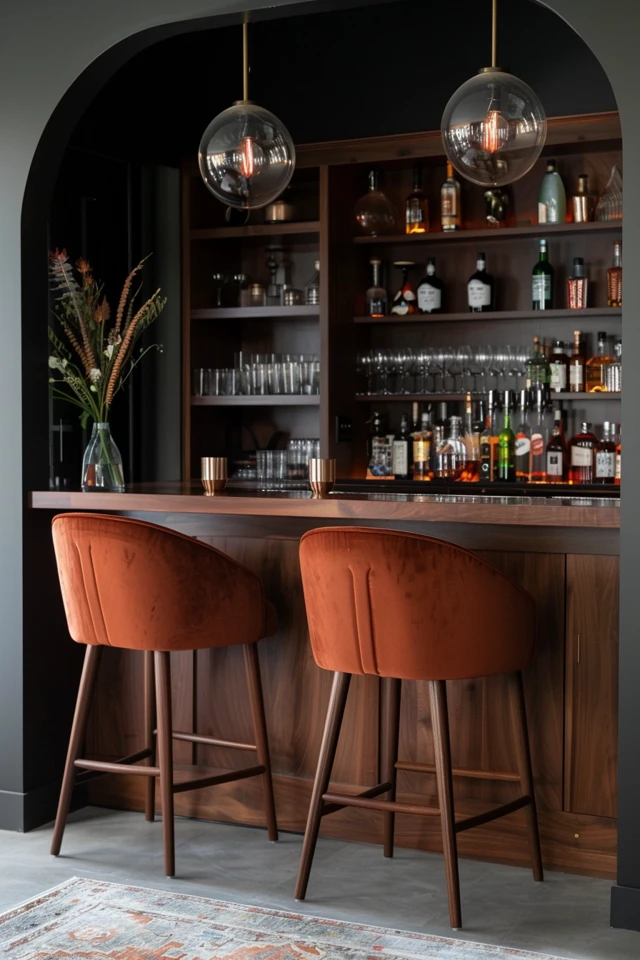
For pendant lights over the bar, hang them lower than you would in a kitchen. A distance of 30 to 32 inches from the countertop to the bottom of the shade creates intimacy.
3. Materiality: Textures That Scream Luxury
Since the visual field is dark, your sense of touch becomes more acute. A chic hideaway relies on rich, tactile materials to create comfort and absorb sound. Basements can be echo chambers, so soft materials are essential for acoustics.
The Bar Top
Avoid standard speckled granite, which creates a generic “kitchenette” look.
- Soapstone or Honed Black Granite: These offer a matte, velvety touch that feels historical and wears in beautifully over time.
- Wood: A live-edge walnut slab or a stained butcher block adds warmth, but requires more maintenance to prevent water rings.
- Quartzite: If you want the look of marble without the staining risk of lemon juice or red wine, look for “Taj Mahal” quartzite.
Wall Treatments
Flat drywall is the enemy of the speakeasy aesthetic. You need to add depth.
- Picture frame molding: This is a cost-effective DIY-friendly option that adds immediate architectural weight to the room.
- Brick veneer: Thin brick veneers can be applied to drywall to mimic the look of an old underground cellar.
- Wallpaper: Use a textured vinyl wallpaper (like a faux grasscloth or heavy damask) on accent walls. Vinyl stands up better to potential basement humidity than traditional paper.
Designer’s Note: If you are renovating a basement, humidity is a real concern. While I love the look of hardwood floors, I almost always specify high-end Luxury Vinyl Plank (LVP) or engineered wood for basement bars. LVP is waterproof, mimics the look of aged oak perfectly, and won’t warp if you have a minor plumbing leak.
4. The Logistics: Measurements and Layout
A beautiful bar is useless if it functions poorly. As a designer, I see many DIY bars that are uncomfortable because the dimensions are slightly off. Here are the industry standards you need to know to make your home bar feel professional.
Critical Bar Dimensions
- Bar Height: A standard wet bar is 42 inches high. This allows guests to stand comfortably with a drink or sit on standard 30-inch bar stools.
- Bar Depth: The top should be at least 16 to 18 inches deep on the guest side, plus a prep area on the bartender side.
- Overhang: You need an overhang of at least 10 to 12 inches for knee clearance. Anything less and your guests will be knocking their knees against the front panel.
- The “Bartender’s Aisle”: Leave 36 to 42 inches of space behind the bar. You need room to bend down to reach a mini-fridge or turn around without hitting the back cabinetry.
Plumbing vs. Dry Bar
If your budget allows, a wet bar (one with a sink) significantly increases utility and home value. However, cutting into the concrete slab for drainage can be expensive.
If you are renting or on a tight budget, a “dry bar” is a perfectly acceptable alternative. Focus on a beautiful prep counter and invest in a high-quality freestanding ice maker. Clear ice makers are a quintessential speakeasy luxury that elevate the cocktail experience immediately.
5. Furniture and Styling: The Final Polish
The furniture layout should encourage conversation. In a speakeasy, we move away from the “all furniture facing the TV” layout. Instead, create small vignettes or “conversation pits.”
Seating Selection
Choose low-profile furniture. Since basement ceilings are often only 7 or 8 feet high, a sofa with a low back (under 32 inches) makes the room feel taller.
- Chesterfield Sofas: The tufted leather is a classic choice that ages well and fits the vibe perfectly.
- Velvet Swivel Chairs: Swivel chairs are excellent for social spaces, allowing guests to turn toward the bar or the sofa easily.
- Bar Stools: Ensure your stools have a footrest. Dangling legs become uncomfortable after 15 minutes.
Common Mistakes + Fixes
Mistake: Buying a rug that is too small, making the furniture look like it is floating on an island.
Fix: Ensure the front legs of all major furniture pieces sit on the rug. In a lounge setup, an 8×10 or 9×12 rug is usually necessary to ground the space.
Mistake: Empty, cluttered open shelving.
Fix: Treat your back bar shelving as a display case. Group bottles by spirit type, but prioritize the prettiest bottles for the front row. Decant less attractive labeled spirits into crystal decanters. Add non-bar elements like vintage books, small framed art, or a brass clock to break up the rows of glass.
Final Checklist: What I’d Do in a Real Project
If I were designing your basement bar today, here is the exact mental checklist I would run through to ensure success.
- Check the moisture: Before building, tape a plastic sheet to the concrete floor for 24 hours. If it’s damp underneath, seal the concrete before laying floors.
- Plan the electrical early: Decide where your blender, ice maker, and wine fridge will go. You need outlets inside the cabinetry, not just on the backsplash.
- Soundproofing: If the bar is under a bedroom, install Rockwool insulation in the ceiling joists to dampen the noise of laughter and music.
- Select the focal point: Is it the liquor display? The backsplash? Pick one hero moment so the eye knows where to land.
- Source vintage: Buy at least one item (a mirror, a set of glasses, a side table) from an antique store. New furniture lacks the “soul” needed for a vintage hideaway.
- Test the paint: Buy a sample pot of your dark paint and put it on two different walls. Basement lighting can turn a nice charcoal into a weird purple.
FAQs
How much does it cost to build a basement bar?
Costs vary wildly based on DIY vs. contractor labor. A DIY dry bar using stock cabinetry might cost $2,000–$5,000. A fully custom wet bar with stone counters, plumbing, and electrical work usually ranges from $15,000 to $40,000+.
What is the best flooring for a basement bar?
Luxury Vinyl Plank (LVP) is the industry standard for basements. It is waterproof, durable, warm underfoot, and comes in convincing wood and stone looks. Avoid wall-to-wall carpet in the immediate bar area where spills are inevitable.
How do I make a small corner feel like a speakeasy?
You don’t need a whole room. Use a dark wall color to define the corner. Install a floating shelf for bottles, hang a dramatic piece of art or a mirror, and use a dimmable wall sconce or a small table lamp. The vibe comes from the lighting and shadows, not the square footage.
Can I have a speakeasy with white walls?
It is difficult. The speakeasy aesthetic is inherently rooted in shadows and intimacy. If you must keep walls light, use very dark cabinetry, dark woods, and keep the lighting very dim and warm to compensate.
Conclusion
Designing a speakeasy basement bar is about more than just finding a place to store your bourbon. It is about creating an escape within your own home—a space that prioritizes comfort, conversation, and a touch of theatricality.
By focusing on warm, layered lighting, rich textures, and proper scale, you can overcome the typical challenges of a basement environment. Remember that the imperfections of a basement—the lack of light, the enclosed feeling—are actually your greatest assets in achieving this look. Pour yourself a drink, dim the lights, and enjoy your new hideaway.
Picture Gallery


