
Spooky Halloween Chalkboard Ideas to Try
Nothing signals the start of the holiday season quite like swapping out everyday decor for something a little more festive. Halloween offers a unique opportunity to be playful with your interior styling, and chalkboard art is one of the most versatile tools in a designer’s arsenal. It allows you to change the mood of a room instantly without storing bulky decorations for the other eleven months of the year.
I remember one specific project where a client felt their modern farmhouse entry felt too cold for trick-or-treaters. We didn’t want to clutter the space with plastic skeletons, so we installed a large, oversized slate chalkboard with a reclaimed wood frame. By simply adding some hand-lettered spooky quotes and a few sketches of cobwebs, the entire foyer transformed into a welcoming, festive space.
The beauty of chalkboard art is that it requires very little investment but delivers high visual impact. Whether you are an experienced artist or someone who struggles to draw a stick figure, there are techniques to make your board look professional. For a huge dose of inspiration, make sure to check out the Picture Gallery at the end of the blog post.
Setting the Stage: Selecting and Prepping Your Surface
Before you even pick up a piece of chalk, you need to evaluate the surface you are working with. As an interior designer, I see many homeowners make the mistake of buying a brand-new chalkboard and writing on it immediately. This often leads to “ghosting,” where your first design is permanently etched into the background.
To prevent this, you must “season” a new chalkboard. Take a piece of traditional white chalk, turn it on its side, and rub it over the entire surface of the board. Wipe it off with a dry cloth. This creates a fine layer of chalk dust that gives the board a slate-gray, matte finish rather than a stark black one, allowing for easier erasing later.
When selecting a board for a specific room, scale is everything. If you are hanging a board above a console table, the board should generally be about two-thirds the width of the table. For a standard 60-inch console, look for a board that is roughly 40 inches wide.
Designer’s Note: The “Floating” Problem
One lesson I learned the hard way involves hanging heights. A common error is hanging the chalkboard too high, making it feel like it is floating aimlessly on the wall.
For a standalone piece, the center of the board should be at eye level, which is approximately 57 to 60 inches from the floor. If it is above a piece of furniture, leave about 4 to 8 inches of breathing room between the bottom of the frame and the top of the furniture. This visually connects the two items, creating a cohesive vignette rather than disjointed elements.
Essential Tools and Techniques for Pro Results
Achieving that crisp, Pinterest-worthy look rarely happens with standard classroom chalk alone. For sharp lines and opaque whites, I recommend using a combination of traditional chalk and liquid chalk markers. However, you must ensure your board is non-porous before using markers, or they will never wash off.
If you are using traditional chalk, try the “wet technique” for your main text. Dip the tip of your chalk into a cup of water for 30 seconds before writing. The chalk will go on looking somewhat transparent, but as it dries, it turns a brilliant, opaque white that resists smudging.
For those who are not confident in their hand-lettering skills, stencils and transfer methods are legitimate design shortcuts. You can print out your desired phrase in a font you love, rub chalk on the back of the paper, tape it to the board, and trace the letters with a pencil. This transfers a faint outline of chalk onto the board that you can simply fill in.
Common Mistakes + Fixes
- Mistake: The text looks crowded and uneven.
- Fix: Always sketch your layout lightly with standard chalk first. Use a ruler to mark horizontal guidelines for your text, ensuring you leave at least 20% negative space around the border.
- Mistake: Smudging the design with your hand while drawing.
- Fix: Work from the top left corner down to the bottom right (if you are right-handed). This prevents your palm from dragging through your fresh work.
- Mistake: The board looks messy and dusty after erasing.
- Fix: Use a felt eraser for the bulk of the dust, followed by a microfiber cloth dampened with water and a tiny drop of dish soap for a deep clean.
The Haunted Welcome: Entryway and Porch Designs
Your entryway sets the tone for the entire home, making it the prime location for a Halloween chalkboard. For the front porch, an A-frame sandwich board is a classic choice that adds instant curb appeal. I prefer wooden frames in darker stains like walnut or charcoal to ground the design against the lighter siding of a house.
When styling an outdoor board, you must consider the elements. If your porch is uncovered, use a spray fixative over your finished chalk design to prevent rain or humidity from running the ink. However, be aware that this makes the design permanent, so only do this if you plan to repaint the chalkboard surface next year.
Pair your board with organic elements to soften the hard lines of the frame. I typically group three pumpkins of varying sizes (one tall, one wide, one mini) at the base of one leg. Adding a potted mum in a 12-to-14-inch planter creates necessary height variation and introduces texture.
Phrasing Ideas for Entries
- “Trick or Treat, Smell My Feet” (Playful)
- “Enter if You Dare” (Spooky)
- “The Family Name Haunted House” (Personalized)
- “Witches Welcome, Goblins Go Away” (Whimsical)
In the interior foyer, a wall-mounted chalkboard can serve as a changing art piece. During October, I like to drape a faux cobweb over the top right corner of the frame. This adds a 3D element that breaks the rectangular plane and makes the decor feel integrated into the room.
Kitchen and Dining: Menus and Mantels
In the kitchen and dining areas, chalkboard art should feel functional yet festive. A popular trend in my recent projects is the “Potions and Poisons” bar menu. If you have a bar cart or a coffee station, a small 8×10 easel chalkboard listing spooky drinks adds a layer of sophisticated fun.
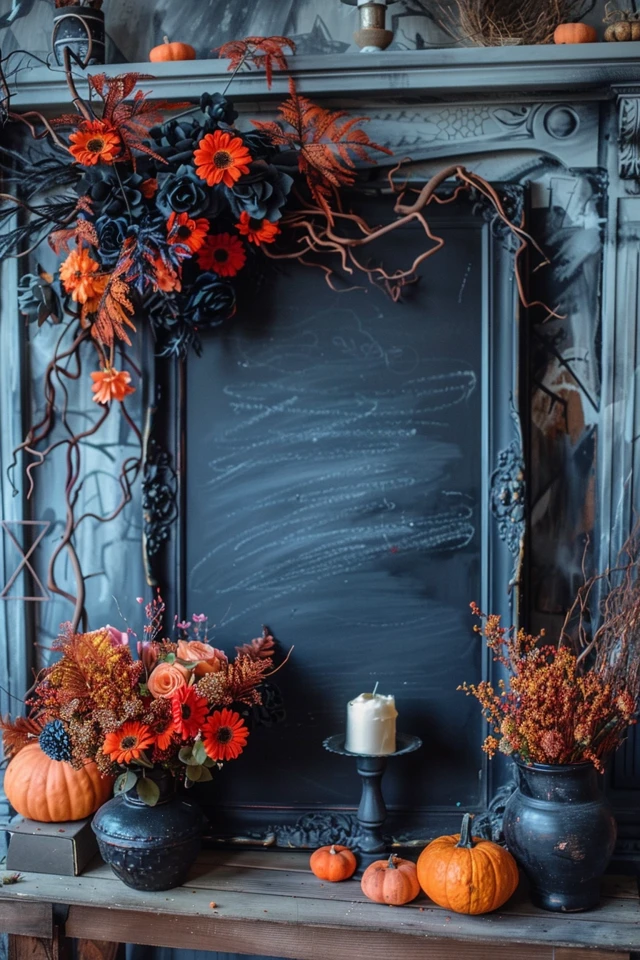
For the dining room, a large chalkboard works beautifully as a backdrop to a buffet or mantel. When styling a mantel with a chalkboard, layering is key to avoiding a flat look. Lean the chalkboard against the wall, then place a tall candlestick or a vase with dried wheat slightly overlapping the frame on one side.
This overlap creates depth and ensures the chalkboard feels like part of the architecture. If you are drawing a menu for a Halloween dinner party, keep the typography simple. Use a serif font for the headers (like “First Course”) and a clean sans-serif for the food items to ensure readability for your guests.
What I’d Do in a Real Project: The Dining Focal Point
- Select the Board: I would choose a large, frameless slate board or one with a minimal brass frame to keep it elegant.
- Draft the Content: I would sketch a large, circular moon in the center using the “string and chalk” compass method for a perfect circle.
- Add Text: Inside the moon, I would write “Eat, Drink & Be Scary” in a script font.
- Add Texture: I would draw silhouette bats flying out from the moon toward the top right corner.
- Style the Surface: On the buffet below, I would place a black cheesecloth runner and brass candelabras to echo the warmth of the room while keeping the Halloween theme.
Low-Stress Ideas for Playrooms and Kids’ Spaces
When designing for families with young children, durability and safety are the top priorities. Chalkboard paint is a fantastic solution for playrooms. You can paint a designated section of a wall, or even the back of a door, to create a canvas that doesn’t take up floor space.
For Halloween, turn these spaces into interactive zones. Draw a large tic-tac-toe grid using pumpkins and ghosts as the X and O markers. This not only serves as decor but also provides an activity.
If you are worried about chalk dust and asthma or allergies—a very real concern for many clients—opt for dustless chalk crayons. They provide the same vibrant look without the airborne particles. Additionally, ensure that any wall-mounted boards in a child’s room are secured with heavy-duty anchors, not just picture wire, to prevent accidents during enthusiastic play.
Kid-Friendly Drawing Prompts
- Draw your costume: Encourage them to sketch what they want to be.
- Design a jack-o-lantern: Draw a blank pumpkin outline and let them fill in the face.
- Monster mash: Draw a monster body and let them add the eyes and arms.
Final Checklist: The Designer’s Approach
To ensure your Halloween chalkboard project is a success, run through this final mental checklist before you commit to the design. These are the same steps I use to ensure quality control on a job site.
- Surface Check: Is the board seasoned? If not, rub the side of the chalk over it and wipe clean.
- Stability: Is the easel sturdy enough to withstand wind (if outdoors)? Is the wall anchor rated for the weight of the board?
- Legibility: Can the text be read from 6 feet away? If the letters are under 3 inches tall, they may be too small for a focal point.
- Contrast: Are you using enough pressure? Faint gray lines look messy; bright white lines look intentional.
- Integration: Have you styled the area around the board? A board rarely looks good in isolation; anchor it with physical decor items.
FAQs
Q: How do I get liquid chalk marker off a porous board?
A: This is tough. If standard water doesn’t work, try a “magic eraser” sponge gently. If that fails, you can paint over the surface with fresh chalkboard paint. This is why I always recommend testing a small corner first.
Q: Can I use a mirror instead of a chalkboard?
A: Absolutely. Using dry-erase markers or liquid chalk markers on a vintage mirror is a chic, spooky alternative. It creates a “haunted mirror” effect. Just be sure to write on the glass surface, not the frame.
Q: How do I make my drawing permanent for the season?
A: Use a matte spray sealer or fixative (available at art supply stores). Spray a light, even coat from about 12 inches away. Note that you will likely need to scrub hard or repaint the surface to remove it later.
Q: My handwriting is terrible. Is there a cheat?
A: Yes! Print your design on paper, rub the back with chalk, tape it to the board, and trace over the letters with a pencil. When you remove the paper, you’ll have a perfect chalk outline to fill in.
Conclusion
Bringing Halloween spirit into your home doesn’t require a total renovation or bins full of plastic decorations. A well-styled chalkboard offers the perfect blend of creativity, nostalgia, and sophistication. It allows you to customize your message to fit the exact mood of your home, whether that is spooky, whimsical, or elegant.
Remember that the charm of chalkboard art lies in its handmade nature. It doesn’t need to be digitally perfect to be beautiful. The slight imperfections in the chalk texture add warmth and character that mass-produced decor simply cannot replicate.
I hope these ideas inspire you to pick up a piece of chalk and start experimenting. Whether you are dressing up your front porch or adding a menu to your dining room, the possibilities are endless. Grab your eraser, season your board, and let your creativity haunt your halls this season.
Picture Gallery


