
Texas Landscaping Ideas for Front Yard Beautification
Landscaping in Texas is a unique challenge that balances extreme heat, unpredictable freezes, and soil conditions ranging from heavy clay to solid limestone. Many homeowners assume that a low-water yard means settling for a barren “gravel and cactus” look, but that could not be further from the truth. A truly beautiful Texas front yard combines lush textures, native resilience, and structural hardscaping to create curb appeal that survives July and August without driving up your water bill.
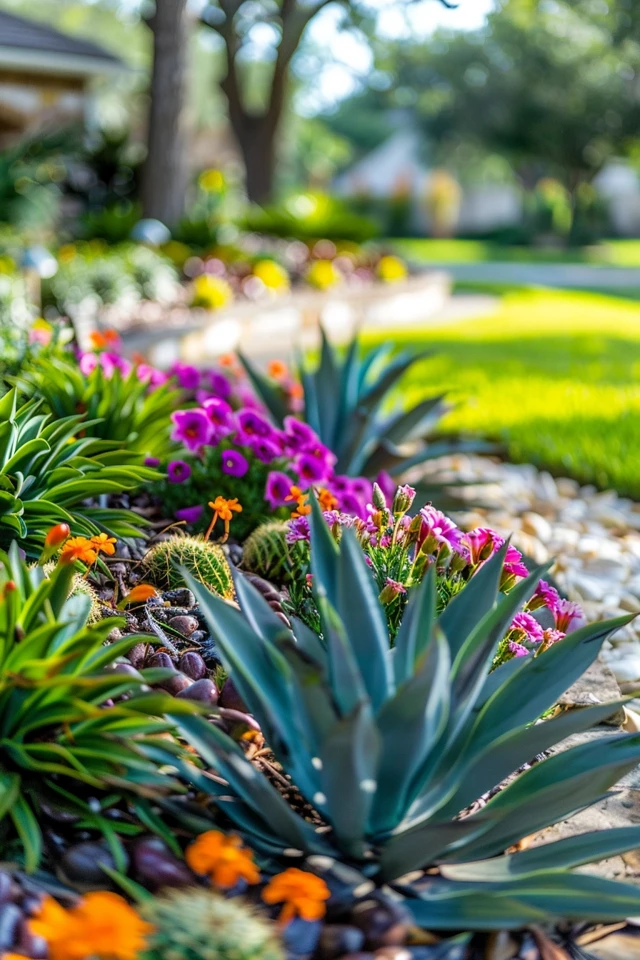
If you are looking for visual inspiration to guide your renovation, we have curated a comprehensive Picture Gallery at the end of this blog post.
We will cover the specific design rules I use to create welcoming entrances, the correct plant choices for your specific region, and the layout tricks that make a front yard feel expansive rather than cluttered. Whether you are in the humid Gulf Coast or the arid Hill Country, these principles will help you design a space that thrives.
At-a-Glance: Key Takeaways
- Native is Necessary: Plants native to Texas or adapted to the climate (like Esperanza, Red Yucca, and Texas Sage) are non-negotiable for long-term survival and low maintenance.
- Layer Your Heights: Avoid the “single row” effect. Successful designs use three distinct height layers: ground cover, mid-sized shrubs, and specimen trees.
- Hardscape Defines the Space: In Texas, defining beds with steel edging or limestone borders is crucial to preventing grass encroachment and maintaining clean lines.
- Soil Prep is Everything: Most Texas soil is nutrient-poor or overly compacted. Amending your beds with 3 to 4 inches of compost before planting is the secret to success.
- Irrigation Strategy: Drip irrigation is far superior to spray heads for flower beds, reducing evaporation in the summer heat and preventing fungal issues on leaves.
What This Style Means (and Who It’s For)
Texas landscaping style is often characterized as “Soft Contemporary” or “Modern Rustic.” It is an approach that moves away from the traditional, thirsty manicured lawn and boxwood hedges found in the Northeast. Instead, it embraces organic shapes, contrasting textures, and plants that move with the wind.
This style is for the homeowner who wants their house to look established and intentional, not like a generic builder-grade lot. It is particularly well-suited for people who want to reduce their environmental footprint. By using plants adapted to the region, you naturally use less water and fewer fertilizers.
However, this is also a practical style for busy families. Once established, a Texas-style native garden requires significantly less weekly maintenance than a traditional turf-heavy yard. You spend less time mowing and edging, and more time enjoying the view from the porch.
The Signature Look: Ingredients That Make It Work
To achieve a professional Texas look, you need to curate your materials palette carefully. In my design projects, I stick to a specific set of “ingredients” that play well together.
The Plant Palette
- Structure Plants: These are your evergreens that look good year-round. Texas Sage (Cenizo), Dwarf Yaupon Holly, and Agave provide the “bones” of the garden.
- Color & Softness: Use perennials that bloom in cycles. Blackfoot Daisy, Autumn Sage (Salvia greggii), and Lantana offer pops of color that attract pollinators.
- Architectural Accents: Plants with unique shapes draw the eye. Red Yucca (Hesperaloe parviflora) and Prickly Pear (spineless varieties like ‘Ellisiana’) add sculptural drama without looking messy.
Hardscaping Materials
- Limestone: Whether it is chopped blocks for edging or large slabs for walkways, limestone is the quintessential Texas stone. Its creamy white and gray tones reflect heat rather than absorbing it.
- Decomposed Granite: This is excellent for pathways or replacing turf in low-traffic areas. It is permeable, allowing rain to soak into the ground rather than running off into the street.
- Steel Edging: For a modern, clean look, I use raw steel edging to separate grass from flower beds. It creates a crisp line and weathers to a beautiful rust patina that complements native plants.
- River Rock: Use this for dry creek beds to manage drainage. Texas storms can be intense, and having a designated channel for water flow prevents soil erosion.
Layout & Proportions (Designer Rules of Thumb)
One of the biggest differences between a DIY job and a pro design is the understanding of scale and spacing. When I walk a site, I am constantly calculating measurements to ensure the yard feels balanced.
The “Two-Thirds” Rule for Bed Depth
Most homeowners make their flower beds too shallow. A 2-foot strip of dirt pushed up against the house looks stingy and forces you to plant in a single, boring straight line.
I recommend foundation beds be a minimum of 6 to 8 feet deep. This depth allows you to layer plants. You can place taller shrubs in the back (closest to the house) and shorter perennials and ground covers in the front. This creates depth and makes the house feel grander.
Tree Placement and Canopy
A common error is planting trees too close to the home. For a small ornamental tree (like a Texas Redbud or Crape Myrtle), place the trunk at least 8 to 10 feet away from the foundation. For large shade trees (like a Live Oak or Cedar Elm), you need 15 to 20 feet of clearance.
Remember the mature size. That small 15-gallon oak will eventually have a 40-foot spread. If you plant it too close to the driveway, you will be trimming branches off your car roof for the next two decades.
Pathway Widths
Your front walkway is the handshake of your home. It needs to be generous. A standard builder walk is often 36 inches, which feels tight for two people walking side-by-side.
I specify a minimum of 48 inches for front entry paths. If space allows, 60 inches is luxurious and welcoming. If you are using stepping stones, space them so that the center of one stone is roughly 24 inches from the center of the next, which mimics a natural walking stride.
Step-by-Step: How to Recreate This Look
Transforming your front yard is a major project, but breaking it down makes it manageable. Here is the sequence I follow on installation days.
1. Site Prep and Demolition
Start by marking your new bed lines with spray paint. Live with the lines for a few days to ensure you like the shape. Once decided, remove the grass. Do not just till the grass into the soil; the Bermuda or St. Augustine roots will come right back. Use a sod cutter to remove the top layer of turf entirely.
2. Soil Amendment
This is the unglamorous part that matters most. Texas soil is often heavy clay or rocky caliche. You must amend it. Bring in a “landscape mix” (usually a blend of compost, topsoil, and sand) and till it into your existing soil to a depth of 6 inches. If you are planting on solid rock, you may need to build raised berms.
3. Hardscaping Installation
Install your edging, boulders, and pathways before any plants go in. Set your steel or stone edging so it is 1 to 2 inches above the soil grade. This acts as a lip to keep mulch inside the bed and grass outside.
4. Plant Placement
Set all your plants out in their pots before digging a single hole. Stand back at the street and look. Adjust spacing as needed. Remember to account for the mature size of the plant, not the size it is in the pot. If the tag says it grows 4 feet wide, leave 4 feet of space.
5. Planting
Dig holes twice as wide as the root ball but no deeper. When you place the plant, the top of the root ball should be slightly higher (about 1 inch) than the surrounding soil level. This ensures water drains away from the crown, preventing rot.
6. Mulching
Apply 2 to 3 inches of hardwood mulch. Avoid “dyed” mulches (black or red) as they look synthetic and fade quickly. Native cedar mulch is an excellent choice as it breaks down slowly and repels some insects. Keep mulch 3 inches away from the base of every plant trunk to allow airflow.
Budget Breakdown: Low / Mid / Splurge
Landscaping costs vary wildly based on labor and material choices. Here is what you can expect at different investment levels.
Low Budget: The DIY Refresher
- Strategy: Keep existing beds but improve them. Focus on high-impact, low-cost perennials.
- Materials: Bagged mulch from a big-box store, 1-gallon plants, DIY edging removal.
- Labor: 100% homeowner sweat equity.
- What you get: A cleaner look with pops of seasonal color. You might plant Lantana, Salvia, and ornamental grasses.
Mid-Range: The Curb Appeal Update
- Strategy: Expand bed sizes and add stone accents. Replace overgrown shrubs with better specimens.
- Materials: Bulk mulch delivery, steel edging, 5-gallon shrubs, one or two 15-gallon accent trees, limestone boulder accents.
- Labor: Professional help for hard labor (sod removal) or design consultation, with homeowner planting.
- What you get: A structured, designed look with defined borders and year-round interest.
Splurge: The Complete Overhaul
- Strategy: Ripping out the front walk, installing landscape lighting, and full irrigation updates.
- Materials: Lueders limestone paver walkway, extensive river rock drainage beds, 30-gallon or 45-gallon instant-impact trees, professional LED lighting system.
- Labor: Full professional design and installation crew.
- What you get: A magazine-worthy entrance that extends your living space and significantly increases property value.
Common Mistakes (and How to Fix Them)
Designer’s Note: The “Volcano” Mulch Disaster
The most damaging mistake I see—often committed by “mow and blow” landscaping crews—is mulching trees like volcanoes. This is when mulch is piled high against the trunk of the tree in a cone shape.
Why it’s bad: The tree bark is meant to be dry. Constant moisture against the trunk causes rot, invites pests, and can kill the tree.
The Fix: Pull the mulch back. You should be able to see the “root flare” where the trunk widens at the base. It should look like a donut, not a volcano.
Mistake: The Monoculture Trap
Planting 20 of the same shrub in a row looks great for a month and terrible if a pest or freeze targets that specific species.
The Fix: Biodiversity. Mix textures and species. If you lose one type of plant to a freeze, the rest of the garden remains intact.
Mistake: Ignoring Winter
Many homeowners buy plants in spring when everything is blooming, resulting in a yard that looks dead from November to March.
The Fix: Aim for a 50/50 ratio of evergreen to deciduous plants. Incorporate Texas Sabal Palms, Agaves, or Wax Myrtles to ensure green structure during the gray months.
Mistake: Planting for Instant Gratification
Cramming plants together to make the bed look “full” on day one leads to overcrowding and fungal disease within a year.
The Fix: Trust the spacing. Fill the empty gaps with annuals for the first year if it looks too sparse, but give the permanent shrubs room to breathe.
Zone-by-Zone Variations
“Texas Landscaping” isn’t a single aesthetic because the state is massive. Here is how I adapt the design based on specific conditions.
The Foundation Beds (Against the House)
This is the most critical zone. Avoid plants with aggressive root systems here to protect your foundation. Use soft, non-thorny plants near water spigots and electrical meters so utility access is painless.
My Pick: Dwarf Yaupon Holly or Soft Leaf Yucca.
The Sidewalk Strip (The “Hellstrip”)
The area between the sidewalk and the street is brutal. It gets reflected heat from the concrete and asphalt.
The Driveway Border
People often step off the driveway into the beds. Avoid delicate plants or stiff, thorny agaves right on the edge.
* My Pick: Creeping Rosemary. It is tough, smells great when brushed against, and creates a softening cascade over the concrete edge.
Regional Adjustments
- North Texas (Clay/Freeze): Focus on cold-hardy natives like Coralberry and Possumhaw Holly. You must amend clay soil with expanded shale to improve drainage.
- Central/Hill Country (Limestone/Deer): Deer resistance is the priority. Use Damianita, Agarita, and most Salvias. If you don’t fence it, the deer will eat it.
- Gulf Coast (Humidity): Fungal issues are prevalent. Ensure wider spacing for airflow. Tropicals like Ginger and Hibiscus thrive here but may freeze in harsh winters.
Finish & Styling Checklist
Once the plants are in, the styling details elevate the look from “planted” to “designed.”
1. Lighting
Do not rely solely on the porch light. Use uplights on your specimen trees (like the focal point Oak or Crepe Myrtle) to create drama at night. Path lights should be used sparingly—pools of light are better than a runway effect.
2. Pottery
Use large pots near the front door. Small pots look cluttered. I recommend a minimum pot height of 24 inches. Fill them with seasonal color that you can change out easily. Ensure the pot color contrasts with your brick or siding.
3. House Numbers
Update your house numbers. Modern metal numbers or a limestone address block can modernize a home instantly. Ensure they are lit or placed where the porch light hits them.
4. The Mailbox
If you have a curbside mailbox, give it a small garden bed at the base. A circle of crushed granite and three Lantana plants can turn a utility post into a feature.
FAQs
How often should I water my new native plants?
Even drought-tolerant plants need regular water to establish. For the first 3 weeks, water every 2-3 days. For the next 3 months, water once a week deeply. After the first year, most native plants only need water during severe drought or every 2-3 weeks in summer.
What is the best time of year to landscape in Texas?
Fall (October through November) is the absolute best time. The soil is still warm enough for root growth, but the air is cool, and rain is more frequent. Spring (March-April) is second best. Avoid planting in July and August at all costs.
Do I need weed fabric under my mulch?
I generally advise against weed fabric in flower beds. It eventually clogs, prevents water from reaching the soil, and weeds will just grow on top of it in the decomposing mulch. A thick layer of mulch (3 inches) is a better natural weed barrier.
My HOA requires a percentage of turf grass. What do I do?
Check the bylaws carefully. Many HOAs are updating rules to allow “Florida-friendly” or “Xeriscape” designs. If you must have grass, keep it in the center as a geometric “rug” and expand your flower beds around the perimeter to minimize the turf area.
Conclusion
Creating a beautiful Texas front yard is about working with the environment rather than fighting it. By choosing the right native plants, respecting proper spacing, and investing in quality hardscaping, you create a space that offers year-round beauty and withstands the harsh climate.
Remember that a garden is a living thing. It sleeps in the winter, explodes in the spring, and rests in the summer heat. Patience is your best tool. Start with good soil, plant the right things in the right places, and you will be rewarded with a landscape that welcomes you home every day.
Picture Gallery


