
Toilet Tank Tray Ideas for Stylish Bathroom Decor
The bathroom is often the smallest room in the house, yet it carries the heaviest functional burden. As a designer, I see many homeowners overlook the most obvious horizontal surface available for styling: the top of the toilet tank. It is prime real estate that, when left bare, feels industrial and unfinished, but when styled poorly, looks like cluttered afterthoughts.
To help you visualize how these elements come together in a professional setting, I have curated a complete visual guide for you to browse in the Picture Gallery located at the very end of this post. By focusing on scale, material, and purpose, you can transform this utility-heavy area into a curated moment of Zen. We will explore how to select the right tray, what to place inside it, and how to maintain that “just designed” look even in a high-moisture environment.
At-a-Glance: Key Takeaways
- Scale is everything: Aim for a tray that covers roughly 60% to 75% of the tank lid’s width to avoid looking cramped or dwarfed.
- Material matters: Choose non-porous materials like marble, treated teak, or acrylic to withstand the constant humidity of a bathroom.
- The Rule of Three: Group items in odd numbers to create visual interest and prevent the tray from looking like a storage bin.
- Function meets form: Use the tray to hold items you actually use, like extra hand towels or a high-end candle, to justify its presence.
- Safety first: Ensure the tray has a non-slip base or silicone bumpers to prevent it from sliding off the porcelain surface.
What This Style Means (and Who It’s For)
The toilet tank tray isn’t just a “Pinterest trend”; it is a functional solution to the lack of counter space in modern urban dwellings and older homes alike. In interior design, we refer to this as “elevated utility.” It is the art of taking a necessary, often unattractive fixture and giving it a sense of intentionality.
This approach is perfect for renters who cannot swap out their vanities or tiles but want to inject personality into their space. It is also a godsend for busy families who need a designated spot for essentials that usually end up scattered across the sink. If you appreciate a “spa-like” atmosphere, the tank tray acts as the bridge between the sterile porcelain of the toilet and the soft, luxurious textures of your towels and rugs.
For those living in small apartments, every inch counts. By utilizing the tank, you free up the vanity for daily grooming rituals. It creates a secondary zone of interest that draws the eye upward and away from the floor, making the entire room feel more spacious and well-considered.
The Signature Look: Ingredients That Make It Work
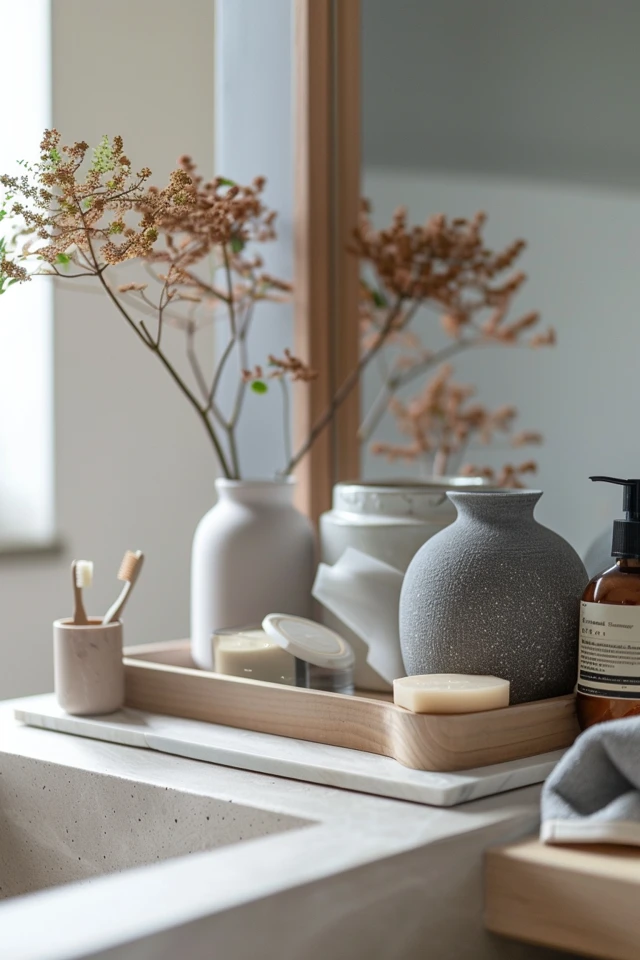
To achieve a professional-grade look, you need a balance of textures and heights. A flat tray with flat objects looks like a cafeteria tray. You want to build a “landscape” within those few square inches. Start with your base—the tray itself—and consider how its finish interacts with your existing hardware.
Material Selection:
If you have matte black faucets, a white marble tray with grey veining creates a high-contrast, modern feel. If your bathroom has warm wood tones, a teak or acacia wood tray adds an organic, grounding element. Acrylic trays are the “invisible” heroes; they provide organization without adding visual weight, which is ideal for very dark or very cramped bathrooms.
The “Hero” Item:
Every tray needs a focal point. This is usually a small potted plant (like a snake plant or a small fern) or a tall, sculptural candle. The greenery adds life to a room that can often feel cold and clinical. If you have a black-thumb, a high-quality “real-touch” faux succulent works perfectly here, as it won’t be affected by the lack of natural light often found in bathrooms.
The Functional Layer:
Include something that serves the user. This could be a small ceramic bowl holding artisanal soaps, a glass canister of cotton swabs, or a neatly folded linen hand towel. These items signal to guests that the tray isn’t just for show—it is a thoughtful inclusion for their comfort.
Layout & Proportions (Designer Rules of Thumb)
One of the most common mistakes I see is a tray that is either a “postage stamp” (too small) or an “overhang” (too large). To get this right, you need to pull out your measuring tape. Most standard toilet tanks are between 18 and 22 inches wide and about 7 to 9 inches deep.
- The 2-Inch Rule: Ideally, you should have at least 1.5 to 2 inches of exposed porcelain on either side of the tray. This provides a “frame” for the tray and ensures it doesn’t interfere with the flush lever.
- Verticality: Your tallest item on the tray should not exceed the height of your bathroom mirror’s bottom edge if the toilet is directly below it. Usually, a maximum height of 6 to 8 inches for objects is the sweet spot.
- Weight Distribution: Place heavier-looking items (like a stone candle) on one side and a grouping of lighter items (like a glass jar and a small bud vase) on the other. This creates a “balanced asymmetry” that is more pleasing to the eye than perfect symmetry.
Designer’s Note: Always check the “dome” of your toilet lid. Many modern, high-efficiency toilets have a slightly curved lid. A flat-bottomed tray will wobble every time someone walks by or closes the door. I always keep a pack of clear, adhesive silicone bumpers in my kit. Placing one in each corner of the tray base levels it out and prevents the tray from scratching the porcelain lid over time.
Step-by-Step: How to Recreate This Look
- Clear and Clean: Remove everything from the top of the tank. Give the porcelain a deep clean and dry it thoroughly. This is the only time you’ll have a blank canvas, so make sure it’s pristine.
- Measure Twice: Measure the flat area of the lid. Ignore the beveled edges. If your lid is 18 inches wide, look for a tray that is 12 to 14 inches wide.
- Select Your Base: Choose a tray material that contrasts with your tank. If the tank is white, avoid a plain white plastic tray; it will look cheap. Go for stone, wood, or a colored resin.
- Add the Greenery: Place your plant in the back corner (left or right, depending on which side the flush lever is on). This adds height and freshness.
- Layer the Essentials: Place a small stack of 2-3 guest towels or a decorative box of tissues next to the plant.
- Include a Scent: Add a candle or a reed diffuser. This is functional for bathroom etiquette and adds a sensory layer to the design.
- Edit: Step back to the doorway. Does it look cluttered? If so, remove one item. The goal is “curated,” not “crowded.”
Budget Breakdown: Low / Mid / Splurge
Low Budget ($15 – $30):
You don’t need a designer price tag to get a designer look. Look for bamboo kitchen organizers or desktop stationery trays. A simple bamboo tray paired with a $5 IKEA succulent and a jar of cotton balls from the dollar store can look remarkably sophisticated. Focus on keeping the color palette monochromatic (all whites or all earth tones) to make the cheaper materials look more expensive.
Mid-Range ($50 – $120):
This is where you can find high-quality resin trays that mimic marble or high-gloss lacquer trays. Brands like West Elm or CB2 offer stylish options in this range. At this level, invest in a “prestige” candle with a beautiful label. The candle itself becomes a piece of art. Pair it with a small ceramic dish from a local potter to add a “found” feel to the arrangement.
Splurge ($200+):
If you want the ultimate luxury feel, go for solid Carrara marble or hand-turned teak. These materials have a weight and presence that cannot be faked. Combine this with a designer room spray and perhaps a small, framed piece of vintage art (ensure it is behind glass to protect it from steam). A splurge-level tray is often an heirloom piece that you will take with you to every home you move into.
Common Mistakes (and How to Fix Them)
Mistake 1: Blocking the Flush Lever.
I have seen beautiful trays that make it impossible to actually flush the toilet without knocking over a vase.
The Fix: Always leave at least 3 inches of clearance around the flush handle. If you have a top-flush button, choose a tray with a “cutout” or a very slim profile that sits toward the back of the tank.
Mistake 2: Using the Wrong Wood.
Pine or untreated oak will warp, mold, and rot within months due to shower steam.
The Fix: Only use tropical hardwoods like teak, acacia, or bamboo. These woods have a high natural oil content that repels water. Alternatively, ensure any wood tray is sealed with a waterproof polyurethane finish.
Mistake 3: The “Store-Bought” Look.
Placing a plastic bottle of hand sanitizer and a commercial box of tissues on a tray doesn’t make it “decor.”
The Fix: Decant your items. Put the sanitizer in a glass pump and the tissues in a decorative cover. It is the lack of commercial branding that creates the high-end, “hotel” feel.
Room-by-Room Variations
The Powder Room:
Since this is the bathroom guests use most, focus on hospitality. Your tray should feature a fresh hand towel, a high-end candle, and perhaps a small dish of mints or individual toothpicks. Because there is usually no shower in a powder room, you have more freedom with materials like delicate metals or even mirrored trays.
The Primary (Master) Bath:
This is your private sanctuary. Focus on self-care items. Use the tray to hold your evening skincare routine items, a jar of luxury bath salts, and a waterproof e-reader or book. The vibe here should be “spa,” so lean into natural textures like stone and wood.
The Kids’ or Guest Bath:
Durability is key. Avoid glass or heavy stone that could break if knocked over. A high-quality silicone or melamine tray in a bright color can be very effective. Use it to hold a timer for toothbrushing or a fun, animal-shaped soap dispenser to encourage hygiene in a playful way.
Finish & Styling Checklist
- Does the tray material complement the faucet finish?
- Are there at least three different heights represented (tall plant, medium candle, flat dish)?
- Is there a mix of textures (shiny glass, matte stone, soft fabric)?
- Is the tray stable and non-slip?
- Can the toilet be flushed easily without moving the tray?
- Is there “negative space” (empty area) within the tray so it doesn’t look cluttered?
- Have you removed all commercial labels and branding?
What I’d Do in a Real Project: Mini Checklist
When I am styling a home for a reveal, the toilet tank is often my final touch. Here is my personal “pro-designer” workflow:
- The “Scent” Test: I choose a scent that matches the season. Citrus for summer, eucalyptus for year-round freshness, or amber for winter.
- The “Reflection” Check: I look at the tray through the bathroom mirror. Sometimes what looks good from the front looks messy in the reflection. I adjust the items to ensure the 360-degree view is clean.
- The “Humidity” Guard: I always apply a thin coat of carnauba wax to metal trays to prevent rust spots from forming in the humid environment.
- The “Touch” Point: I make sure the most-used item (like the hand towel) is the easiest to reach and isn’t “trapped” behind a fragile vase.
FAQs
How do I clean a toilet tank tray?
Because it sits in a high-germ area, you should wipe the bottom of the tray weekly with a disinfectant. For the tray surface itself, use a damp microfiber cloth. Avoid harsh chemicals on marble or wood; a simple drop of dish soap in warm water is usually enough.
Can I use a tray if my toilet lid is curved?
Yes. As mentioned earlier, use adhesive silicone bumpers or “museum putty” (QuakeHold) to level the tray and keep it secure. This is a common issue with Kohler and TOTO toilets, which often have sleek, aerodynamic lid shapes.
What if I have a top-flush toilet?
Look for a tray that is narrow enough to sit behind the buttons, or use two smaller “mini-trays” on either side of the button. Alternatively, use an “offset” layout where a small tray sits on the side of the lid that doesn’t have the internal mechanism directly beneath it.
Should the tray match the vanity countertop?
It doesn’t have to, but it should “talk” to it. If your vanity is white quartz, a white marble tray on the tank creates a cohesive visual thread. If you want a more eclectic look, use the tray to introduce a new material, like copper or woven rattan, to break up the monotony.
Conclusion
Styling a toilet tank tray is a small gesture that yields significant results. It bridges the gap between a room that is purely functional and a room that is truly designed. By following the rules of scale, choosing moisture-appropriate materials, and layering your items with intention, you can elevate your bathroom from a utility space to a curated retreat.
Remember that the best designs are those that serve your daily life. If a tray feels like it’s in the way, it’s the wrong size or in the wrong spot. Take the time to measure, choose a material that brings you joy, and don’t be afraid to swap items out as the seasons change. A small plant and a fresh candle can go a long way in making your morning routine feel just a little more luxurious.
Picture Gallery


