
Top Loading Washer Laundry Room Makeovers
Introduction
Designing a laundry room around a top-loading washer presents a unique set of challenges that front-loader owners simply do not face. You cannot run a sleek, continuous countertop across the machines, which instantly removes the most convenient spot for folding clothes and organizing detergent. However, top loaders are often more reliable, less prone to mold, and easier on your back during loading, making them a fixture in many homes despite the design hurdles.
I have worked with countless clients who initially felt frustrated by their top-load configuration, believing it destined their laundry space to look cluttered or unfinished. For those seeking visual inspiration immediately, please note that a comprehensive Picture Gallery is located at the very end of this blog post. With the right layout adjustments and vertical thinking, we can transform these utility spaces into rooms that are just as beautiful as they are functional.
The key to a successful makeover lies in managing the “dead space” above the machine and reclaiming functionality elsewhere. In this guide, I will walk you through the exact measurements, shelf placements, and layout tricks I use to make a top-loading laundry room feel custom and high-end.
1. The Geometry of the Lid: Layout and Clearances
The first step in any top-loader makeover is respecting the vertical clearance required for the lid. If you ignore this measurement, you will end up with shelving you cannot reach or cabinetry that blocks the machine from opening fully.
Start by measuring the height of your washer with the lid completely open. Add exactly two inches to this measurement; this is the absolute minimum bottom height for any shelf or cabinet installed directly above the unit.
If you install storage lower than this, you risk scratching the finish of your machine or cracking the shelf every time you run a load. In tight spaces, I often see homeowners install standard 12-inch deep cabinets too low, forcing them to lean awkwardly over the open lid to reach the detergent.
Ideally, you want to offset your upper storage. If you have the depth, set your cabinets or shelves back 15 to 18 inches from the wall, but ensure they are mounted high enough—usually starting at 54 to 60 inches off the floor depending on the machine size.
Designer’s Note: The “Sock Gap”
One of the most annoying aspects of top loaders is the gap between the machine and the wall where socks go to die. Because you cannot have a counter covering this gap, things fall behind constantly.
The Fix: I install a simple ledger board or a “floating shelf” strip directly behind the machines, positioned exactly at the height of the control panel. It stops items from falling but is easily removable if a plumber needs access.
2. Solving the Folding Station Dilemma
The biggest loss with a top loader is the lack of a folding surface directly on top of the machine. To fix this, we have to get creative with the adjacent space.
If you have side-by-side machines, the best approach is often a “waterfall” counter to the side of the washer or between the washer and dryer if space permits. However, most plumbing restricts spreading the machines apart.
My preferred solution for small rooms is a hinged countertop. This is a custom piece of butcher block or laminate mounted to the wall with heavy-duty drop-leaf brackets. When the washer is not in use, you lower the counter over the machine to create a flat surface.
When it is time to do laundry, you lift it up and lock it against the wall. It requires sturdy wall anchors, as a solid wood top is heavy, but it effectively doubles your workspace.
For larger rooms, the solution is an island or a rolling cart. A small kitchen island on casters (sized roughly 24 by 36 inches) can be moved into the center of the room for folding and tucked away when not in use.
3. Vertical Storage and Shelving Logic
Since we cannot build horizontally across the machines, we must build vertically. Open shelving is usually the best friend of a top-loading laundry room because it feels lighter than heavy cabinetry.
I recommend using wood shelves that are at least 10 to 12 inches deep. Anything shallower won’t hold the large detergent dispensers or fabric softener bottles that most families buy.
In terms of spacing, I follow the “rule of thirds” for laundry walls. The bottom third is the machines. The middle third is your active workspace (or negative space for lid clearance). The top third is storage.
Avoid using brackets that interfere with the lid swing. I prefer floating shelf hardware that is hidden inside the wood shelf itself. This keeps the wall visual clean and prevents you from banging your knuckles on metal brackets when reaching for items.
What I’d do in a real project:
- Step 1: Install a deep floating shelf (12 inches) at 60 inches above the finished floor.
- Step 2: Place frequently used items here in clear glass jars or uniform bins to reduce visual noise.
- Step 3: Install a second shelf 14 inches above the first one for bulk supplies and seasonal linens.
- Step 4: Add a drying rod under the highest shelf or between two upper cabinets for hanging delicates.
4. Managing Plumbing and Visual Chaos
Top-loading washers often leave the water supply lines and drain hoses highly visible. In a front-load setup, the countertop hides these. In your setup, they are staring you in the face.
The most effective way to hide these is a “plumbing box.” This is a small, removable carpentry structure built from MDF or trim that covers the taps and drain.
You paint it the same color as the wall so it disappears visually. Alternatively, you can build a small shelf ledge specifically designed to sit just above the taps, placing a shallow basket or artwork in front to conceal the connections.
If you are renting and cannot build a box, use high-contrast styling. Place a tall, structured laundry hamper or a potted plant in the gap between the machines.
Common Mistakes + Fixes
Mistake: Letting cables dangle behind the machine where they collect dust and look messy.
Fix: Use adhesive cable clips attached to the back of the machine (not the wall) to bundle cords. Keep them tight to the unit so the wall remains clear.
5. Lighting the Workspace
Lighting is often an afterthought, but in a laundry room, it is critical for spotting stains. A single overhead boob light is rarely sufficient.
Because you likely have shelves instead of upper cabinets, under-cabinet lighting might not be an option. Instead, look for wall sconces.
I love placing an articulated sconce (an arm that swings out) between the washer and dryer if the wall width allows. This lets you direct light exactly into the washer tub when you are digging for that last sock.
Aim for a color temperature of 3000K to 4000K. This is a bright, neutral white that mimics daylight. Anything warmer (2700K) will make yellow sweat stains invisible until it is too late.
If hardwiring sconces isn’t in the budget, rechargeable magnetic puck lights mounted to the underside of your lowest shelf are a fantastic, renter-friendly alternative.
6. Material Selection and Durability
Laundry rooms are wet zones. The materials you choose need to withstand humidity, vibration, and chemical spills.
For the walls behind the washer, I highly recommend semi-gloss or satin paint. Matte paint absorbs moisture and is impossible to wipe down if detergent splashes on it.
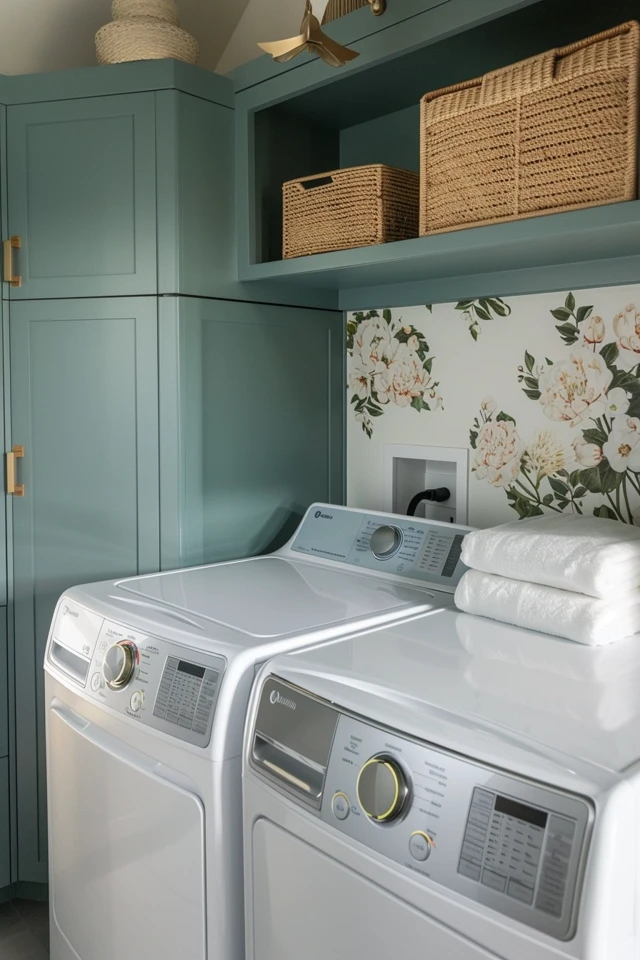
If you want to add wallpaper, ensure it is vinyl-based or specifically rated for bathrooms. The humidity from a top-loader (especially when running hot cycles) rises directly up the wall, which can cause standard paper wallpaper to peel at the seams.
For flooring, luxury vinyl tile (LVT) or porcelain tile are the gold standards. Avoid laminate flooring that is not rated waterproof, as a minor leak from a washer hose can cause the planks to swell and buckle permanently.
If you are using a rug to soften the space, choose a polypropylene indoor/outdoor runner. These are virtually indestructible, can be bleached, and won’t hold onto mold if they get damp.
Final Checklist
Before you start purchasing materials or tearing out old shelves, run through this designer checklist to ensure your plan works for a top-loading configuration.
- Clearance Check: Did you measure the washer lid height fully open and add 2 inches?
- Valve Access: Can you reach the water shut-off valve without moving the heavy machine?
- Shelf Depth: Are your shelves deep enough (12 inches minimum) for your detergent bottles?
- Vibration Gap: Is there at least 1 inch of space between the washer and dryer to prevent banging during the spin cycle?
- Door Swing: Does the laundry room door swing into the machine? If so, consider switching to a barn door or pocket door.
- Folding Plan: Have you designated a specific surface for folding, or are you relying on a different room?
FAQs
Can I put a dryer on top of a top-loading washer?
No. You cannot stack anything on top of a top-loading washer because you need access to the lid. Stacking is exclusively for front-loading sets.
How do I hide the gap between the washer and dryer?
A “gap filler” or laundry guard is a plastic or silicone strip designed to bridge this gap. For a more custom look, I often have a custom piece of wood trim painted to match the cabinetry inserted between the units, provided it doesn’t transfer vibration.
What is the best height for a drying rack above a top loader?
Ensure the bottom of the hanging clothes won’t dangle into the open washer. Usually, mounting a drying rack at 72 to 78 inches off the floor allows enough clearance for shirts to hang freely without touching the machine lid.
Is it okay to use peel-and-stick tile behind the washer?
Yes, but surface preparation is vital. You must degrease the wall thoroughly before applying. The heat and humidity from the washer can weaken the adhesive if the wall isn’t perfectly clean and primed.
Conclusion
Renovating a laundry room with a top-loading washer requires a shift in perspective. You have to let go of the “continuous counter” dream and embrace the benefits of vertical zoning and creative storage. By respecting the lid clearance and focusing on wall-mounted solutions, you can create a space that feels intentional rather than compromised.
Remember that the goal is to make the chore of laundry slightly more enjoyable. Whether that means a beautiful articulated light, a smart folding table, or just a really organized shelf for your stain removers, these small details make a massive difference in daily use. Don’t fight the machine’s design; work with it, and the results will follow.
Picture Gallery


