
Transform Your Space: Unfinished Basement Gym Ideas
Introduction
Walking down the stairs into an unfinished basement can feel a bit like descending into a dungeon. You see exposed insulation, concrete floors that are cold to the touch, and perhaps a maze of hvac ducting overhead. However, as an interior designer, I see this raw square footage as the ultimate blank canvas for a home gym.
The beauty of an unfinished basement is that it is inherently durable and separated from the main living areas, making it perfect for dropping heavy weights or blasting loud music. You do not need to spend a fortune on drywall and finished carpentry to create a high-performance training space. With the right layout, lighting, and flooring choices, you can embrace the industrial aesthetic while saving your budget for the equipment that actually matters.
If you are looking for visual inspiration, check out our curated Picture Gallery at the end of the blog post for ideas. By focusing on functional upgrades rather than cosmetic perfection, you can transform that cold storage area into a fitness sanctuary that rivals any commercial gym. Let’s dive into the practical steps to make this happen.
1. Assessing the Environment: Moisture, Air, and Safety
Before you buy a single dumbbell, you must address the physical environment of an unfinished basement. The biggest enemy of a basement gym is moisture. If your space smells musty or feels damp, your equipment will rust, and spending time there will be unpleasant.
Start with a simple moisture test. Tape a 2-foot square of plastic sheeting to the concrete floor and leave it for 48 hours. If the concrete is dark or there are water droplets under the plastic when you peel it up, you have moisture moving through the slab.
In this scenario, you cannot simply lay down rubber mats, or you will trap mold underneath. You may need to apply a concrete sealer first or use a dimpled underlayment that allows air to circulate beneath your gym flooring.
Airflow is the second critical factor. Basements often lack return air vents. I always recommend installing a dedicated dehumidifier rated for the square footage of the space. Look for a unit with a continuous drain hose option so you are not emptying a bucket every day.
Additionally, install a wall-mounted industrial fan or a high-velocity floor fan. Good circulation prevents that stagnant “basement smell” from settling into your gym clothes and mats.
Finally, check your clearances. Unfinished basements are notorious for low hanging pipes and ductwork. Measure the lowest point of the ceiling before ordering a power rack or treadmill. You typically need at least 7 feet of clearance for a standard rack, and closer to 8 or 9 feet if you plan on doing overhead presses or box jumps.
2. Flooring Solutions for Concrete Slabs
The most impactful change you can make in an unfinished gym is the flooring. Concrete is brutal on joints and will ruin your equipment if dropped. However, you do not need to floor the entire basement; you only need to floor your “work zones.”
For a professional-grade feel, I almost exclusively recommend 3/4-inch rubber horse stall mats. You can find these at farm supply stores. They are significantly cheaper than branded “gym flooring” and are virtually indestructible. They usually come in 4×6 foot sheets.
If you are renting or on a strict budget, these mats are heavy enough that they do not require adhesive. You can simply butt them together tightly. For a cleaner look, use black duct tape on the underside of the seams to keep them from shifting over time.
Avoid the cheap, puzzle-piece foam tiles often sold at department stores. They are too soft for heavy lifting, meaning you will lose stability during squats, and they tend to peel up or tear under the friction of burpees or lateral movements.
If you prefer a warmer aesthetic or plan to use the space mostly for yoga and pilates, consider commercial-grade low-pile carpet tiles. They are easy to install directly over concrete and offer some thermal insulation. However, they are harder to clean if you are sweating heavily.
Designer’s Note: The “Off-Gassing” Period
One thing rarely mentioned in product descriptions is the smell of new rubber flooring. Real rubber mats have a strong chemical odor when first unrolled. I learned this the hard way on a project where we installed flooring the day before the client wanted to use it. The smell was overpowering.
The Fix: scrub the mats with a mild soap and water solution and let them sit outside in the sun for a day or two before bringing them indoors. This accelerates the off-gassing process significantly.
3. Lighting: Creating Energy in a Dark Space
Unfinished basements are notorious for having a single, sad lightbulb pulling a chain in the center of the room. This creates harsh shadows and a low-energy atmosphere that makes you want to quit your workout early. Lighting is the single most important design element in a raw space.
Because you have exposed joists, you have the perfect opportunity to easily mount LED shop lights. I recommend linkable LED fixtures that are at least 4 feet long. You can plug them into existing outlets and chain them together, avoiding the need for expensive electrical work.
Pay close attention to “Color Temperature.” For a gym, you want to mimic daylight to keep your energy levels high. Look for bulbs or fixtures rated between 4000K and 5000K (Kelvin). Anything lower (2700K-3000K) is too yellow and relaxing, while anything higher (6000K+) can feel sterile and harsh like a hospital.
Aim for general lighting that eliminates shadows in your lifting zones. A good rule of thumb is to place lights slightly in front of where you will be standing, rather than directly overhead, to avoid casting shadows on your face or body when looking in a mirror.
If you want to lean into the industrial vibe, consider adding RGB LED strips along the top of a concrete wall or behind your equipment rack. This allows you to change the room to red or blue for high-intensity cardio sessions, which adds a surprisingly high-end commercial gym feel for very little money.
4. Layout and Zoning: Making Sense of the Chaos
In an open, unfinished basement, clutter is the enemy. Without defined walls, equipment tends to migrate, and the space becomes a storage unit again. You need to create distinct “zones” for your activities.
Start by placing your largest equipment first. If you have a power rack, it usually works best against a wall or between two structural posts. Ensure you have at least 24 to 36 inches of clearance on either side of the bar so you can load weights comfortably without hitting a wall or a water heater.
Create a dedicated “Cardio Zone.” Treadmills and ellipticals often require dedicated electrical circuits, so your layout might be dictated by outlet location. Always leave at least 4 feet of clearance behind a treadmill for safety. If you fall, you do not want to be thrown into a concrete wall.
Create a “Floor Work Zone.” This is where you lay your mats for stretching, abs, or yoga. Try to position this away from the draftiest part of the basement. A 6×8 foot open space is usually sufficient for one person to move freely.
What I’d do in a real project (Mini Checklist):
1. Paint the ceiling: If the budget allows, I would spray paint the entire exposed ceiling (pipes, wires, wood) a matte black or charcoal. This makes the visual clutter disappear and makes the ceiling feel higher.
2. Add oversized mirrors: I would mount frameless bathroom mirrors (often found cheap at hardware stores) using mastic adhesive or J-channels. This reflects light and allows you to check your form.
3. Define the perimeter: I would use floor marking tape to visually section off the gym area from the storage boxes and holiday decorations.
5. Storage and Wall Utilization
Concrete walls can be intimidating to drill into, but vertical storage is essential to keep your floor clear. If you are comfortable using a masonry drill bit and tapcon screws, you can mount heavy-duty stringers or lumber directly to the concrete.
Once you have wood mounted to the concrete, you can easily screw in hooks for resistance bands, jump ropes, and weight belts. This is much easier than drilling a new hole in concrete for every single hook.
If drilling into concrete isn’t an option, utilize the exposed wooden studs of the partition walls or the vertical wooden support posts. These are gold mines for storage. Install heavy-duty utility hooks to hang barbells vertically or to store weight plates.
For lighter items, I love using metal pegboards. They fit the industrial aesthetic perfectly. You can organize all your small accessories, timers, and bands in one visual spot.
Another excellent option for unfinished spaces is heavy-duty metal shelving units (the wire rack kind). They are ventilated, hold a tremendous amount of weight, and you can adjust the shelf heights to fit kettlebells, medicine balls, and foam rollers.
Common Mistakes + Fixes
Mistake: Ignoring Temperature Control
Working out in a freezing basement in January or a humid one in July is miserable and leads to skipped workouts.
The Fix: If you don’t have HVAC vents, invest in a quality space heater for winter and a powerful floor fan for summer. Smart plugs can allow you to turn the heater on 15 minutes before you go downstairs.
Mistake: Poor Mirror Placement
People often buy small door-mirrors and lean them against the wall. This distorts your reflection and creates a safety hazard.
The Fix: Buy larger frameless mirrors and mount them securely. If you can’t mount to the wall, build a simple wooden frame on legs that can stand independently and securely.
Mistake: Overcrowding the Space
Trying to fit a treadmill, rower, bike, and full rack into a 10×10 space.
The Fix: Prioritize movement over machines. If you can’t do a lunge without hitting something, you have too much gear. Sell the unused elliptical and reclaim your floor space.
Final Checklist: Your Unfinished Basement Gym Build
Use this checklist to ensure you haven’t missed any critical steps in your build-out.
Prep Phase:
- specific moisture test performed on concrete slab.
- Ceiling height measured at lowest points (ducts/pipes).
- Electrical outlets identified and tested.
- Dehumidifier installed and running.
Flooring & Lighting:
- Rubber mats purchased (allow 10% extra for waste).
- Mats scrubbed and off-gassed outdoors.
- LED shop lights (4000K-5000K) purchased.
- Lighting layout planned to avoid shadows.
Setup & Install:
- Concrete walls sealed or painted (optional but recommended).
- Equipment layout taped off on the floor.
- Mirrors mounted securely.
- Storage racks assembled and anchored.
FAQs
Can I paint the concrete walls to make it look finished?
Yes, absolutely. Use a masonry waterproofing paint. White is the best choice for walls because it reflects light and makes the basement feel brighter and larger. Just be sure to scrub the walls with a wire brush to remove any loose debris before painting.
Is it safe to drill into the floor for a squat rack?
Generally, yes, but you must be careful. Most basement slabs are 3 to 4 inches thick. You need to ensure you do not drill into post-tension cables or hydronic heating pipes if your home has them. If you are unsure, look for a “flat foot” rack that is stable enough not to require bolting down, or build a wooden lifting platform to bolt the rack into.
How do I reduce noise traveling upstairs?
Unfinished basements lack the soundproofing of drywall and insulation. To minimize noise transfer, buy “silencer pads” or drop pads for your weights. Avoid mounting speakers directly to the ceiling joists, as the bass will vibrate the floor above. Use a Bluetooth speaker on a shelf instead.
Conclusion
Transforming an unfinished basement into a home gym is one of the most rewarding home improvement projects because it offers immediate lifestyle returns. You do not need a contractor or a massive budget to create a space that inspires you to move.
By respecting the constraints of the space—managing moisture, choosing the right flooring, and upgrading the lighting—you turn a dark storage area into a high-performance training facility. The industrial look isn’t a compromise; it’s an aesthetic choice that says this room is built for work.
Start with the basics, keep the layout functional, and add equipment slowly as you grow into the space. Your unfinished basement is waiting to become your favorite room in the house.
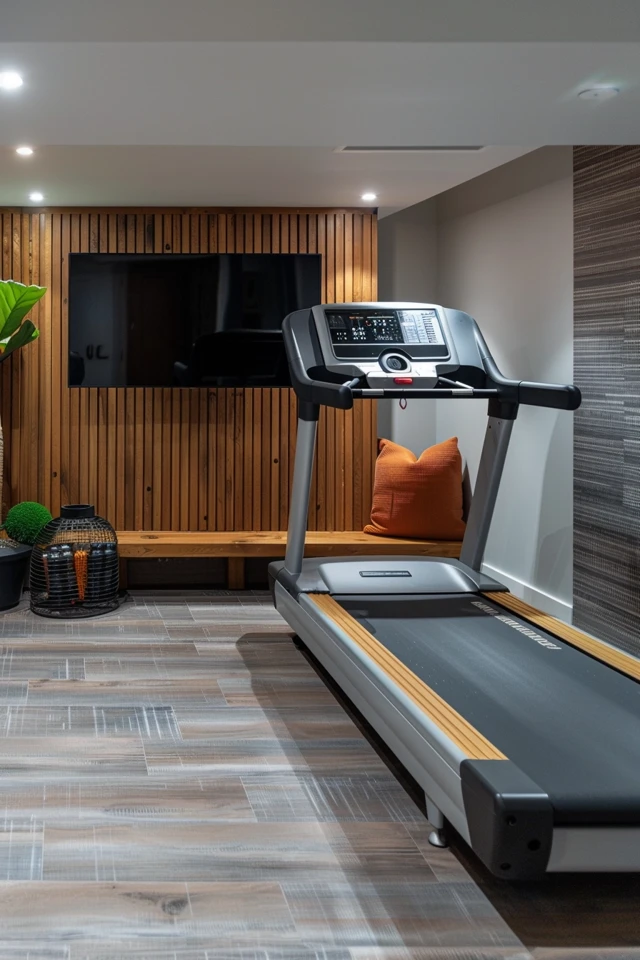
Picture Gallery


