
Transform Your Yard: Dry Creek Bed Landscaping Ideas
Every landscape project presents a unique set of challenges, but few are as common or as frustrating as drainage issues. I often walk into a client’s backyard to find a soggy, unusable mud pit where they had hoped to put a patio or a play area. The instinct is usually to hide the problem with French drains and buried pipes, but I prefer a solution that turns a functional necessity into a stunning focal point.
A dry creek bed mimics the course of a natural stream, guiding water away from your foundation or low spots while adding significant texture and hardscaping structure to the garden. It bridges the gap between interior design principles—like flow, focal points, and scale—and rugged landscape engineering. When done correctly, it looks like it has been there for a century, waiting for the next rainfall to come to life.
Whether you are trying to manage heavy runoff or simply want to break up a flat, boring lawn, this guide will walk you through the design and execution. For those seeking visual inspiration to spark your own creativity, a curated Picture Gallery is included at the end of this blog post.
1. analyzing the topography and function
Before ordering tons of rock, you have to understand the land. A dry creek bed is useless if it does not respect gravity. In professional landscape design, we start with a site survey to determine the “thalweg,” or the line of lowest elevation where water naturally wants to flow.
If you are addressing a drainage issue, observe your yard during a heavy rain. Mark the path the water takes with landscape flags. This natural path should dictate the general route of your creek bed. Fighting nature by trying to force water uphill or at sharp right angles will result in flooding and failure.
If this is purely aesthetic, you have more freedom, but the placement still needs to make sense visually. A creek bed should start from a logical source, like behind a large boulder or a cluster of shrubs, and end at a logical destination, such as a rain garden or a drainage outlet. A creek that starts in the middle of a lawn and ends abruptly at a fence looks artificial and jarring.
Designer’s Note: The 2% Rule
To ensure water actually moves and doesn’t just pool and breed mosquitoes, you need a minimum slope of 2%. This means for every 100 feet of length, the elevation should drop at least 2 feet. If your yard is dead flat, we have to artificially create this slope by excavating deeper at the end of the run than at the beginning.
2. The Art of the Layout: Curves and Scale
The biggest mistake DIYers make is digging a trench that looks like a straight canal. Natural streams meander. They widen at bends and narrow in straights. When I sketch a layout for a client, I use the “S” curve principle. The curves should be lazy and organic, not tight zig-zags.
Scale is equally critical. A narrow, 12-inch channel in a large backyard looks like a drainage ditch, not a feature. For a standard suburban yard, I recommend a width varying between 3 feet and 5 feet. This provides enough visual weight to stand up against fences, trees, and furniture.
Common Mistakes + Fixes:
- The Mistake: The “snake” effect, where the width remains exactly 24 inches the entire length.
- The Fix: Vary the width. If the straight section is 3 feet wide, flare the curve out to 5 feet. This mimics how rushing water naturally erodes banks on the outside of a turn.
Pro-Level Spacing
When laying out the shape with spray paint, step back and look at the view from your primary interior windows. The creek bed should draw the eye through the landscape. If you have a patio, ensure the creek bed is at least 4 to 6 feet away from the hardscape edge to allow for planting buffers. You never want the rock to butt directly against a paver patio unless you are creating a specific “bridge” moment.
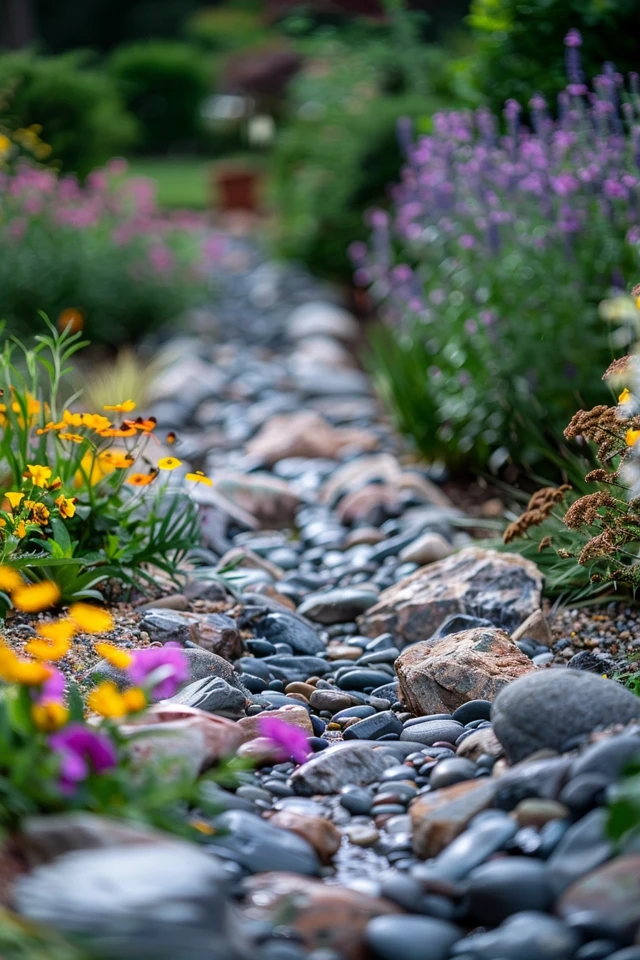
3. Material Selection: Creating Natural texture
In interior design, we talk about layering textures to create depth. The same applies here. A dry creek bed requires three distinct sizes of stone to look authentic. If you only use one size of gravel, it will look like a gravel driveway, not a stream.
1. The Base Layer (River Jacks or Gravel):
This is your bottom layer. I usually specify 1-inch to 3-inch rounded river rocks. These cover the liner and simulate the bed where constant water flow would have worn the stones smooth. Avoid crushed angular gravel (like driveways use) because it locks together and looks man-made. You want round, tumbled stones.
2. The Banks (Head-Size Stones):
Along the edges and scattered through the middle, you need 4-inch to 10-inch stones. These act as the “banks” of your creek. They hold the soil back and define the shape. In a real stream, these heavier rocks get pushed to the sides during floods.
3. The Anchors (Boulders):
You need genuine boulders, sized 18 inches to 36 inches across. These are your focal points. They interrupt the flow and create visual eddies. I typically place boulders in groups of three (one large, two small) at the bends of the creek. This directs the eye and makes the turn look intentional.
Color Coordination
Selecting the wrong color rock is a design disaster. Avoid white marble chips or red lava rock; they look unnatural in 99% of environments. Look for granite, sandstone, or local river rock blends that contain greys, tans, and browns. Take a wet sample of the rock home before buying. It needs to look good when it rains, as that is when the colors will deepen and pop.
4. Excavation and Structure
This is the labor-intensive part. You cannot simply dump rocks on top of the grass. The creek bed must be recessed into the ground to function and look real. I specify an excavation depth of 12 to 15 inches for the center channel, sloping gently up to the banks.
Once the soil is removed, you must install a high-quality, non-woven geotextile fabric. Do not use cheap plastic weed barrier; it tears easily and prevents drainage. Use a heavy-duty filter fabric (usually 4oz or higher). This keeps your expensive rocks from sinking into the mud over time and stops weeds from taking over.
The Berming Technique:
Do not haul away all the dirt you dig out. Use it to build up “berms” or small mounds along the edges of the creek. This elevates the planting areas, improving drainage for your plants and adding vertical interest to a flat yard. A 12-inch high berm next to a 12-inch deep creek creates a 24-inch visible change in elevation, which is dramatic and beautiful.
5. Planting: Softening the Hardscape
A pile of rocks is just a pile of rocks until you add plants. The goal is to soften the edges so the creek looks like it cuts through a lush landscape. In design terms, we are balancing “mass” (the rocks) with “void” and “softness” (the foliage).
Inside the Creek:
Generally, avoid planting directly in the center of the flow line if this is an active drainage channel. However, if this is mostly decorative, you can place moisture-loving ground cover like creeping Jenny or moss between the large boulders to simulate age.
On the Banks:
This is where you do the heavy lifting. You want plants that spill over the rocks. Weeping habits work best here. I love using Ornamental Grasses (like Miscanthus or Fountain Grass) because their movement mimics flowing water. Place them on the outside curves of the creek.
Planting Checklist:
- Structure: Dwarf conifers or Japanese Maples placed near large boulders.
- Texture: Ferns and Hostas (for shade) or Sedums and Lavender (for sun).
- Color: Siberian Iris or Daylilies provide grassy texture with pops of seasonal color.
Real-World Constraint: Leaf Litter
If you build a dry creek bed directly under a large shedding tree (like a Sycamore or Oak), maintenance will be a nightmare. The rocks will trap every falling leaf, eventually turning into compost and burying your rocks. If you must build under trees, invest in a powerful leaf blower and commit to blowing it out weekly in the fall.
6. Adding “Jewelry”: Lighting and Bridges
Just as a room isn’t finished without lighting and accessories, your creek bed needs finishing touches. Landscape lighting brings the feature to life at night. I recommend low-voltage uplights positioned at the base of the larger boulders or small trees along the bank.
Avoid “runway lighting” where path lights are evenly spaced along the edge. Instead, use “moonlighting” if you have nearby trees, or gentle wash lights that highlight the texture of the stone. The contrast between light and shadow emphasizes the depth of the channel.
The Crossing:
If your creek bisects the yard, you need a way to cross it. A flat slab of flagstone or a large, flat-topped boulder placed securely in the center of the creek bed acts as a stepping stone. For wider creeks (over 4 feet), a small wooden bridge or a large slab of natural stone spanning the width is functional and charming. Ensure the bridge is anchored; you don’t want it floating away during a flash flood.
7. What I’d Do in a Real Project: A Mini-Checklist
If I were designing a dry creek bed for a client tomorrow, this is the exact workflow I would follow to ensure success. Use this as your project roadmap.
Phase 1: Preparation
- Identify the source and destination of the water flow.
- Mark the path with white marking paint, varying widths between 3 and 5 feet.
- Call 811 (or your local utility) to check for buried lines before digging.
Phase 2: The Bones
- Excavate the channel 12-18 inches deep in the center.
- Mound the excavated soil on the sides to create berms.
- Line the entire trench with heavy-duty non-woven landscape fabric.
- Pin the fabric down with landscape staples.
Phase 3: The Rock
- Place the largest boulders (2ft+) first. Bury the bottom 1/3 of the boulder so it looks rooted, not floating.
- Place medium stones (6-10 inches) along the banks and around boulders.
- Fill the rest with river rock (1-3 inches), covering the fabric completely.
Phase 4: The Greenery
- Plant ornamental grasses on the upper banks.
- Plant creeping ground covers at the rock edges to blur the line between soil and stone.
- Install drip irrigation for the new plants.
8. Frequently Asked Questions
Will a dry creek bed breed mosquitoes?
No, not if built correctly. Mosquitoes require standing, stagnant water to breed. A dry creek bed is designed to keep water moving or allow it to percolate into the ground quickly. The gaps between the rocks allow water to drain into the soil below, preventing puddles.
How much does it cost to build?
Materials are the biggest variance. River rock can cost between $100 and $200 per ton depending on your location. A DIY project for a 30-foot creek might cost $500–$800 in materials. Hiring a professional usually starts at $2,500–$4,000 due to the labor intensity of excavation and hauling heavy stone.
Do I need a permit?
Usually, no, as long as you aren’t altering city drainage easements or directing water into a neighbor’s yard. However, if you are connecting your creek bed to a municipal storm drain or curb, you will likely need permission from the city engineering department.
How do I keep weeds out of the rocks?
The filter fabric is your primary defense. However, dust and seeds will eventually settle on top of the rocks. I recommend using a pre-emergent herbicide granule (like Preen) sprinkled over the rocks in early spring to stop seeds from germinating. Hand-pull stragglers immediately; don’t let them establish deep roots.
9. Conclusion
A dry creek bed is one of the most versatile tools in a landscape designer’s arsenal. It solves a functional problem by managing stormwater, but it also solves an aesthetic problem by adding flow, texture, and a sense of permanence to the garden. It connects the wildness of nature with the order of your home design.
By following the rules of scale, varying your rock sizes, and softening the edges with lush planting, you can transform a troublesome muddy patch into the highlight of your property. Remember, the goal is to work with the land, not against it.
Picture Gallery


