
Tray Ceiling Painting Ideas for Stylish Rooms
The “fifth wall” is often the most neglected surface in a home, yet it holds the most potential for transforming spatial perception. In my years of designing residential interiors, I have found that a tray ceiling—an architectural feature with a recessed center—offers a unique opportunity to add depth without cluttering the floor plan. For those seeking visual inspiration, be sure to check out the extensive Picture Gallery included at the end of this blog post.
I remember walking into a client’s master bedroom early in my career; the room felt cavernous and cold despite the expensive furniture. The tray ceiling was painted the same builder-grade white as the crown molding, leaving the architectural detail completely lost in a sea of blandness.
By simply painting the recessed center a moody charcoal and adding a soft sheen, we instantly lowered the visual height to a cozy level and highlighted the beautiful molding. This guide will walk you through exactly how to achieve similar results, whether you want drama or subtle elegance.
Understanding the Anatomy of Your Tray Ceiling
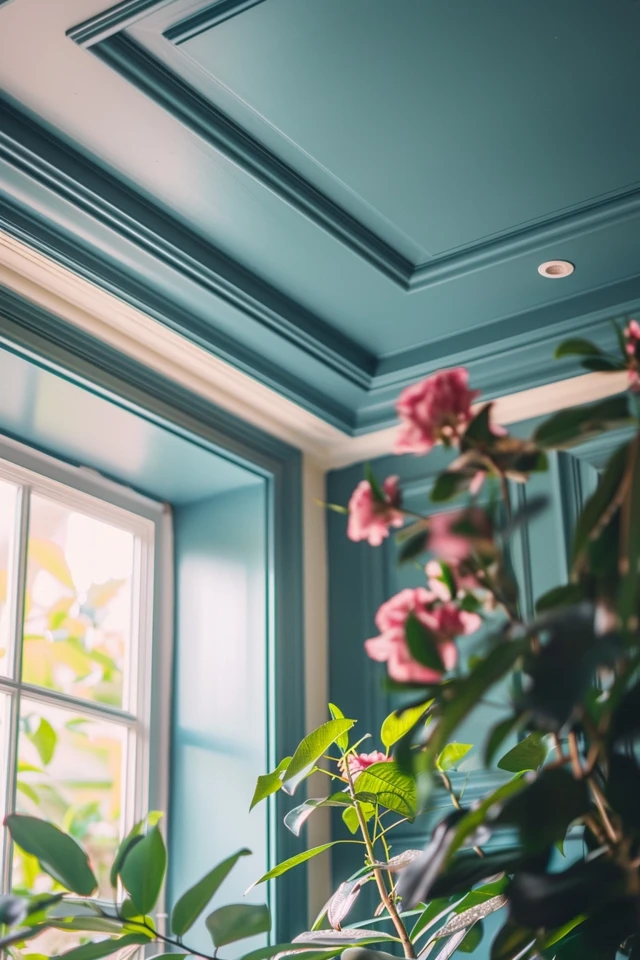
Before you even open a paint can, you must understand the specific geometry of your ceiling. A tray ceiling generally consists of three distinct parts: the perimeter (the lowest border), the slope (or vertical drop), and the center tray (the highest flat surface).
Identifying these parts is crucial because where you start and stop your paint color dictates the final effect. Painting the wrong section can make a room feel like a tunnel rather than a sanctuary.
If your ceiling includes crown molding, you have natural “stops” for your paint. If you have a drywall-only tray with rounded corners (bullnose), you will need to be much more strategic about creating crisp lines.
Designer’s Note: The “Lid” Effect
One lesson I learned the hard way involves the vertical drop. If you paint the vertical sides the same dark color as the center tray, you create a heavy “lid” effect that can feel oppressive.
In 90% of my projects, I keep the vertical drop or slope the same color as the perimeter or the trim. This allows the colored center to “float,” lifting the eye upward rather than pressing it down.
Strategy 1: The Tonal Shift (Monochromatic Scale)
If you are nervous about committing to a bold color, the tonal shift is your safest and most elegant bet. This involves using a lighter or darker shade of your wall color on the tray ceiling.
This technique works exceptionally well in living rooms and open-concept spaces where you want cohesion. It highlights the architecture without demanding immediate attention.
To execute this, I usually look at the paint strip for the wall color. If the walls are a mid-tone greige, I will choose the darkest color on that same strip for the tray center to create intimacy. Alternatively, I might choose the lightest color on the strip for a breezy, open feel.
The 50% Formula
If you cannot find a coordinating shade on the swatch deck, ask the paint store to mix your wall color at “50% strength.”
This means they use half the pigment formula. It guarantees the undertones match perfectly but provides a subtle distinction between the walls and the ceiling.
Common Mistakes + Fixes
- Mistake: Picking a ceiling color with a different undertone than the walls (e.g., a cool gray ceiling with warm beige walls).
- Fix: Always test paint swatches on the ceiling, not just the wall. Lighting hits horizontal and vertical surfaces differently, often shifting cool tones to blue.
Strategy 2: The Jewel Box Effect (High Contrast)
For dining rooms, powder rooms, or master bedrooms, high contrast creates a “jewel box” feel. This is where we paint the center tray a deep, saturated hue like navy, charcoal, emerald, or even black.
This approach effectively visually lowers the ceiling. While that sounds counterintuitive, it creates a sense of envelope and warmth, which is desirable in spaces meant for relaxation or evening entertaining.
When going dark, the finish matters more than ever. A standard “ceiling flat” paint can look chalky in dark colors. I recommend a matte or high-quality eggshell finish for dark trays to give the color depth and durability.
Lighting Requirements
You cannot do a dark tray ceiling without adequate lighting. Dark paint absorbs light.
- Ensure you have a chandelier or pendant centered in the tray.
- The bottom of your chandelier should generally hang 30 to 34 inches above a dining table.
- If there is no table, ensure there is at least 7 feet of clearance from the floor to the bottom of the fixture.
- Consider adding cove lighting inside the trim to make the dark ceiling glow.
Strategy 3: The Metallic or Wallpapered Insert
Paint isn’t the only way to treat a tray. In high-end design, we often treat the center panel as a canvas for texture. Metallic paints (gold, silver, bronze) reflect light and add a warm glow to the room, particularly at night.
However, metallic paint highlights every imperfection. If your drywall finishing is not Level 5 (perfectly smooth), metallic paint will show every bump and seam.
Wallpaper is a fantastic alternative for the center tray. A grasscloth adds texture, while a geometric pattern adds energy. This is particularly effective in home offices or nurseries.
Installation Realities
Wallpapering a ceiling is physically demanding and technically difficult. Gravity is working against you.
Unless you are an advanced DIYer with scaffolding, hire a professional paperhanger. The cost is worth avoiding the frustration of wasted paper and neck strain.
Coordinating Trim and Crown Molding
The success of a painted tray ceiling relies heavily on the trim work. Crown molding acts as the frame for your art.
In most traditional and transitional homes, semi-gloss white is the standard for molding. It provides a crisp separation between the wall color and the ceiling color.
However, a modern trend I am loving is “color drenching.” This involves painting the crown molding the same color as the walls or the ceiling, but in a semi-gloss finish. This reduces visual clutter and makes the ceilings feel higher because the eye doesn’t stop at the white line of the trim.
What I’d Do in a Real Project
If I were designing a 12×14 bedroom with an 8-foot perimeter and a 9-foot tray center, here is my checklist:
- Perimeter Ceiling: Ceiling Flat White (to match the molding and extend the visual height of the lower ceiling).
- Vertical Slope: Ceiling Flat White (to avoid the “lid” effect).
- Crown Molding: Semi-Gloss White.
- Center Tray: A soothing blue-gray (like Benjamin Moore’s Boothbay Gray) in a Matte finish.
- Result: An airy, lifted look that highlights the height difference without feeling heavy.
Selecting the Right Paint Sheen
I cannot stress this enough: sheen dictates the final look. The higher the sheen, the more light it reflects, but the more imperfections it reveals.
Flat / Ultra Flat
This is the industry standard for ceilings. It absorbs light and hides drywall seams and roller marks. Use this for the perimeter of the tray and for the center if you are using light-to-mid-tone colors.
Matte
Matte has a velvety texture. It is washable but has very low luster. I prefer this for dark colors in the tray center. It looks more sophisticated than flat paint.
Satin / Eggshell
Only use this on a ceiling if the surface is immaculate or if you are using wood paneling/shiplap in the tray. On drywall, it often looks like a mistake unless done with specific intent (like a lacquer look).
Working with Lighting and Coves
Tray ceilings often harbor hidden LED strips or rope lights, known as cove lighting. This feature casts light upward onto the ceiling center.
If you have cove lighting, the color of your ceiling will change drastically when the lights are on. Warm white LEDs (2700K – 3000K) will turn a blue ceiling slightly green or a gray ceiling muddy.
Pro Tip: The Swatch Test
Before finalizing your color, tape a large painted swatch to the ceiling center. Turn on your cove lights and your main chandelier. Observe it at night.
I once had a client pick a beautiful cream color, but once the 3000K LED strip lights hit it, the ceiling looked bright yellow. We had to switch to a cooler, grayish-white paint to achieve the cream look when the lights were on.
Final Checklist: Ready to Paint?
Before you dip your roller, run through this final check to ensure professional results.
- Check the Prep: Have you dusted the tray corners? Cobwebs painted over are impossible to fix smoothly.
- Define the Lines: If you don’t have crown molding, have you used high-quality painter’s tape (like FrogTape) to create sharp lines between the slope and the center?
- Lighting Check: Have you tested the color with the lights you actually use in the room (not just daylight)?
- Tools: Do you have an extension pole? Standing on a ladder for the center of a tray is dangerous and tiring. An 8-12 foot pole is essential.
- Sheen Verification: Did you buy Flat for the ceiling and Semi-Gloss for the trim? Don’t mix them up.
Frequently Asked Questions
Should the tray ceiling be lighter or darker than the walls?
It depends on the goal. Lighter centers make the room feel taller and more open. Darker centers create coziness and intimacy. For bedrooms and dining rooms, I prefer darker. For living rooms and kitchens, I prefer lighter or tonal.
Can I paint a tray ceiling if the room is small?
Absolutely. A painted tray in a small room draws the eye upward, distracting from the limited square footage. Just avoid painting the vertical drop a dark color, as that can make the walls feel like they are closing in.
How do I paint a tray ceiling with rounded bullnose corners?
This is tricky. Since there is no sharp corner to tape off, you have two options. First, you can install a piece of flexible molding to create a barrier. Second, and most common, is to transition the paint color at the “top” of the curve where it becomes flat. Use a laser level to tape a straight line around the perimeter.
Does a gray tray ceiling go with beige walls?
Generally, no. Mixing cool grays with warm beiges can make the room feel disjointed or dirty. If you want gray, look for a “warm gray” or “greige” that shares the same yellow or red undertones as your beige walls.
Conclusion
A tray ceiling is a gift in interior design. It provides built-in zoning and architectural interest that flat ceilings simply cannot match. By treating it with intention—whether through a monochromatic dip, a moody contrast, or a wallpapered texture—you elevate the entire perceived value of the room.
Remember the golden rule: respect the architecture. Let the lines of the molding or the slope dictate where your color stops, and always test your colors under your specific lighting conditions. With a weekend of work and a few gallons of paint, you can turn a standard builder feature into the highlight of your home.
Picture Gallery


