
Tray Ceiling Painting Ideas to Transform Your Room
When walking into a home, most people immediately look at the walls, the furniture, or the flooring. However, as an interior designer, I often tell my clients to look up. The ceiling is the “fifth wall” of a room, and if you are lucky enough to have a tray ceiling, you possess a built-in architectural feature that can define the entire atmosphere of your space. For a comprehensive look at how these concepts come to life, make sure to check out our curated Picture Gallery at the end of this blog post.
A tray ceiling, sometimes called a recessed or inverted ceiling, features a center section that is several inches or feet higher than the perimeter. This creates a multi-dimensional effect that adds depth and volume to a room. While many builders simply spray these ceilings stark white and move on, leaving them plain is a missed opportunity for serious design impact.
Transforming a tray ceiling with paint is one of the most cost-effective ways to elevate a room without undergoing a structural renovation. Whether you want to make a large room feel cozy or a small room feel grand, the placement of color on the different planes of the tray makes all the difference.
Understanding the Anatomy of Your Tray Ceiling
Before you select a single paint swatch, you must understand the geometry of your specific ceiling. Not all tray ceilings are built the same, and knowing the specific terminology helps you decide where to stop and start your paint colors.
The Perimeter or Soffit is the flat border that runs along the wall at the lower ceiling height. This usually holds your recessed lighting cans. In most designs, this section matches the regular ceiling color or the crown molding color.
The Vertical Rise (or Return) is the vertical strip that connects the lower perimeter to the higher center. This creates the “step” effect. This small strip of drywall is often the most contentious part of the painting process. If you paint it the wall color, it brings the eye up; if you paint it the ceiling color, it widens the center tray.
The Tray (or Center Deck) is the highest, flat part of the ceiling. This is your canvas. This is where you can apply a darker hue, a wallpaper, or a high-gloss finish to reflect light.
Finally, you have the Crown Molding. Many tray ceilings have molding installed inside the tray (at the top of the vertical rise). If you have molding here, you have a natural separation line for your paint colors. If you do not have molding, you will need a steady hand and laser levels to create a crisp transition line between the vertical rise and the center deck.
Strategy 1: Color Placement and Visual Height
The biggest fear clients have regarding ceiling paint is that it will make the room feel like a cave. This is a valid concern, but it usually stems from a misunderstanding of how dark colors work on a horizontal plane above you.
If you have a ceiling height of eight feet or lower on the perimeter, you need to be careful. In this scenario, I recommend painting the center tray a color that is only two or three shades darker than the perimeter. This creates a gentle shadow effect that implies depth without lowering the visual ceiling height.
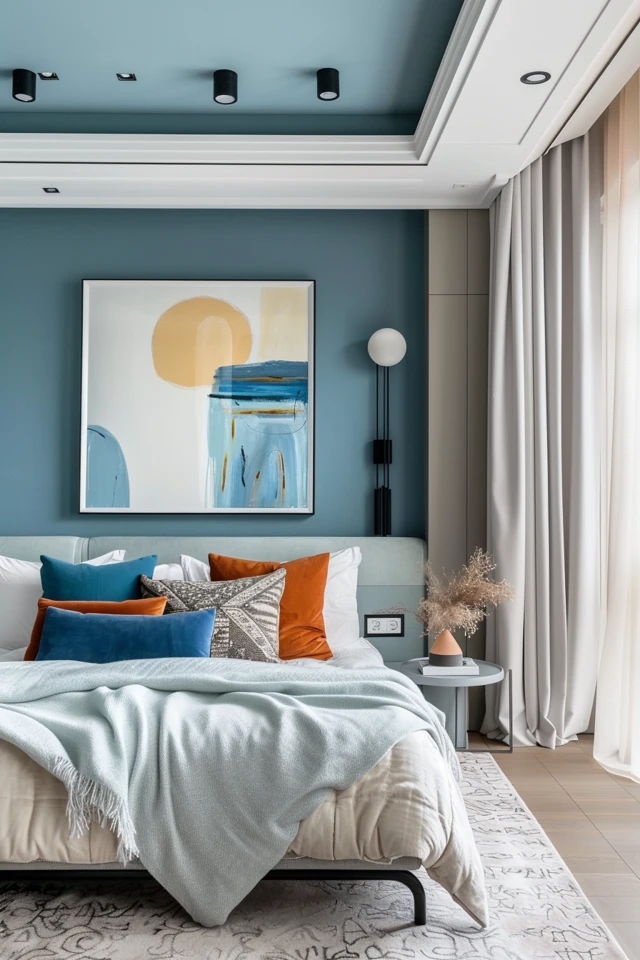
For ceilings that are nine feet or higher, you have much more freedom. A dark, moody color in the center tray actually pushes the ceiling “away” visually in the evening because the corners recede into shadow. In a dining room or primary bedroom, painting the center tray a charcoal gray, navy, or deep espresso can create an incredible “jewel box” effect.
Designer’s Note: The 50% Rule
If you love your wall color and want to bring it onto the ceiling, ask the paint store to mix it at 50% strength. Wall colors often look darker on a ceiling because the surface receives less direct light than vertical walls. By cutting the saturation in half, you get a color that reads as a perfect match to the walls rather than a heavy, shadowy version of them.
Strategy 2: The Monochromatic Drench
One of the most modern and sophisticated ways to handle a tray ceiling is color drenching. This involves painting the walls, the crown molding, the vertical rise, and the center tray all the exact same color.
This technique works exceptionally well in media rooms, libraries, and bedrooms where the goal is relaxation and immersion. When you remove the stark white contrast of the trim, you eliminate visual breaks. This tricks the eye into thinking the boundaries of the room are limitless.
When attempting a color drench, texture becomes your best friend. While the color stays the same, you can vary the sheen. I often specify a matte or eggshell finish for the walls and a flat finish for the ceiling. This subtle difference in light reflection adds sophistication without breaking the monochromatic theme.
If you choose a dark color for a monochromatic look, ensure your lighting plan is robust. You will need ample floor lamps and table lamps, as the ceiling will no longer bounce light around the room as a white ceiling would.
Strategy 3: Contrasting the Vertical Rise
If you want to highlight the architecture of the tray itself, focus on the vertical rise. This is the strip of drywall that connects the lower ceiling to the upper tray.
A popular technique is to paint the lower perimeter white, the center tray white, but paint the vertical rise a bold accent color. This creates a “ribbon” effect that outlines the shape of the room. It draws the eye upward and traces the perimeter.
This works best in rectangular rooms with clean lines. If your tray ceiling has complicated corners or octagonal shapes, a high-contrast ribbon can sometimes look jagged or messy. In those cases, stick to softer transitions.
Alternatively, you can paint the vertical rise the same color as the walls. This creates a funnel effect, extending the visual height of the walls up into the ceiling cavity. This is my go-to strategy for rooms that feel slightly squat or vertically challenged.
Strategy 4: Finish and Sheen for Drama
Color is not the only lever you can pull; paint sheen plays a massive role in the final aesthetic. Most ceilings are painted in a “dead flat” finish. Flat paint is non-reflective, which hides drywall seams, tape marks, and uneven texture.
However, if you want high drama, consider a satin or semi-gloss finish for the center tray.
High Gloss and Lacquer Effects:
A high-gloss tray ceiling reflects light from chandeliers and windows, making the room feel brighter and more glamorous. This is a staple in high-end traditional design.
However, there is a catch. Glossy paint highlights every single imperfection. If you want a high-gloss ceiling, your drywall contractor must execute a “Level 5” smooth finish. This is a skim coat over the entire surface. Do not attempt high gloss on a textured (orange peel or knockdown) ceiling; it will look like wet plastic.
Metallic Finishes:
For a dining room or a formal powder room, metallic paints in gold, champagne, or silver can add a warm glow. These paints are often translucent and require a specific base coat color to look right. They reflect warm light beautifully during dinner parties.
Common Mistakes + Fixes
Even seasoned DIYers can struggle with tray ceilings because the angles are tricky. Here are the issues I see most often when I walk into a project to fix a previous paint job.
Mistake: Ignoring the Light Fixture
People choose a ceiling color without considering their chandelier. If you have a black iron chandelier and you paint the ceiling dark charcoal, the fixture will disappear.
Fix: Ensure there is contrast between your fixture and the paint. If you go dark on the ceiling, swap the fixture for brass or polished nickel.
Mistake: Shaky Cut-In Lines
Tray ceilings have multiple corners (inside and outside corners). Wobbly paint lines at the vertical rise ruin the architectural effect.
Fix: Do not rely on blue tape alone. Tape can bleed, especially on textured drywall. Use the “lock-in” method: apply your tape, paint over the tape edge with the existing base color to seal it, let it dry, and then paint your new color. This ensures a crisp, razor-sharp line.
Mistake: The “Gray” White Ceiling
Clients often paint the tray “ceiling white” thinking it will look bright. However, because the tray is recessed, it gets less light. Standard white can look dingy and gray in the corners.
Fix: Choose a white with a higher LRV (Light Reflectance Value) or a white with a very slight warm undertone to counteract the shadows.
Real Project Checklist: What I’d Do
If I were managing your room transformation, this is the exact mental checklist I would run through before buying a single gallon of paint.
1. Assess the Crown Molding
Does the tray have molding inside it?
- Yes: Great. The molding will be the separator. I can paint the center tray a deep color and keep the molding white to frame it.
- No: I need to decide if I’m capable of cutting a straight line on a corner. If the drywall finishing is poor in the corners, I will likely keep the vertical rise and center tray the same color to hide wavy corners.
2. Check the Drywall Texture
Is the ceiling smooth or textured?
- Smooth: I have the option to use eggshell or satin finishes for a glow.
- Textured: I am strictly limited to flat/matte paint. Anything with a sheen will look cheap on texture.
3. Define the Vibe
- Cozy/Intimate (Bedroom/Media): Go dark in the tray. Navy, forest green, or charcoal.
- Airy/Open (Living/Kitchen): Go light. 50% strength of the wall color or a crisp white that contrasts with beige walls.
4. Lighting Audit
Turn on the lights in the tray. Do they cast harsh shadows?
- If you have recessed “can” lights in the vertical rise, they will create scallops of light on the paint. Ensure your paint job is flawless in those areas, as the light washes directly over the surface, highlighting roller marks.
Frequently Asked Questions
Should I paint the crown molding in the tray the same color as the ceiling?
Generally, no. Crown molding is meant to be architectural “jewelry.” Painting it a semi-gloss white (or a contrasting trim color) frames the colored ceiling much like a mat frames a piece of art. The only exception is if you are doing a full monochrome look where walls and trim match.
Can I paint a tray ceiling if the room is small?
Absolutely. In fact, a painted tray in a small room draws the eye upward, distracting from the limited square footage. It adds complexity to the space. Just ensure you don’t use a color that is overwhelmingly heavy if there is very little natural light.
What is the best roller nap for painting a ceiling?
For a smooth ceiling, use a 3/8-inch nap. If you have a light texture, step up to a 1/2-inch nap. If you have heavy popcorn or knockdown texture, you need a 3/4-inch nap to get the paint into the crevices. Always use an extension pole; standing on a ladder for hours with your arm above your head is exhausting and leads to sloppy work.
How do I handle a double tray ceiling (two steps)?
A double step offers a gradient opportunity. You can leave the lowest level white, paint the first step a light version of your color, and paint the highest center section the darkest, richest version of that color. This creates an ombre effect that looks very custom.
Conclusion
A tray ceiling is a gift to your home’s interior architecture. It breaks up the monotony of flat surfaces and offers a designated zone for creativity. Whether you choose to create a moody, dark retreat by painting the center a deep hue, or you opt for an airy, open feel with a color that matches your walls, the key is intentionality.
Stop treating your ceiling as an afterthought. By addressing the vertical rise, considering the finish, and respecting the lighting in the room, you can turn that “fifth wall” into the focal point of your home.
Take a look at the gallery below to see these principles applied in real homes. You will see examples of high-contrast dining rooms, soft and subtle bedrooms, and bold living spaces that prove paint is the most powerful tool in your design arsenal.
Picture Gallery


