
Title: Two Beds in One Room Ideas: Stylish Layouts
Introduction
Designing a room with two beds is one of the most common puzzle games interior designers play. Whether you are creating a shared bedroom for siblings or setting up a versatile guest suite, fitting two distinct sleeping zones into four walls requires strategic planning. It is not just about squeezing furniture in; it is about maintaining flow and comfort.
I often tell clients that a shared room does not have to feel crowded or utilitarian. With the right layout, you can actually maximize floor space while giving each sleeper a sense of autonomy and privacy. The key lies in understanding the scale of your furniture and the traffic patterns of the room.
If you are looking for visual inspiration, you can find a curated Picture Gallery at the end of this blog post. Before we get to the visuals, let’s break down the rules of layout, spacing, and styling that ensure your dual-bed setup functions beautifully.
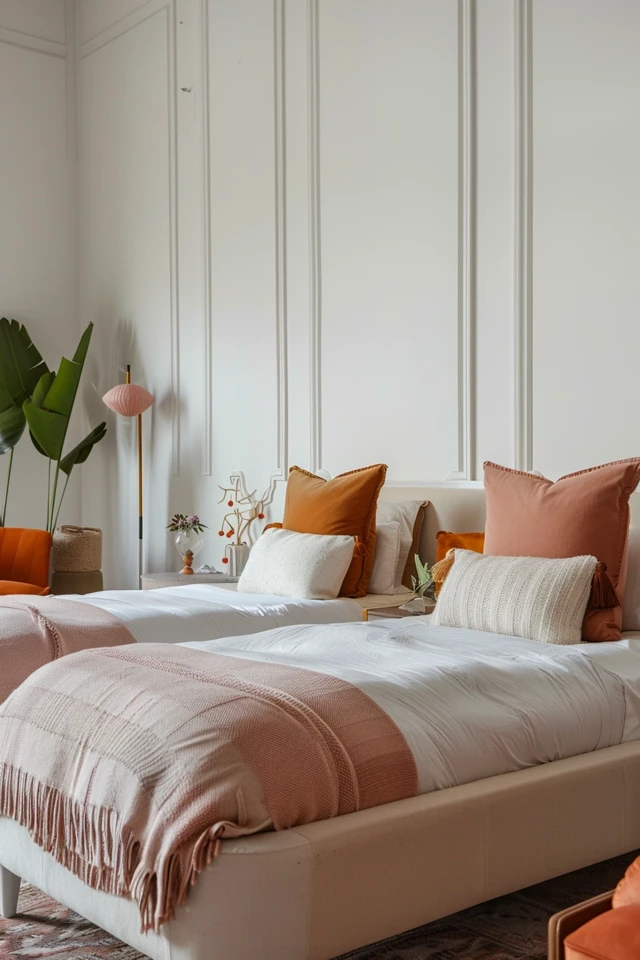
1. The Classic Parallel Layout (Side-by-Side)
The most traditional approach to putting two beds in one room is the parallel arrangement. This is what you see in hotels because it is generally the most efficient use of a rectangular space. However, doing this at home requires more nuance than a hotel setting to avoid a sterile look.
The symmetry of this layout is naturally pleasing to the human eye. It creates a focal wall that anchors the room, usually facing the entry door or a major window. To make this work, you need to be very precise with your spacing measurements.
Designer’s Note: The “Gap” Rule
A common issue I see in DIY designs is placing the beds too close together. In a perfect world, you want 30 to 36 inches between the two beds. This allows two people to walk between them comfortably and gives you space to make the beds without hitting your shins. If you are tight on space, the absolute minimum is 18 inches, but be warned: this will feel tight and requires a shared nightstand.
Furniture Selection for Parallel Layouts
If you have the luxury of space (at least 6 feet between beds), use two separate nightstands with a dresser or chest of drawers in the middle. This fills the void and provides storage.
For tighter rooms, a single shared nightstand is the standard solution. Ensure this nightstand is substantial; a tiny round table will look lost sandwiched between two twin or queen beds. Look for a chest that is at least 24 to 30 inches wide with drawers.
Lighting the Parallel Setup
Symmetry is your friend here. Matching table lamps on the outer sides of the beds help frame the space. If you are using a shared middle nightstand, consider wall-mounted sconces above each headboard. This frees up the surface area on the nightstand for water glasses and phones.
Common Mistakes + Fixes
Mistake: Using a rug that is too small, resulting in “floating” beds.
Fix: Use one large rug (9×12 or larger) that sits under the bottom two-thirds of both beds and spans the gap between them. Alternatively, place a runner rug between the beds and leave the area under the beds bare.
2. The “L-Shape” Corner Configuration
When you are dealing with a square room or need to maximize open floor space for play, the L-shape layout is a lifesaver. This involves placing two beds in a corner, with the headboards perpendicular to each other.
This layout is particularly popular in children’s rooms because it opens up the center of the room for rugs, toys, or a desk. It keeps the sleeping zone contained in one quadrant of the room.
Handling the “Dead Corner”
The trickiest part of an L-shape is the square corner where the two headboards meet. You cannot easily access this space, so do not put drawers there.
The Square Table: Place a large, square corner table here. It serves as a shared headboard and surface for lamps.
Custom Storage: Built-in corner units that open from the top (like a trunk) can store seasonal bedding.
The Void: In some modern layouts, we simply leave the corner empty and place a tall floor lamp behind the beds to cast a soft glow.
Ideally Suited For:
Square bedrooms (10×10 or 12×12).
Kids or teens who need floor space for activities.
Rooms where window placement prevents a parallel layout.
What I’d Do in a Real Project
If I am designing an L-shape room for kids, I almost always use upholstered headboards or daybeds. Since the beds run along the walls, children tend to lean against the wall while reading or playing tablets. An upholstered side rail or a “corner bed” frame protects them from cold drywall and makes the bed function like a deep sofa during the day.
3. The Linear “Head-to-Head” Arrangement
This is a layout that many homeowners overlook, but it is incredibly effective for long, narrow rooms. If your room is shaped like a bowling alley, placing beds side-by-side often blocks the walking path.
In a linear layout, you place both beds along the same long wall, positioned end-to-end. You can position them foot-to-foot (with a bench in the middle) or head-to-head.
The Head-to-Head Strategy
Placing the headboards toward each other is generally the best use of space. You place a piece of furniture between the two headboards to act as a divider. This creates a distinct separation between the sleepers.
Separation Ideas
Bookshelf Divider: A tall bookshelf perpendicular to the wall between the beds creates a physical wall, offering privacy for each sleeper.
Shared Desk: A desk unit built between the two beds allows the sleeping area to double as a study zone.
Console Table: A simple console table with a large lamp or artwork can serve as the buffer zone.
Designer’s Note: Sizing the Buffer
You need a minimum of 24 inches between the headboards to avoid it feeling like a train car. If you use a bookshelf divider, ensure it is anchored to the wall for safety.
Common Mistakes + Fixes
Mistake: Creating a “barracks” feel where the room looks like a dormitory.
Fix: Differentiate the spaces. Even if the bedding is the same, use different art above each bed. Use a canopy or drape over the center to soften the long line of furniture.
4. Opposite Walls (Face-to-Face)
In wider rooms where the window or door is centered on one wall, placing beds on opposite walls can create excellent balance. One bed sits on the left wall, and the other sits on the right wall, facing each other.
This is often the best solution for rooms with difficult architectural features, such as low sloped ceilings (attic rooms) or radiators that block specific wall sections.
The “Social” Layout
This arrangement is very social. It encourages conversation across the room, which is great for guest rooms or siblings who get along. However, it can feel less private.
Managing the Center Space
The challenge here is the “runway” in the middle of the room.
Center Furniture: If the room is wide enough (12 feet or more), you can place a low bench, a pair of ottomans, or even a small play table in the center.
Traffic Flow: Ensure you have at least 36 inches of clear walking path if the door is positioned between the beds.
Measurements to Know
Bed Clearance: You still need clearance for door swings. Ensure the foot of the bed does not block the entry.
Window Treatments: Since this layout often frames a window, invest in high-quality drapery. The window becomes the focal point.
5. Zoning and Styling for Cohesion
Once you have selected a layout, the success of the room depends on styling. The goal is to make the two beds look like a unified design choice, not an accident.
The “Cousins, Not Siblings” Rule
Matching everything perfectly can look a bit catalogue-like. I prefer the “cousins” approach. The beds should look related but don’t have to be identical twins.
Option A: Identical bed frames, but slightly different throw pillows (same pattern, different colors).
Option B: Different vintage bed frames painted the same color to unify them.
Option C: Identical bedding, but personalized art above each headboard.
Rug Sizing Logic
I mentioned rugs earlier, but this is worth a specific callout. In a two-bed room, the rug anchors the “zone.”
For Parallel Beds: The rug should start about 12-18 inches in front of the nightstands and extend past the foot of the beds by at least 12 inches.
For L-Shape: A round rug often works best here to soften all the hard angles of the mattresses meeting in the corner.
Texture: High-traffic shared rooms benefit from durable materials like wool or high-performance synthetics. Avoid viscose in kid or guest rooms; it stains with water.
Lighting Layers
Overhead lighting is rarely enough. Each bed needs its own task light. If you are renting and cannot hardwire sconces, look for “plug-in” sconces with cord covers. They look high-end but require zero electrical work.
Position reading lights so the bottom of the shade is roughly at eye level when the person is sitting up in bed (usually 40-42 inches off the mattress surface).
Final Checklist: What I’d Do in a Real Project
Before you buy furniture or move heavy mattresses, run through this checklist. These are the steps I take for every client project involving dual beds.
1. Tape it out first.
Use blue painter’s tape on the floor to outline the beds. Walk around them. Can you open the closet door? Can you open the dresser drawers? If the tape feels tight, the furniture will feel suffocating.
2. Check the outlets.
In older homes, outlets are scarce. If your layout puts a bed in front of the only outlet, you will need flat-head extension cords. Plan this before you put the heavy bed frame in place.
3. Verify the mattress height.
If you are using a shared nightstand, the mattress tops should be roughly level with the nightstand top. A variance of 2-3 inches is fine, but you don’t want to reach up or reach way down to grab a glass of water.
4. Assess the door swing.
Ensure the bedroom door can open fully (90 degrees) without hitting the side of a bed. If it hits, you need to downsize the bed or change the layout.
5. Plan for “Landing Strips.”
Each sleeper needs a place to put their feet down. Ensure there is at least 18 inches of clear floor space on the exit side of every bed.
FAQs
Can I mix a Queen and a Twin bed in the same room?
Yes, absolutely. This is common in guest rooms meant for families (parents + one child). The key is to match the headboard height or style to create visual continuity. Place the larger bed on the larger wall and use matching bedding to tie them together.
What is the minimum room size for two twin beds?
For a comfortable parallel layout, you typically need a room that is at least 10 feet wide by 10 feet long. This allows for two standard twin beds (roughly 40 inches wide each) and a modest 24-inch walkway between them. Anything smaller usually requires bunk beds or a trundle.
How do I handle privacy in a shared room?
Vertical height helps. High headboards or canopy beds create a psychological sense of enclosure. If the room is large, a ceiling-mounted curtain track between the beds can offer true privacy when needed.
Should I use a trundle bed instead of two permanent beds?
Trundles are great for occasional sleepovers, but for a room used every night, they are a hassle. Pulling out a trundle daily is tedious, and the lower sleeper is on the floor. If the room is used nightly by two people, find a way to fit two permanent beds or use a bunk bed.
Conclusion
Putting two beds in one room is a design challenge that yields high rewards. It forces you to be creative with space planning and often results in a room that feels cozy, functional, and inviting.
Whether you choose the classic parallel look for a guest suite or a corner L-shape for a playful kids’ room, remember that flow comes first. Prioritize the walking paths and the ability to access storage. Once the layout works functionally, the styling—through matching linens, strategic lighting, and cohesive colors—will bring the room to life.
Take the time to measure your space accurately, and do not be afraid to experiment with the non-traditional layouts like head-to-head if your room shape demands it.
Picture Gallery


