
Title: Ultimate Pajama Party Ideas for Epic Slumber Fun
Introduction
There is something undeniably magical about transforming a standard living room into a cozy, dedicated sleep sanctuary. As an interior designer, I often tell clients that their homes should be flexible enough to handle formal dinners and chaotic, joy-filled sleepovers with equal grace. Whether you are hosting a birthday bash for kids or a sophisticated movie marathon for adults, the layout and atmosphere set the tone for the entire night.
When planning a slumber party, we move beyond basic decoration and start thinking about spatial planning, traffic flow, and ambient lighting. It is about creating a temporary “soft architecture” that feels safe, enclosed, and incredibly comfortable. For a visual dose of inspiration, be sure to scroll all the way down because a curated Picture Gallery is at the end of the blog post.
This guide will walk you through the practical steps of staging your home for a sleepover, focusing on comfort, durability, and style. We will cover everything from rearranging furniture to selecting the right textiles that can withstand snacks and spills. Let’s design a night to remember.
1. The Layout Logic: Configuring Your Space for Sleep
Before you inflate a single mattress or pitch a teepee, you need a floor plan. In interior design, we call this space planning. The goal is to maximize the sleeping area while maintaining clear walking paths so no one trips in the middle of the night.
Start by clearing the perimeter. Push heavier furniture, like armchairs and side tables, against the walls to open up the central floor space. If you have a coffee table, move it to another room entirely; this is prime real estate for sleeping bags.
Key Measurements for Spacing:
- Walkways: Maintain a clear path of at least 24 to 30 inches to the bathroom and kitchen. This prevents guests from stepping on each other in the dark.
- Mattress Spacing: Leave 12 to 18 inches between sleeping bags or mattresses if possible. This gives guests a sense of personal territory.
- Screen Distance: If movies are involved, the head of the sleeping area should be at least 6 to 8 feet away from the TV screen to avoid eye strain.
Designer’s Note: The Rug Anchor
In open-concept spaces, use your area rug to define the “sleep zone.” If your current rug is small (like a 5×8), layer a larger, inexpensive drop cloth or painter’s canvas underneath it for the night. This protects your hard floors and visually demarcates the party area.
2. Tent Village vs. Mattress Floor: Choosing Your Architecture
Vertical height adds drama to a room. When we design kids’ rooms, we often use canopy beds to create a “room within a room.” You can achieve this same effect at a pajama party using individual teepees or a large fort structure.
The Teepee Setup
Individual A-frame tents are trending for a reason. They provide privacy and contain the mess of pillows and blankets.
- Scale Check: Most individual sleepover tents have a footprint of about 40 to 48 inches square. Measure your room first.
- Placement: Arrange them in a semi-circle facing a focal point (like the TV or a fireplace) rather than straight rows. This encourages conversation.
- Height Clearance: Ensure your ceiling fixture (chandelier or fan) is high enough. You need at least 12 inches of clearance between the tent peak and the light fixture.
The Low-Profile Lounge
If you are working with a smaller apartment or low ceilings, skip the tents and go for a “floor lounge” aesthetic. Use twin-sized air mattresses or high-density foam sleeping pads.
- Uniformity: Try to use matching sheet sets, even if the blankets are different. White or neutral fitted sheets create a cohesive, hotel-like look.
- Headboards: Push the head of the mattresses against the sofa front. The sofa acts as a soft, upholstered headboard for the guests.
3. Lighting the Mood: From Task to Ambient
Lighting is the most critical element in shifting the mood from “Tuesday afternoon” to “Party Time.” Overhead lighting is generally too harsh for a slumber party. Your goal is to create a warm, low-level glow that mimics a campfire or starlight.
Color Temperature Matters
Stick to warm white bulbs (2700K to 3000K). Cool white or daylight bulbs (5000K) contain too much blue light, which inhibits melatonin and keeps guests awake longer than you might want.
Lighting Layers Checklist:
- Fairy Lights: Drape these along the perimeter of the ceiling or around the entrance of tents. Battery-operated ones are safer as they eliminate tripping hazards from cords.
- Nightlights: Place low-wattage plug-in lights in the hallway leading to the bathroom.
- Projectors: A galaxy or star projector aimed at the ceiling creates an immersive “sleeping under the stars” effect without any installation work.
Safety Tip: Cord Management
As a designer, loose cords are my enemy. In a dark room full of excited guests, they are dangerous. Use gaffer tape (which doesn’t leave residue like duct tape) to tape down any extension cords for lamps or projectors. Run cords under the rugs whenever possible.
4. The Soft Goods: Layering Rugs, Pillows, and Bedding
Comfort comes down to layers. A single sleeping bag on a hardwood floor is a recipe for a sore back. You need to build a foundation that mimics the support of a bed.
The Base Layer
If you have hard flooring (wood, tile, vinyl), you need a thick buffer.
- Layer 1: Yoga mats or camping foam pads go on the very bottom. They provide density and insulation from the cold floor.
- Layer 2: The air mattress or sleeping bag goes on top.
- Layer 3: A plush area rug. If you are hosting often, investing in a high-pile shag or a thick wool rug for the living room pays off in comfort.
Pillow Scaping
Don’t rely solely on bed pillows. Bring in Euro shams (26×26 inches) from the bedrooms to lean against walls or sofas. This allows guests to sit up and chat comfortably before sleeping.
Fabric Durability
For a party, avoid your silk cushions or vintage heirlooms. Stick to performance fabrics like velvet (which cleans easily) or heavy cotton. If you are worried about spills, use indoor/outdoor pillows. They have come a long way in terms of softness and are virtually indestructible.
5. Zoning the Party: Eating, Crafting, and Sleeping
One of the biggest mistakes in open-plan living is letting the activities bleed into each other. This results in cracker crumbs in the sleeping bags. Even in a small space, you must create distinct zones.
The Grazing Zone
Keep food off the floor. Use a console table, kitchen island, or a sturdy dining table as the designated snack station.
- Protection: Use a wipeable tablecloth or placemats.
- Hydration Station: Set up a drink dispenser with a drip tray. This prevents the inevitable specialized juice spills on your carpet.
The Activity Zone
If you are doing crafts, facials, or board games, do this at a table or on a separate hard surface before the beds are fully made up. Once the “sleep setup” is done, that area should be a “shoes off, food off” zone.
The Transition
Have large baskets or bins ready for guests to store their daytime clothes and bags. Clutter creates visual stress. By giving everyone a designated bin, you keep the walkways clear and the design looking intentional.
Common Mistakes + Fixes
Mistake: Overcrowding the Room
It is tempting to invite everyone, but a cramped room gets hot and stuffy quickly.
Fix: Apply the “Hotel Rule.” Calculate your square footage. Deduct furniture space. Ensure you have 20 square feet per person for sleeping. If the math doesn’t work, reduce the guest list or move furniture to a storage unit/garage.
Mistake: Ignoring Temperature Control
Body heat raises the room temperature significantly.
Fix: Lower your thermostat by 3 to 5 degrees before guests arrive. Keep a fan running on low to circulate air. If you are using a fireplace for ambiance, turn it off at least two hours before bedtime so the room can cool down for sleep.
Mistake: Inaccessible Power Outlets
Everyone needs to charge phones or tablets, leading to fights over outlets.
Fix: Use a multi-port USB charging station on the kitchen counter. Keep devices out of the sleeping zone to encourage sleep, or provide one surge protector strip in a central, safe location.
What I’d Do in a Real Project
If I were hired to style a high-end slumber party for a client, here is the exact checklist I would follow to ensure a polished look:
1. The “Morning After” Flow
I always plan for the next morning. I would set up a coffee/cocoa station in the kitchen the night before. I would also have a designated basket for dirty linens so the cleanup is instant.
2. The Scentscape
I would use a reed diffuser with a calming scent like lavender or chamomile near the entryway. I avoid candles due to fire risk with all the blankets on the floor.
3. The Uniformity Hack
I would buy inexpensive, matching pillowcases for everyone to use (and keep). Even if sleeping bags are different colors, matching white pillowcases make the room look styled and intentional.
4. The Entryway Mat
I would place a heavy-duty mat inside and outside the front door. Keeping shoes off the living room rugs is non-negotiable for hygiene and cleanliness during a sleepover.
Final Checklist
Before the doorbell rings, run through this final sweep to ensure your home is ready:
- Clear Floor Space: Coffee tables removed, fragile decor stored away.
- Safety Check: Cords taped down, nightlights plugged in, heavy furniture anchored.
- Temperature: Thermostat lowered to 68-70°F.
- Lighting: Overhead lights off, lamps and fairy lights on.
- Bedding: Base layers (yoga mats/rugs) in place for insulation.
- Zoning: Food station set up away from sleeping area.
- Storage: Bins or baskets ready for guest belongings.
- Bathroom: Stocked with extra toilet paper and fresh hand towels.
FAQs
How do I protect my rug from spills during a sleepover?
The best defense is a strict “no food in the tents” rule. However, accidents happen. I recommend treating your rug with a stain repellent spray a few days before the party. Alternatively, layer a machine-washable cotton rug or a “Ruggable” style cover over your main wool rug for the night.
What is the best way to darken a living room for sleeping?
Living rooms often lack the blackout curtains found in bedrooms. You can use temporary paper blackout shades (available at hardware stores) that clip onto window frames. Another designer trick is to use tension rods inside the window frame with extra dark sheets or curtains just for the night.
How much space do I need for a teepee sleepover?
A standard sleepover teepee requires a footprint of about 4 feet by 4 feet, plus the mattress extending out. You generally need a room that is at least 12×12 feet to comfortably fit 3 to 4 tents while maintaining a walkway.
Is it better to move furniture out or push it to the walls?
If you can physically move the coffee table and side chairs to another room, do it. It creates a cleaner look and prevents stubbed toes. However, large sofas are usually best pushed to the perimeter. They act as sound absorbers and cozy barriers for the sleeping zone.
Conclusion
Hosting the ultimate pajama party is about more than just snacks and movies; it is about curating an environment that feels special, safe, and distinct from everyday life. By applying interior design principles—like thoughtful space planning, layered lighting, and strategic zoning—you can elevate a chaotic sleepover into a comfortable, memorable event.
Remember that the best design serves the function of the room. In this case, the function is fun, connection, and eventually, sleep. Don’t stress about perfection. If the lighting is warm, the floor is soft, and the flow works, your guests will have an incredible time.
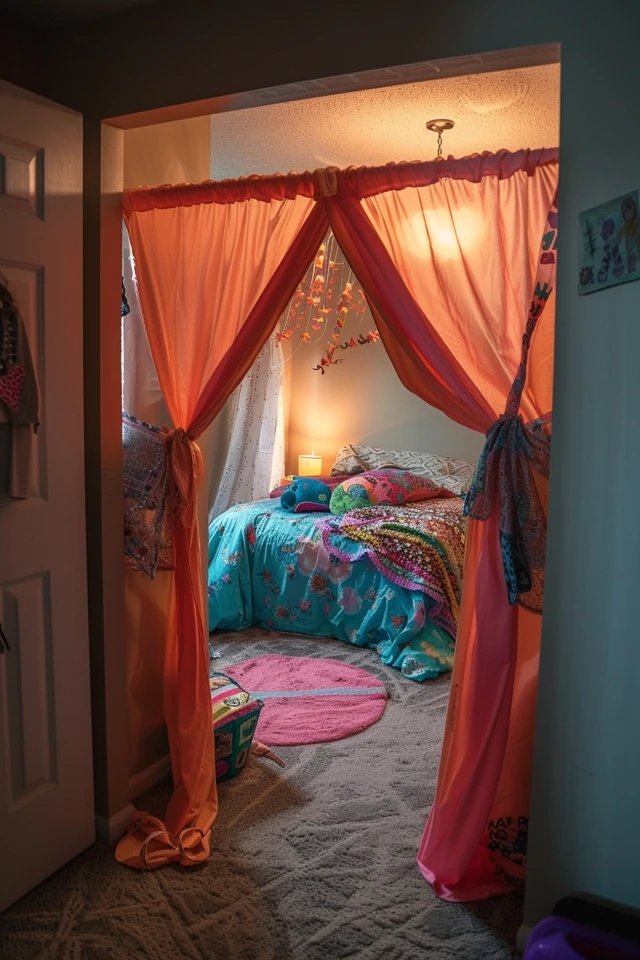
Picture Gallery


