
Upcycled Charm: Old Bathtub Garden Ideas
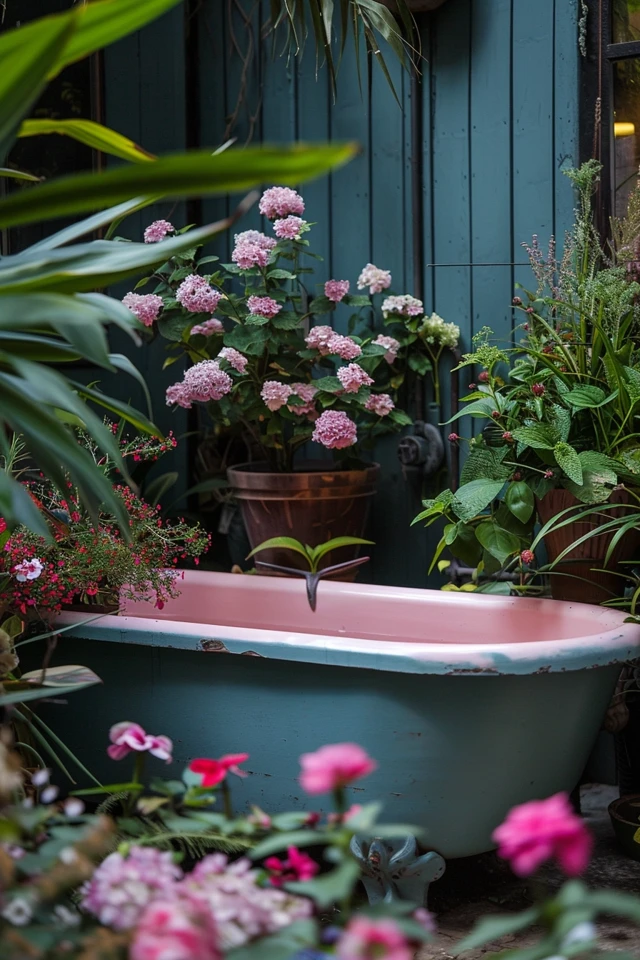
There is something deeply nostalgic about seeing a vintage clawfoot tub repurposed as a garden planter. It instantly adds a layer of history and whimsy to a landscape that brand-new ceramic pots just cannot replicate. However, integrating such a massive object into a garden design requires more than just dragging it onto the lawn and dumping in a bag of soil.
As a designer, I love these projects because they bridge the gap between architectural salvage and horticultural design. I have dragged heavy cast iron tubs out of renovation sites specifically to create focal points in English cottage-style gardens. It is a labor of love that pays off when you see the contrast of delicate blooms against weathered enamel.
If you are looking for visual inspiration, you can visit our Picture Gallery at the end of the blog post.
1. Sourcing and Prepping Your Tub
Before you worry about flowers, you have to address the vessel itself. Not all tubs are created equal, and your choice between cast iron and acrylic dictates your installation process. Cast iron tubs offer that authentic, heavy look, but they are incredibly heavy before you even add soil.
If you are placing this on a patio or deck, you must verify the structural load capacity. A standard cast iron tub weighs 200–400 pounds empty. Once filled with wet soil and plants, that weight can easily skyrocket to over 1,000 pounds.
Acrylic or fiberglass tubs are much lighter and easier to move, making them ideal for renters or balcony gardens. However, they lack the thermal mass of iron, meaning your soil will heat up and cool down faster. You may need to water more frequently during peak summer heat.
Designer’s Note: The Safety First Rule
In my projects, we always test vintage tubs for lead paint before sanding or planting, especially if the client plans to grow edibles. Many old tubs were coated with lead-based paints on the exterior. If the paint is chipping, we strip it safely or seal it completely to prevent lead from leaching into the soil or surrounding ground.
Drilling for Drainage
You cannot skip drainage. Without it, your tub becomes a swamp, and root rot will kill your plants within weeks.
- Cast Iron: You need a high-quality cobalt drill bit and cutting oil. Drill 4–6 holes (roughly half an inch in diameter) spaced evenly along the bottom. This takes patience and safety goggles.
- Acrylic/Fiberglass: A standard wood or general-purpose twist bit works fine. Apply masking tape over the spot where you plan to drill to prevent the finish from splintering.
- The Plug Hole: Do not rely solely on the existing drain hole. It is usually located at the lowest point, which is good, but it is rarely enough for the volume of soil a tub holds.
2. Strategic Placement and Layout
A bathtub is a massive visual anchor. In interior design terms, we treat this like a statement piece of furniture; you do not push it into a dark corner. It needs to be a focal point.
If you have a large backyard, place the tub at the end of a sightline. When you look out your kitchen window or stand at the back door, the tub should draw the eye. Framing it with a trellis or an arbor creates a vignette that feels intentional rather than cluttered.
For smaller courtyards, angle the tub in a corner to soften the hard 90-degree lines of fences or walls. Angling furniture or large planters makes small spaces feel dynamic and larger than they are.
Spacing and Clearances
Functionality matters as much as aesthetics. You need to access the tub from at least three sides for weeding and watering.
- Walkways: Leave at least 30 to 36 inches of clearance around the accessible sides of the tub. This allows you to kneel comfortably or roll a wheelbarrow past it without scraping your knuckles.
- Sun Exposure: Most flowering annuals and vegetables require 6–8 hours of direct sun. Track the sunlight in your yard before committing to a spot. Once that tub is full, you are not moving it.
Common Mistakes + Fixes
Mistake: Placing the tub directly on soil or grass.
Fix: Over time, the heavy tub will sink unevenly into the ground, causing it to list to one side. Always place the feet on concrete pavers, flagstones, or a compacted gravel pad to distribute the weight and keep the tub level.
3. Managing Soil Volume and Weight
A standard bathtub holds a massive volume of soil. Filling the entire vessel with high-quality potting mix is expensive and unnecessary. It also makes the unit incredibly heavy, which can stress a deck structure.
I use a layering method similar to “hugelkultur” or raised bed gardening to fill the volume efficiently. This improves drainage and reduces the overall cost of materials.
The “Lasagna” Filling Method
- Base Layer (Drainage): Place 2 inches of coarse gravel or crushed stone at the bottom. This prevents the drainage holes from getting clogged with heavy soil.
- Filler Layer (Volume): Fill the bottom 1/3 of the tub with lightweight filler. I often use upside-down plastic nursery pots, sterilized logs, or empty plastic milk jugs. If you use organic matter like logs, know that the soil level will drop over time as they decompose.
- Barrier Layer: Lay down a piece of landscape fabric or burlap over the filler. This keeps the good soil from washing down into the crevices of your filler material.
- Growing Medium: Fill the top 1/2 to 2/3 with a high-quality potting mix (not garden soil). Potting mix is lighter and formulated to retain moisture without becoming waterlogged.
What I’d Do in a Real Project
If I am designing a tub for a client who travels often, I install a false bottom or a water reservoir system (sub-irrigation). We use perforated drain pipes at the bottom wrapped in fabric to create a water storage area. This allows the plants to wick moisture up from the bottom, reducing the need for daily watering in July and August.
4. Design Themes and Planting Recipes
The style of the tub should dictate the plants you choose. A rustic, chipped clawfoot looks best with wild, cottage-style planting. A sleek, refinished tub can handle structured, architectural plants.
We use the “Thriller, Filler, Spiller” formula for container gardening, and it applies perfectly here. You need height, mid-level volume, and trailing elements to soften the hard ceramic edges.
The Edible Kitchen Garden
Bathtubs are excellent for edible gardens because the height deters rabbits and some pests.
- Thriller (Height): A central trellis with cherry tomatoes or runner beans. Alternatively, a dwarf fig tree or blueberry bush works beautifully as a permanent anchor.
- Filler (Volume): Surround the base with bush basil, swiss chard (the ‘Bright Lights’ variety adds great color), and marigolds to deter pests.
- Spiller (Trailing): Plant nasturtiums or trailing rosemary at the corners. They will cascade over the rim, breaking up the heavy visual line of the white porcelain.
The Moon Garden (Evening Enjoyment)
If your garden is mostly used in the evenings, go for a white and silver palette. This reflects moonlight and looks sophisticated against a white or pastel tub.
- Thriller: White Cosmos or tall Nicotiana (Flowering Tobacco).
- Filler: Dusty Miller (silver foliage), White Petunias, and Artemisia.
- Spiller: Dichondra ‘Silver Falls’ or White Bacopa.
Designer’s Note: Color Coordination
Look at the exterior color of your tub. If you have left it a rusty orange, use plants with purple or blue flowers (Salvia, Lavender, Heliotrope). Orange and blue are complementary colors, creating high visual contrast that looks professionally designed. If the tub is white, almost anything works, but a monochrome palette often looks more high-end.
5. Exterior Finishes and Styling
The outside of the tub is just as important as the plants inside. In many salvage finds, the exterior is rough, peeling, or rusted. You have two choices: embrace the patina or refinish it.
Embracing the Patina
For a “ruin” or “secret garden” look, seal the rust rather than painting over it. Use a clear matte sealant designed for metal. This stops the rust from progressing to the point of structural failure but keeps that warm, weathered character.
I often plant tall grasses or ferns around the base of the tub to integrate it into the ground. This makes the tub look like it has been there for a century.
Painting for Pop
If you want a modern or cheerful look, painting the exterior is a great weekend project.
- Preparation: Scrub the exterior with a wire brush to remove loose flakes. Sand the surface smooth.
- Priming: Use an oil-based primer specifically for metal. This is non-negotiable if you want the paint to stick.
- Painting: Exterior semi-gloss latex or enamel works well. I recently painted a tub in a deep charcoal gray (Sherwin Williams Iron Ore) for a client. The dark color made the green foliage pop incredibly well.
Accessories and styling
Don’t let the tub float alone in space. Add a side table or a garden stool nearby. If the tub is purely decorative (a water feature or planter), placing a vintage watering can or a stack of terracotta pots next to the feet grounds the composition.
Final Checklist: The Designer’s Cheat Sheet
Before you shovel that first scoop of dirt, run through this list to ensure your project lasts more than one season.
- Site Selection: Is the ground level and compacted? Do you have 6+ hours of sun?
- Drainage Test: Did you drill at least 4 holes? Pour a bucket of water in to ensure it drains before filling with soil.
- Weight Check: If on a deck, have you confirmed the joists can support 1,000 lbs?
- Lead Check: Did you test the exterior paint for lead?
- Filler Material: Do you have gravel and lightweight filler to save on soil costs?
- Planting Plan: Do you have a mix of heights (Thriller, Filler, Spiller)?
- Water Access: Can your hose reach the tub?
FAQs
Can I use a bathtub as a fish pond instead of a planter?
Yes, but it requires more work. You must seal the drain perfectly with plumbing putty and a cap. You also need to treat the water to remove chlorine and potentially add a pump for aeration. Standing water in a stagnant tub will become a mosquito breeding ground very quickly without movement or fish.
Do I need to paint the inside of the tub?
No. The soil will cover the interior, and moisture will eventually cause any interior paint to peel anyway. The original porcelain or enamel coating is durable enough to handle soil contact.
How do I winterize a bathtub planter?
In freezing climates, wet soil expands and can crack cast iron or ceramic. Ideally, you should empty the tub, but that is rarely practical. The best approach is to ensure perfect drainage so water doesn’t pool at the bottom. Cover the top with mulch or burlap to insulate the roots if you are trying to overwinter perennials.
Can I grow carrots or deep-root vegetables?
Absolutely. A bathtub provides 15–20 inches of depth, which is luxurious for root vegetables like carrots, parsnips, or potatoes. Just ensure your soil is loose and free of rocks.
Conclusion
Upcycling an old bathtub into a garden feature is a bold design move that pays off in character and functionality. It provides a raised bed that is easy on your back, creates an instant focal point, and saves a large item from the landfill.
The key to success lies in the preparation. If you handle the drainage and placement correctly, you have a durable container that will last for decades. Whether you fill it with wild cosmos or a tidy kitchen garden, the result is always a conversation starter.
Picture Gallery


