
Warm Wood Bathroom Designs to Inspire You
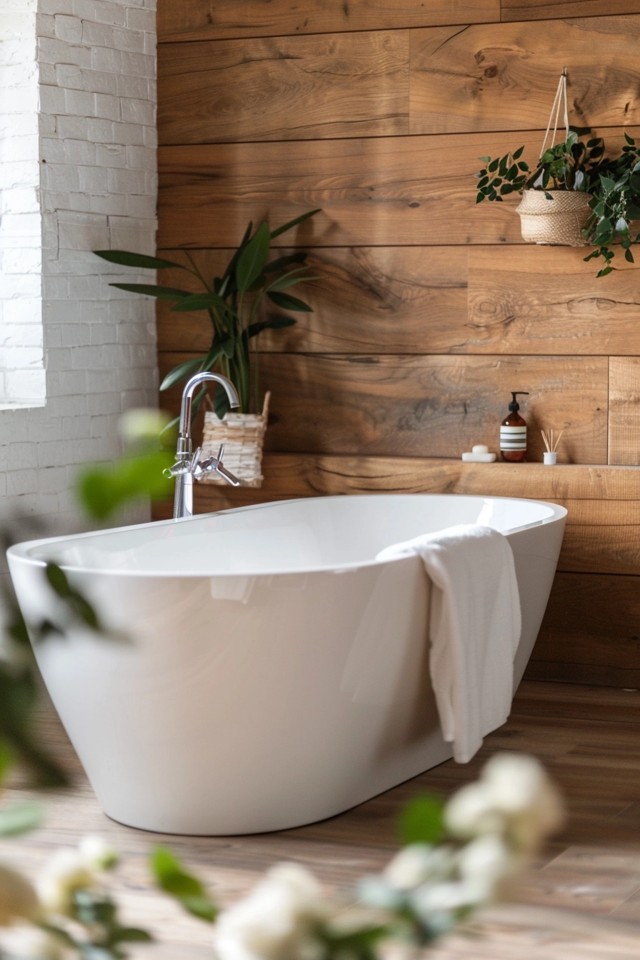
Bathrooms have historically been defined by cold, hard surfaces like ceramic tile, porcelain, and stone. While these materials are practical for water resistance, they often leave the space feeling sterile or clinical. Introducing wood elements is the single most effective way to bring warmth, texture, and organic luxury into your bathroom design.
However, many homeowners hesitate to mix lumber with water due to valid concerns about humidity, warping, and mold. The key lies in selecting the right timber species, applying the correct sealants, and understanding placement within the room. When done correctly, wood transforms a bathroom from a utility space into a genuine sanctuary.
Be sure to scroll to the bottom of this post to see the full Picture Gallery of warm wood bathroom designs.
1. Choosing the Right Wood Species for Damp Environments
Not all wood is created equal, especially when steam and splashing water are involved. In my design projects, I strictly avoid softwoods like pine for main bathroom surfaces because they are too porous and prone to denting. You need hardwoods that are naturally oily and dense.
Teak: The Gold Standard
Teak is widely considered the best choice for wet environments. It contains high levels of natural oils that repel water and prevent rot, even if the finish wears down. It has a rich, honey-brown hue that grays beautifully over time if left untreated, though for interiors, we usually seal it to maintain the color.
White Oak: The Modern Favorite
White oak is currently the most popular wood in interior design due to its neutral undertone and tight grain. Unlike red oak, which can pull pink when wet or stained, white oak stays true to an organic, wheat-colored palette. It is dense and durable, making it excellent for vanities and cabinetry.
Walnut: Ideally Suited for Contrast
If you want a moodier, more sophisticated look, American Black Walnut is an excellent choice. It is softer than oak but highly stable, meaning it resists warping when humidity levels fluctuate. Its deep chocolate tones pair incredibly well with bright white marble or limestone.
Designer’s Note on Grain Cuts:
When specifying oak for a bathroom, I always request “rift-sawn” or “quarter-sawn” lumber rather than “plain-sawn.”
- Plain-sawn: Has the traditional cathedral (arched) grain pattern. It expands and contracts more with moisture.
- Rift-sawn: Has straight, linear grain lines. It is structurally more stable in humid environments and looks more contemporary.
2. Designing the Vanity: The Centerpiece of Warmth
The vanity is often the safest and most impactful place to introduce wood. Since it usually sits away from the direct spray of the shower, you have more flexibility with materials compared to flooring or shower slats.
Floating vs. Freestanding
For smaller bathrooms (under 50 square feet), I almost always recommend a floating wood vanity. Seeing the floor extend underneath the cabinet tricks the eye into thinking the room is larger.
- Mounting Height: Standard comfort height is 34 to 36 inches from the finished floor to the top of the counter.
- Clearance: For a floating look, leave 8 to 10 inches of open space between the floor and the bottom of the cabinet.
Mixing Wood with Countertops
The countertop material dictates how warm the wood feels.
- Warm Wood + Cool Stone: Pairing a walnut vanity with Carrara marble (which has cool gray veining) creates a classic, high-contrast balance.
- Warm Wood + Warm Stone: Pairing white oak with Cream of Marfil or a warm quartz creates a monochromatic, “Japandi” style spa vibe.
Common Mistakes + Fixes
Mistake: Ignoring the “filler” strip.
Fix: If your wood vanity goes wall-to-wall, walls are rarely perfectly plumb. Always order the vanity 1-2 inches smaller than the opening and use a “scribe molding” or filler strip made of the same wood veneer to close the gap seamlessly.
3. Wood Accents: Slats, Beams, and Ceilings
If you are nervous about water damage on a vanity or floor, look up. Adding wood to the ceiling or walls brings instant character without the maintenance stress of standing water.
The Wood Slat Ceiling
A slat ceiling is a powerful tool for visual elongation. By running 1×2 inch wood slats with 1-inch gaps parallel to the longest wall, you can make a narrow bathroom feel longer.
- Material: Cedar or Hemlock are lightweight options that are easy to install overhead.
- Finish: Use a clear matte sealer. Avoid high-gloss on ceilings as it reflects glare from recessed lighting.
Tambour and Fluting
Fluted wood details (rounded vertical grooves) or tambour panels add texture that flat wood panels lack. This is particularly useful in powder rooms where you want a high-design impact.
- Scale: For small rooms, use tighter fluting (1/2 inch width). For large master baths, wider fluting (1 to 2 inches) reads better from a distance.
- Lighting: Grazing light is essential here. Place a recessed light or LED strip 4 to 6 inches away from the wood wall to highlight the texture.
Real Project Constraints:
In a recent rental renovation, we couldn’t replace the tile. Instead, we installed a removable wood shelf above the toilet and a large wood-framed mirror. These two elements alone warmed up the entire gray-tiled room without requiring construction.
4. Flooring: Real Wood vs. Wood-Look Alternatives
Flooring is the most contentious area for wood in bathrooms. While half-baths and powder rooms are perfectly fine with engineered hardwood, full bathrooms with showers create risk.
Engineered Hardwood (Powder Rooms Only)
If there is no shower, I love running the same engineered hardwood from the hallway into the powder room. It creates a seamless flow.
- Wear Layer: Ensure your engineered floor has a thick wear layer (at least 3mm) so it can be refinished if a plumbing disaster occurs.
Wood-Look Porcelain Tile
For full baths, high-quality porcelain tile that mimics wood is often the smarter choice for families or rental properties.
- Grout Lines: The secret to making this look real is the grout. Use a rectified tile (perfectly straight edges) and the smallest grout line possible (1/16 inch).
- Grout Color: Do not match the grout to the lightest part of the “wood.” Match it to the darkest grain tone. This shadows the gap and makes the individual planks look like real butted-up lumber.
Luxury Vinyl Plank (LVP)
I generally avoid LVP in high-end projects, but for basement bathrooms or budget renovations, it is 100% waterproof. Look for “rigid core” LVP, which feels more substantial underfoot than the flexible glue-down varieties.
5. Finishing and Maintenance for Longevity
The difference between a wood bathroom that lasts two years and one that lasts twenty is the finish. Raw wood is beautiful, but in a bathroom, it is a sponge for bacteria and mold.
Polyurethane vs. Oil / Wax
- Hardwax Oil (e.g., Rubio Monocoat): This penetrates the wood fibers rather than sitting on top. It looks incredibly natural and matte. However, it requires re-oiling every 1-2 years in a bathroom setting.
- Marine Grade Varnish (Spar Urethane): This builds a film on top of the wood. It is impervious to water. The downside is that it can look “plastic” if you use a semi-gloss. Always choose a satin or matte sheen to keep the organic feel.
Ventilation is Non-Negotiable
You cannot have significant wood elements in a bathroom with poor ventilation.
- CFM Calculation: Ensure your exhaust fan is rated for the size of your room. A good rule of thumb is 1 CFM per square foot of room area.
- Timers: Install a humidity-sensing switch that automatically turns the fan on when you shower and keeps it running for 20 minutes afterward to clear moisture.
Final Checklist: What I’d Do in a Real Project
If you are about to start your bathroom renovation, use this checklist to ensure your wood elements succeed.
- Check the Undertones: Bring a sample of your wood into the bathroom. Does your artificial light make it look yellow or pink? 3000K LED bulbs are usually best for wood; 4000K can make it look cold and green.
- Seal the Backside: If you are installing wood paneling, seal the back of the boards before installation. Moisture can penetrate from the wall side and cause cupping.
- Test the Water Drop: Before finalizing a vanity finish, drop a bead of water on the sample. It should bead up and sit on the surface. If it darkens the wood within 5 minutes, the seal is not strong enough.
- Plan for Expansion: Wood swells with humidity. Leave a 1/8 to 1/4 inch gap anywhere wood meets a fixed surface (like a wall or tile floor). Cover this gap with baseboard or silicone caulk that matches the wood tone.
- Coordinate Metals:
- White Oak looks stunning with Matte Black or Unlacquered Brass.
- Walnut pairs beautifully with Polished Nickel or Chrome.
- Teak works well with Oil Rubbed Bronze.
FAQs
Can I use wood inside the shower area?
Yes, but it is high maintenance. You must use a dense wood like Teak or Ipe. It should be constructed as a removable slatted floor or bench so you can lift it to clean the tile underneath. If you screw wood directly to the shower wall, water will eventually get behind it and cause rot.
How do I mix wood cabinets with wood floors?
Contrast is key. If your floors are a light white oak, go for a walnut vanity. If the floors and vanity match perfectly, the room can look like a sauna. If you must use the same wood species, vary the application (e.g., herringbone floor pattern vs. vertical grain vanity) to break up the visual mass.
Is solid wood better than veneer for bathroom vanities?
Actually, no. High-quality marine-grade plywood with a thick wood veneer is often more stable than solid wood in a bathroom. Solid wood expands and contracts significantly with humidity changes, which can crack paint or cause drawers to stick. Veneer on a stable substrate stays straight.
What is the best way to clean wood in a bathroom?
Avoid harsh chemical cleaners, bleach, or vinegar, which can strip the finish. Use a pH-neutral cleaner specifically designed for wood floors or furniture. Wipe up standing water immediately—do not let puddles sit on the counter.
Conclusion
Integrating wood into your bathroom design strikes a balance between nature and architecture. It softens the acoustics, adds visual warmth, and creates a spa-like atmosphere that tile alone simply cannot achieve. Whether you commit to a custom walnut vanity, a simple teak shower bench, or a full slat ceiling, the effort to maintain these elements is far outweighed by the beauty they provide.
Remember that successful design is about layering. Use the wood to anchor the space, then layer in your stones, metals, and textiles. By following the guidelines regarding species selection and sealing, you can enjoy the organic luxury of wood without worrying about water damage.
Picture Gallery


