
White Rock Landscape Ideas for Your Dream Yard
There is something instantly modern and refreshing about utilizing white rock in a landscape design. It acts as a powerful reflector of light, instantly brightening up dark corners of a yard and providing a crisp, high-contrast backdrop for greenery. Whether you are dealing with a shaded side yard that refuses to grow grass or you simply want a sleek, low-water alternative to a traditional lawn, white stone is one of the most versatile materials in my design toolkit.
I recently worked on a project for a client who had a small, north-facing courtyard that felt perpetually gloomy. By replacing the struggling, patchy sod with white marble chips and creating a structured grid of deep green boxwoods, we transformed the space into a bright, architectural sanctuary that felt twice as big. The white stone didn’t just cover the ground; it acted like a lighting element, bouncing sunlight into the adjacent living room windows.
However, using white rock requires restraint and specific technical knowledge to ensure it stays pristine and stays put. If you are looking for visual inspiration, you can scroll down to the Picture Gallery at the end of this post. Before you head to the stone yard, let’s walk through the design principles, installation realities, and maintenance schedules you need to know to get this look right.
1. Choosing the Right Stone for Function and Aesthetic
Not all white rocks are created equal, and choosing the wrong type is the most common error I see homeowners make. In landscape design, we generally categorize these into two main groups: crushed angular rock (often marble chips) and smooth river pebbles (often Mexican Beach Pebbles or similar).
Angular rock, like white marble chips, has sharp edges. These rocks lock together better than round stones, making them superior for driveways or walkways where you want a firm surface underfoot. They also tend to be brighter and more reflective, giving that “sparkling” white look. However, they are uncomfortable to walk on barefoot and can be difficult to clean if leaves get stuck in the jagged crevices.
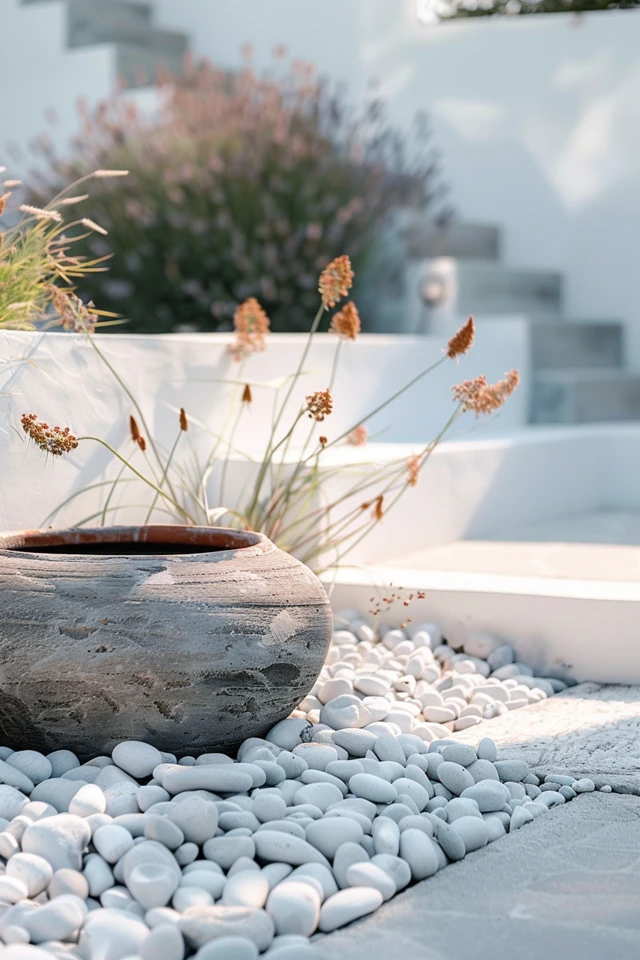
Smooth river rocks provide a softer, more organic aesthetic. They are matte rather than sparkly and feel much better underfoot if you have kids or pets running around. The downside is that round rocks roll. If you place them on a slope, they will migrate to the bottom of the hill after the first heavy rain. For sloped areas, you must use angular rock or install retention grids.
Designer’s Note: The “Wet Test”
One lesson I learned the hard way involves color variation. I once specified a “white” river rock that looked beautiful in the bag. However, when it rained, the stones turned a dull gray and beige. Before purchasing a bulk order, always buy a small bag, take it home, and hose it down. Ensure you are happy with the color of the stone when it is both dry and wet, as it will look different throughout the seasons.
2. Designing Modern Pathways and Spacing
White rock is frequently used as a filler material surrounding stepping stones, creating a “floating” effect that is very popular in modern and contemporary garden design. This layout reduces the amount of concrete needed while maximizing drainage.
When laying out a pathway, the spacing of your pavers is critical for comfort. A common mistake is spacing pavers too far apart, forcing you to hop from stone to stone, or too close together, which ruins the visual rhythm. For an average adult, the sweet spot for stepping stone placement is 24 inches from the center of one stone to the center of the next.
If you are using rectangular pavers, I prefer a size of at least 24 inches by 24 inches. Anything smaller tends to feel dinky and unstable when surrounded by loose rock. The white rock surrounding the pavers should be flush with the surface of the stone, or slightly below (about 1/4 inch) to prevent the gravel from being kicked onto the walking surface.
Common Mistakes + Fixes
Mistake: Laying pavers directly on top of the soil and pouring rocks around them.
Fix: Pavers will sink and tilt over time if not supported. Excavate the path area 4 inches deep. Lay a 2-inch base of compacted road base or crushed gravel, sand-set your pavers, and then fill the remaining negative space with your decorative white rock. This ensures the pavers stay level and safe.
3. High-Contrast Planting Strategies
The beauty of white landscaping rock lies in the contrast. Because the ground cover is so bright, you need plants that can stand up to that visual intensity. Pale green or yellow-green plants often look washed out or sickly when placed against bright white stone.
In my projects, I strictly use deep, dark greens or plants with purple and red foliage to create a deliberate pop. Sculptural plants work best because white rock creates a gallery-like floor that highlights the shape of the plant.
Here are my go-to plants for white rock landscapes:
- Snake Plant (Sansevieria): For warm climates, the vertical, dark green, and yellow architectural leaves look stunning against white marble.
- Agave or Yucca: These succulents offer a distinct geometric shape that complements the clean lines of a gravel bed.
- Boxwoods (Buxus): If you prefer a more traditional or English garden look, manicured round boxwoods provide a soft, deep green texture that contrasts the hard stone.
- Red Cordyline: The deep burgundy leaves provide a dramatic color break against the white floor.
When planting in rock, always leave a “breathing ring.” Pull the rocks back about 3 to 4 inches from the main stem of the plant. Rocks retain heat, and hot white stones touching the stem of a delicate plant can burn it or cause rot due to lack of air circulation.
4. Installation: Edging and Weed Control
White rock is an investment, and you want it to stay where you put it. This requires robust edging. Without a physical barrier, rocks will migrate into your lawn, your flower beds, and your neighbor’s yard.
For a clean, professional look, I recommend steel edging. It is thin, incredibly strong, and creates a nearly invisible line that separates the rock from the grass or mulch. Plastic edging is cheaper, but it tends to warp in the sun and heave out of the ground during freezes, ruining the clean lines essential to this look.
Weed Barrier Realities
You must install a high-quality landscape fabric underneath white rock. However, do not use solid plastic sheeting. Solid plastic traps water, creating a swampy mess underneath your rocks that can rot plant roots and breed mosquitoes. Use a heavy-duty, non-woven geotextile fabric. This allows water and air to pass through while stopping weeds from growing up from the soil.
Common Mistake: Skimping on rock depth.
Fix: If the layer of rock is too thin, you will see the black landscape fabric showing through within weeks. You need a minimum depth of 2 to 3 inches of rock to ensure full coverage. For 1-inch stones, aim for a 3-inch depth. For smaller pea gravel, a 2-inch depth is usually sufficient.
5. Managing Glare and Heat
One functional aspect of white rock that is often overlooked is its thermal properties. White surfaces reflect sunlight. While this keeps the ground cooler than black asphalt, it can significantly increase the ambient temperature in the immediate area due to reflected radiation.
If you have large glass windows facing south or west, placing a massive field of white rock directly outside them can cause glare issues inside the home. It can also bounce heat onto the siding of your house.
To mitigate this, I recommend breaking up large expanses of white rock with other materials. You might use a 3-foot border of white rock near a fence, but switch to wood decking or darker mulch closer to the house. Alternatively, plant a dense row of shrubs between the rock area and your windows to absorb the glare.
What I’d Do in a Real Project: A Mini Checklist
If I were designing your yard tomorrow, here is the order of operations I would follow:
- Measure twice: Calculate the square footage accurately. Rock is sold by the ton or cubic yard. A cubic yard generally covers 100 square feet at 3 inches deep.
- Excavate: Remove 3 inches of topsoil to ensure the finished rock level is flush with adjacent concrete or grass.
- Compact the subgrade: Tamp down the dirt so it is firm.
- Install edging: Hammer in steel edging to define the perimeter.
- Lay fabric: overlap seams by 6 inches and pin down with landscape staples.
- Place plants: Cut “X” shapes in the fabric to dig holes for plants.
- Spread rock: Use a wheelbarrow and a hard rake to spread the stone evenly.
- Rinse: Wash the dust off the stones immediately after installation to reveal their true color.
6. Maintenance and Cleaning
White things do not stay white without effort. This is the trade-off for the pristine look. Over time, organic debris like falling leaves, dirt, and pollen will accumulate on top of the rocks. If left to sit, this debris will decompose and turn into soil, which will eventually support weed growth on top of your fabric.
Invest in a leaf blower. This is the single most important tool for maintaining a rock landscape. You should blow debris off the rocks at least once a week during autumn and spring. Raking is difficult because it tends to move the rocks along with the leaves.
In humid climates, white rocks can develop green algae or mildew, turning them a dingy green or black. To fix this, you can spray the rocks with a mixture of water and white vinegar (a 50/50 ratio works well) on a sunny day. For stubborn stains, a pressure washer on a low setting is effective, but be careful not to blast the rocks out of place.
Designer’s Note: Dealing with Discoloration
If you have iron-rich water from an irrigation system, your white rocks may turn orange or yellow over time due to rust stains. Check the aim of your sprinkler heads to ensure they are not spraying directly onto the hardscape. If staining occurs, you will need a specialized rust remover product safe for masonry.
Final Checklist: Is White Rock Right for You?
Before you commit to this landscape style, run through this final mental checklist to ensure it aligns with your lifestyle and environment:
- Tree Cover: Do you have large deciduous trees (trees that drop leaves) directly overhead? If yes, be prepared for high maintenance. Picking oak leaves out of white gravel is tedious.
- Drainage: Do you need better drainage? White rock is excellent for allowing water to percolate into the ground.
- Traffic: Will you be walking here barefoot? If yes, choose smooth rounded pebbles, not crushed marble.
- Budget: Have you calculated the cost of steel edging and weed barrier in addition to the stone? The prep work often costs more than the rock itself.
FAQs
Q: How much white rock do I need?
A: The general rule of thumb is that one cubic yard of rock covers approximately 100 square feet at a depth of 3 inches. However, this varies by stone size. Always order 10% more than you think you need to account for settling and gaps.
Q: Will white rocks turn yellow?
A: They can. White marble contains minerals that can oxidize over time, and exposure to iron-rich well water or fertilizers can cause yellowing. Regular rinsing helps, but some natural aging is expected.
Q: Can I lay white rock over existing grass?
A: No. The grass will eventually die and decompose, causing the ground to settle unevenly. The remaining root structure will also find a way to grow through. You must remove the sod layer before installing stone.
Q: Is white rock safe for pets?
A: generally, yes. However, crushed stone can be sharp on sensitive paws. Also, in very hot climates, white rock can get hot enough to be uncomfortable for dogs to walk on during the peak of the day.
Conclusion
Integrating white rock into your landscape is a bold design choice that pays off with high curb appeal and low water usage. It creates a sense of cleanliness and order that organic mulches simply cannot replicate. By paying attention to the scale of the stone, the quality of the edging, and the contrast of your planting, you can create a yard that feels like a high-end resort.
Remember that hardscaping is permanent. Take the time to prep your ground properly with excavation and commercial-grade weed barriers. While the initial labor is significant, the result is a durable, stylish foundation that will keep your home looking polished for years to come.
Picture Gallery


