
Winning Scarecrow Ideas for Contest Creativity
Entering a community scarecrow contest is about more than just stuffing some old jeans with hay. To truly catch the eye of the judges and stand out in a crowded field, you have to approach the project with the same eye for detail and composition that a professional designer uses for a high-end window display.
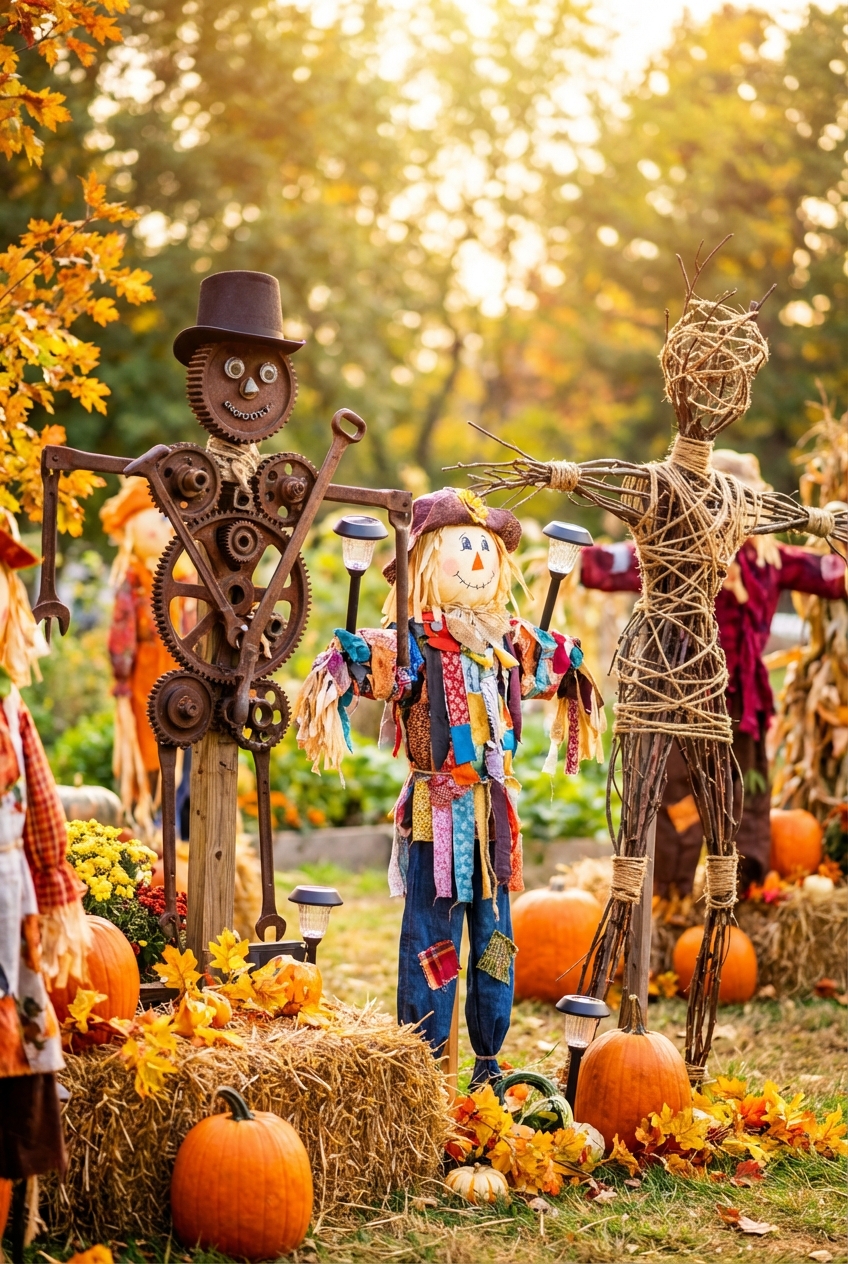
If you are looking for visual inspiration to get your project started, keep in mind that the complete Picture Gallery is at the end of this blog post. We will walk through the technical and creative steps needed to turn a simple garden guardian into a prize-winning masterpiece.
At-a-Glance: Key Takeaways
- Focus on a clear, recognizable silhouette that reads well from at least 30 feet away.
- Prioritize weatherproofing by using synthetic stuffing materials like bubble wrap or plastic bags rather than organic straw.
- Incorporate a strong narrative or “story” that allows the viewer to immediately understand the character’s personality.
- Use professional lighting techniques, such as low-voltage solar spotlights, to ensure the entry looks great after sunset.
- Pay attention to scale and proportion; a scarecrow that is too small for its environment will disappear into the landscape.
What This Style/Idea Means (and Who It’s For)
The “Winning Scarecrow” style is rooted in character design and environmental storytelling. Unlike a traditional farm scarecrow meant to actually deter birds, a contest entry is a piece of temporary public sculpture. It is designed to evoke an emotional response, whether that is laughter, nostalgia, or a bit of autumnal spookiness.
This approach is for the enthusiast who wants to move beyond the basics. It is for the person who enjoys the “theatre” of seasonal decorating and wants to create a focal point that feels intentional and curated. Whether you are a homeowner participating in a neighborhood crawl or a business owner looking to draw foot traffic, these principles apply.
We treat the scarecrow as a protagonist in a larger scene. This means the clothing choice, the posture, and even the “props” surrounding the figure are all working together to sell a specific concept. It is not just a person made of straw; it is a “Chef from the 1950s,” a “Time-Traveling Explorer,” or a “Garden Witch.”
The Signature Look: Ingredients That Make It Work
A winning entry requires a balance of textures and a cohesive color palette. As a designer, I look for items that have “visual weight.” This means using materials that don’t just look good up close but carry their presence across a lawn.
- The Armature: A sturdy frame is the foundation. While many use a simple wooden cross, a PVC pipe frame allows for more dynamic posing, such as a scarecrow sitting on a bench or climbing a ladder.
- High-Contrast Textures: Combine the rough grain of burlap with the smoothness of vintage polyester or the shine of a plastic prop. These contrasts create visual interest.
- The Head: This is the focal point. Avoid generic plastic masks. Instead, try hand-painted burlap, a carved pumpkin, or an upcycled vintage birdhouse.
- The Wardrobe: Clothes should be one size too large. This allows for extra stuffing, which creates a more robust, “alive” silhouette.
- The Base/Environment: A scarecrow standing alone in the middle of a flat lawn looks unfinished. Surround your entry with hay bales, pumpkins, or even an old wooden chair to ground it in the space.
Layout & Proportions (Designer Rules of Thumb)
In interior design, we talk a lot about scale. If you put a tiny chair in a massive room, it looks lost. The same applies to your yard. A contest scarecrow needs to command its territory.
Rule of the Human Scale:
For a scarecrow to look “right,” it should stand between 5 feet 10 inches and 6 feet 2 inches. If it is shorter, it can look like a child or a toy, which might not be the intent. If it is sitting, ensure the seat height is approximately 18 inches from the ground, mimicking a standard chair height, to maintain realism.
The Rule of Thirds in Placement:
Do not place your scarecrow dead-center in your yard. Instead, imagine your lawn divided into a grid. Place the figure at one of the intersections of those lines. This creates a more dynamic and professional-looking composition.
Designer’s Note:
In my experience, the biggest mistake people make is failing to account for “The Slump.” Over time, the stuffing settles, and your 6-foot-tall hero becomes a 5-foot-tall hunchback. I always recommend over-stuffing the torso and using zip ties to anchor the shoulders directly to the frame. This ensures the posture stays upright for the entire duration of the contest.
Step-by-Step: How to Recreate This Look
Creating a professional-grade scarecrow takes a weekend of work. Do not rush the process, or the lack of structural integrity will show.
- Construct the Skeleton: Use 2×4 lumber or 1-inch PVC pipe. If using wood, screw a horizontal crossbar (the shoulders) about 12 inches from the top of the vertical post. If using PVC, you can use “elbow” and “T” joints to create realistic limb angles.
- Build the “Muscle”: Wrap the frame in chicken wire or use pool noodles to create volume. This prevents the clothes from looking flat. For the torso, a common pro-tip is to use a cheap plastic laundry basket turned upside down over the frame to give the chest a broad, sturdy shape.
- Weatherproof the Stuffing: Avoid using real straw for the entire body. It gets heavy when wet and eventually molds. Instead, fill the limbs with plastic grocery bags, bubble wrap, or packing peanuts. Use real straw only at the cuffs of the sleeves and the bottom of the pants for the “look.”
- Dress the Character: Secure the clothes using safety pins or wire from the inside. If the character is meant to be outside for weeks, spray the fabric with a UV-protectant spray to prevent the sun from bleaching the colors out before the judging begins.
- Detail the Face: If using burlap, use outdoor acrylic paint or permanent markers. If using a pumpkin, consider a “funkin” (artificial pumpkin) so it doesn’t rot. Add accessories like a hat, glasses, or a scarf. Secure the hat with a screw or heavy-duty wire so it doesn’t blow away in a fall breeze.
- Anchor the Display: Dig a hole at least 18 inches deep for your main post, or use a heavy umbrella stand hidden by hay bales. A top-heavy scarecrow is a liability in a windstorm.
Budget Breakdown: Low / Mid / Splurge
You can win a contest at any price point, provided you are creative with your materials.
Low Budget (Under $30):
Focus on upcycling. Use old clothes from your closet, free pallets for the frame, and plastic bags from the grocery store for stuffing. Your main costs will be a bag of zip ties and a small bundle of decorative straw for the accents.
Mid Budget ($50 – $150):
This level allows for better materials. You can buy a high-quality thrift store costume, purchase a realistic resin head or mask, and invest in a few solar-powered spotlights to highlight the work at night. You might also add a “set” like a real wooden rocking chair or a small fence.
Splurge Budget ($200+):
At this level, you are looking at “museum-quality” displays. This includes high-end animatronics (moving heads or waving hands), professional theater-grade costumes, and a fully realized environment with faux-autumnal foliage, fog machines for special events, and programmable LED lighting systems.
Common Mistakes (and How to Fix Them)
Even the most creative ideas can fail due to technical oversights. Here are the most frequent issues I see in the field.
- The “Invisible” Scarecrow: Using dark clothes against a dark background (like a brick wall or dark bushes).
Fix: Use bright, saturated colors like yellow, orange, or plaid to make the figure pop against the landscape.
- Lack of Expression: A face that is too small or has no features.
Fix: Exaggerate the features. Eyes should be the size of tennis balls so they can be read from the street.
- The “Limp Rag” Look: Not enough stuffing in the joints.
Fix: Use “inner sleeves” made of cardboard or plastic pipe inside the arms to keep them stiff and posed.
- The Wind Hazard: A scarecrow that spins or falls over in a 10mph breeze.
Fix: Always use a three-point anchoring system if possible, or weight the base with sandbags hidden under the clothes.
Room-by-Room Variations (Outdoor Placement)
While we usually think of scarecrows on the front lawn, the placement changes the design requirements.
The Porch/Entryway Scarecrow:
Since viewers will be closer, the details matter more. You can use finer fabrics and more delicate props. Scale it down slightly so it doesn’t overwhelm the front door. Ensure it is sitting or leaning so it doesn’t block the path for guests or deliveries.
The Curb-Side Scarecrow:
This needs to be big and bold. Think of it like a billboard. Use high-contrast colors and a very simple, iconic silhouette. Skip the tiny details and focus on the overall shape.
The Garden/Backyard Scarecrow:
If your contest involves a “backyard tour,” you can create a scene that is meant to be viewed from 360 degrees. Most scarecrows have a “bad side” (the back), but a garden entry should be finished all the way around. Ensure the back of the head and the spine of the clothes are just as detailed as the front.
Finish & Styling Checklist
Before you call the judges, go through this checklist to ensure your entry is “designer-approved.”
- Check the silhouette: Stand 30 feet away and squint. Is the shape clear?
- Secure the accessories: Give the hat and props a firm tug. Will they survive a storm?
- Assess the “Eye Level”: Is the scarecrow’s face positioned to look toward the street, or is it staring at the ground?
- Hide the mechanics: Are there any visible zip ties, wires, or PVC pipes showing? Cover them with straw or fabric.
- Test the lighting: Come out at dusk. Is the face illuminated, or is it a dark blob?
- Clean the site: Rake up any stray plastic bags or clippings around the base of the display.
What I’d Do in a Real Project
If I were designing a contest-winning scarecrow for a client today, here is my personal “pro-level” checklist:
- I would choose a theme that has “nostalgic resonance,” like a character from a classic 80s movie or a historical figure.
- I would use a “triangulated” lighting setup: one spotlight on the face, one on the props, and a dim backlight to separate the figure from the bushes.
- I would add a “kinetic” element, such as a wind-chime or a light fabric scarf that moves in the breeze, to add the illusion of life.
- I would place a small, printed “Artist Statement” or a humorous sign at the base to engage the judges.
- I would scent the display. Believe it or not, a little bit of cinnamon or apple cider scent sprayed on the fabric can subtly influence a judge’s perception during a walk-through.
FAQs
How do I keep my scarecrow from smelling after it rains?
The smell usually comes from wet straw or damp fabric. Using synthetic stuffing like plastic bags is the first step. If the clothes get soaked, you can spray them with a mixture of water and white vinegar, which acts as a natural antimicrobial.
Can I use a real pumpkin for the head?
You can, but it is risky for a multi-week contest. If you choose a real pumpkin, do not carve it until the day before judging. An uncarved pumpkin will last much longer. Better yet, use a high-quality ceramic or foam pumpkin and weight it so it doesn’t make the scarecrow top-heavy.
What is the best way to attach a scarecrow to a chair?
Don’t just sit it there. Use heavy-gauge wire to go through the back of the clothes and around the slats of the chair. If it’s a windy area, I actually screw the wooden frame of the scarecrow directly into the wooden frame of the chair.
How much straw do I actually need?
Surprisingly little. If you use the “stuffing” methods mentioned above, one standard bale of straw is enough for three or four scarecrows. You only need the straw to peek out of the neck, sleeves, and pant legs.
What kind of paint should I use for the face?
Outdoor acrylics are best. They are flexible and won’t crack as the burlap moves. For a more professional look, use a fabric medium mixed with your paint to help it soak into the fibers rather than sitting on top.
Conclusion
Winning a scarecrow contest is an exercise in creativity, engineering, and storytelling. By focusing on a sturdy armature, weather-resistant materials, and professional-level proportions, you create more than just a seasonal decoration—you create a character that captures the imagination of everyone who passes by.
Remember to look at your creation through the eyes of the viewer. Does it tell a story? Is it visible from the street? Does it feel like a cohesive part of your home’s exterior design? When you combine these technical “rules of thumb” with your own unique personality, you have a recipe for a blue-ribbon entry.
Picture Gallery


