
Charming Decorative Corner Fence Ideas for Your Yard
One of the most effective ways to boost curb appeal is by focusing on the boundaries of your property. You do not always need a full perimeter fence to make a statement. Sometimes, a well-placed corner accent is all it takes to define your space.
I remember a project where a client struggled with a large, undefined front lawn that felt disconnected from the street. By installing a simple L-shaped picket corner with hydrangeas, we instantly anchored the property. For plenty of visual inspiration on how these setups look in real homes, be sure to check out the Picture Gallery at the end of this blog post.
This guide will walk you through designing, selecting, and installing a decorative corner fence. We will cover everything from material durability to the exact plants that help these structures shine.
Planning Your Corner Layout and Placement
Before you buy materials, you need a plan. A corner fence serves a specific purpose, usually aesthetic or functional protection.
If you are dealing with a corner lot, this fence prevents people or dogs from cutting across your grass. It acts as a polite but firm psychological barrier.
If you are framing a driveway, it protects your sprinkler heads and flower beds from careless drivers.
The Golden Rule of Placement
Never install a corner fence right on the property line without checking your local zoning laws. Most municipalities require a setback, usually between 6 to 12 inches from the sidewalk or curb.
From a design perspective, giving yourself a buffer is always better. It prevents the fence from looking crowded and protects it from snow plows or road debris.
Scale and Height
The height of your corner accent should relate to the size of your yard. For most residential front yards, a height of 36 to 42 inches is ideal.
Anything taller than 48 inches in a front yard can feel aggressive or fortress-like. You want this to look like a charming architectural detail, not a barricade.
Designer’s Note: The “Sight Triangle”
One lesson I learned early in my career involved a corner fence that was too tall. It actually blocked the view of traffic for cars pulling out of the driveway.
Always respect the “sight triangle.” If your fence is near a street corner or driveway, keep it low enough (usually under 30 inches) so drivers can see over it easily. Safety always trumps aesthetics.
Material Selection Guide for Longevity
The material you choose dictates the maintenance level and the vibe of the home. Here is how I categorize them based on durability and style.
Natural Wood (Cedar and Redwood)
This is the gold standard for purists. Western Red Cedar is naturally rot-resistant and has a beautiful grain.
It takes paint and stain exceptionally well. However, it requires maintenance every 2 to 3 years to prevent graying.
If you are on a budget, pressure-treated pine is an option, but it tends to warp more easily. If you use pine, let it dry out for a few months before painting it.
Vinyl and PVC
Modern vinyl fencing has come a long way. It is the best choice for busy families because it requires zero painting.
Look for “virgin vinyl” rather than recycled blends, as it holds up better against UV rays. The downside is that it can look a bit shiny or plastic up close.
Aluminum and Steel
For a more formal or historic look, black aluminum mimics the look of wrought iron without the rust issues.
This style pairs beautifully with brick homes. It is also “visually transparent,” meaning it does not block the view of your garden beds behind it.
Common Mistakes + Fixes
Mistake: Using untreated wood posts in direct contact with soil.
Fix: Even if you use cedar, coat the bottom portion of the post (the part going underground) with a liquid rubber sealant. Alternatively, use metal post anchors so the wood never touches the dirt.
Styling Your Corner Fence
The style of the fence must speak the same language as your house. A mismatch here creates visual confusion.
The Classic Picket
This is the L-shaped white fence everyone imagines. It works perfectly with Cape Cod, Colonial, and Farmhouse styles.
Vary the picket tops for interest. “Dog-ear” or “Gothic” points add a historic touch, while flat tops look cleaner and more modern.
Rustic Split Rail
If you have a ranch-style home or a woodland garden, split rail is the way to go. It is rugged, informal, and looks better as it ages.
This style relies heavily on the landscaping around it. Without plants, a small section of split rail can look like broken farm equipment.
Modern Horizontal Slats
For mid-century modern or contemporary homes, avoid vertical pickets. Go for horizontal boards with spacing in between.
Use varied widths of wood (like alternating 1×4 and 1×2 boards) to create texture. Keep the wood natural or stain it a dark charcoal.
Choosing the Right Post Caps
The cap is the jewelry of the fence. A simple flat cap is modern, while a ball finial is traditional.
I often recommend copper post caps. They start shiny but patina to a beautiful verdigris green over time, adding a layer of established elegance to the yard.
Landscape Layering and Hardscaping
A corner fence floating in the middle of a lawn looks awkward. It needs to be anchored by a garden bed.
This is where the “interior design” of the outdoors comes into play. You need to create layers.
The Rule of Three
When planting around a corner fence, think in three heights:
- Back Layer (The Anchor): Tall shrubs or climbing vines that hug the fence.
- Middle Layer (The Color): Perennials that bloom in your preferred palette.
- Front Layer (The Border): Ground cover or low annuals that spill over the edging.
Plant Recommendations
For the anchor layer, Hydrangeas are a classic choice because their blooms are heavy and romantic. They soften the hard lines of the wood.
If you want year-round structure, Boxwoods are bulletproof. Keep them trimmed in a spherical shape to contrast with the square fence posts.
For climbers, Clematis is fantastic. It is less aggressive than ivy and produces stunning flowers that weave through picket slats.
Hardscaping Basics
Don’t let the grass grow right up to the fence. It makes mowing a nightmare and leads to trimmer damage on the posts.
Create a kidney-shaped or curved garden bed around the corner fence. Fill it with dark mulch or river rock.
Lighting the Corner
Lighting adds a premium feel instantly. Solar post caps are the easiest solution, but they often cast a cool, blueish light that looks cheap.
I recommend low-voltage uplighting installed at the base of the fence. Aim the light up at the corner post to highlight the wood grain and the foliage.
Installation and Maintenance Best Practices
You can hire a pro, but a corner fence is a manageable weekend DIY project. Here is the technical breakdown.
Digging the Holes
The stability of your fence depends entirely on the corner post. You need to dig deep enough to beat the frost line in your area.
For most US zones, this means digging at least 24 to 30 inches deep. If you don’t go deep enough, the freeze-thaw cycle will heave the post out of the ground within two years.
Setting the Posts
Use a fast-setting concrete mix. You usually do not need to pre-mix it in a wheelbarrow for small posts.
Pour the dry mix into the hole around the post, then add water according to the bag’s instructions. Use a post level to check plumb (vertical straightness) constantly while it sets.
Angles and Geometry
Most corner fences are set at a 90-degree angle. However, if your driveway curves, your fence should follow that line.
You can buy 45-degree brackets or flexible rail systems if you need a softer curve. A 90-degree fence on a curved driveway often looks rigid and out of place.
Real-Project Checklist: What I’d Do
If I were installing a corner fence at my own home this weekend, here is exactly how I would handle it:
- Call 811: I would have the utility lines marked three days before digging. This is non-negotiable.
- Mock it up: I would drive wooden stakes into the ground and run string between them to visualize the size. I’d leave it there for 24 hours to ensure I like the placement.
- Buy 10% extra: If the project needs 20 pickets, I would buy 22. Lumber quality varies, and having spares saves a trip back to the store.
- Pre-stain: I would stain or paint the wood before assembly. It is much harder to get a brush into the nooks and crannies once the fence is built.
Final Checklist for Success
Before you break ground, run through this summary to ensure you haven’t missed a step.
1. Design Phase
- Choose a style that matches your home’s architecture.
- Determine the height (36-42 inches recommended).
- Check the “sight triangle” for safety.
2. Material Phase
- Select rot-resistant wood or high-quality vinyl.
- Purchase proper hardware (galvanized or stainless steel screws only).
- Buy post caps and decorative finials.
3. Preparation Phase
- Call local utilities to mark underground lines.
- Mark the exact layout with spray paint on the grass.
- Remove sod from the installation area to create a garden bed.
4. Installation Phase
- Dig holes to the frost line depth.
- Add 2 inches of gravel to the bottom of the hole for drainage.
- Set posts in concrete and ensure they are plumb.
- Attach rails and pickets after concrete cures (usually 24 hours).
Frequently Asked Questions
How much does a decorative corner fence cost?
For a DIY project using cedar, expect to spend between $150 and $300 for a single corner setup. Vinyl kits can be cheaper, around $100 to $200. If you hire a handyman, labor will likely double that cost.
Do I need a permit for a corner fence?
In many jurisdictions, fences under 6 feet do not require a permit, but corner fences near intersections have special rules. Always check your local building department’s website or call them. It takes five minutes and saves you from fines.
How do I keep the weed eater from destroying the posts?
This is a major issue. The best fix is to install a designated garden bed with mulch around the fence so grass doesn’t grow near it. You can also install metal or plastic “post shields” at the base, but they can look clunky.
Can I install a corner fence on a slope?
Yes. You have two options: “rack” the fence (follow the slope) or “stair-step” it. For small corner fences, racking usually looks better and smoother. Stair-stepping can look jagged on such a short run.
Conclusion
A decorative corner fence is more than just two posts and some rails. It is a deliberate design choice that adds structure, history, and charm to your yard.
By following the rules of scale, selecting durable materials, and integrating thoughtful landscaping, you can transform a boring patch of grass into a welcoming focal point. It is a manageable project with a high return on investment regarding curb appeal.
Take your time with the layout, invest in quality materials, and don’t forget the flowers. The difference is in the details.
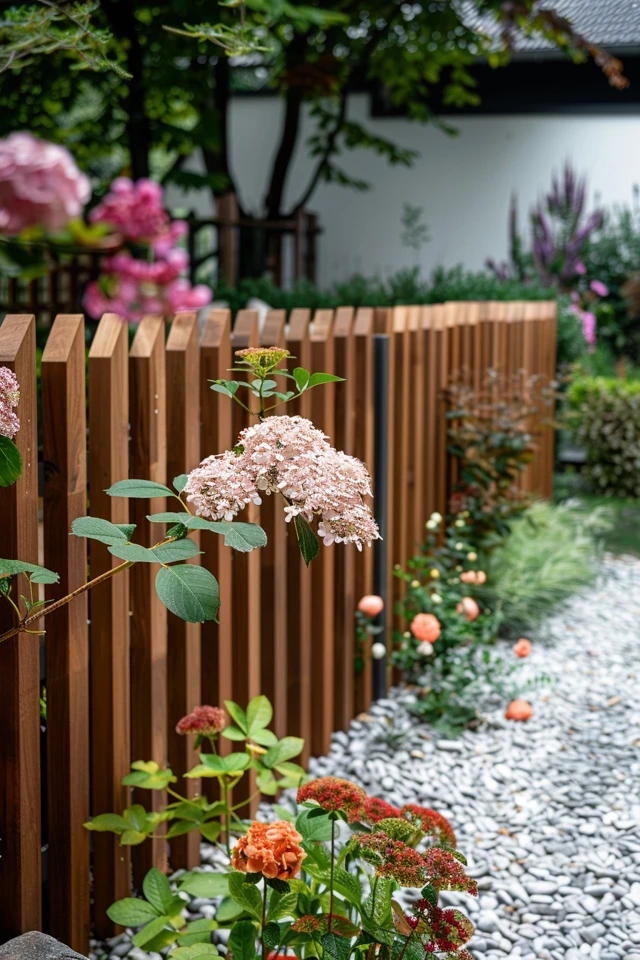
Picture Gallery


