
Compact Beauty: Makeup Storage Ideas for Small Spaces
The struggle of getting ready in a cramped apartment or a bathroom with zero counter space is a universal design challenge. I have seen countless clients try to balance their love for beauty products with the reality of a 40-square-foot bathroom. When you lack square footage, the morning routine often turns into a juggling act of palettes, brushes, and cords.
However, a small footprint does not mean you have to sacrifice a dedicated beauty station. In interior design, constraints often lead to the most creative and efficient solutions. For visual inspiration, make sure to check out our curated Picture Gallery at the end of this post. By shifting our focus from sprawling counters to vertical integration and clever concealment, we can create a vanity space that feels luxurious rather than cluttered.
The key lies in intentionality and understanding the ergonomics of your daily routine. We aren’t just looking for bins to throw things in; we are looking for architectural solutions and furniture pieces that work double-time. Whether you are a renter needing non-permanent fixes or a homeowner ready for a custom build, these strategies will help you reclaim your space and your morning sanity.
1. Utilizing Vertical Wall Space: The Floating Vanity
In small rooms, floor space is the most valuable currency. The moment you place a bulky cabinet with legs on the floor, the room shrinks visually. This is why I almost exclusively recommend floating elements for tight quarters.
A wall-mounted shelf or floating drawer system keeps the flooring continuous underneath. This trick forces the eye to travel all the way to the wall, making the room feel wider.
When selecting a floating shelf to act as a vanity, depth is critical. You do not need a standard 24-inch deep desk; that is overkill for makeup application. I recommend a depth of 12 to 15 inches. This provides enough surface area for a mirror and your immediate tools without encroaching on the traffic flow of the room.
Designer’s Note: The “Elbow Room” Rule
A common failure in DIY vanity projects is installing the shelf too close to a corner or adjacent wall. You need room to move your arms while styling hair or applying mascara. Always leave at least 6 to 10 inches of clearance on either side of your seating position if possible. If you are squeezed into a niche, ensure the width of the niche is at least 30 inches to avoid feeling claustrophobic.
Install heights are equally important.
If you plan to sit on a standard chair, mount your tabletop at 30 inches from the finished floor. If you prefer a counter-height stool, aim for 36 inches. Always mock this up with painter’s tape before drilling holes to ensure your knees clear the underside of the shelf.
Material Selection for Small Spaces
For the shelf itself, consider glass or acrylic if the room is incredibly tight. Transparent materials have zero “visual weight,” meaning they don’t block light or sightlines. If you prefer wood, match it to the wall color to make it recede, or choose a high-gloss finish that reflects light.
2. The “Hidden” Vanity: Dual-Purpose Furniture
Not every home has space for a standalone vanity. In many city apartments, the bedroom or living area must absorb this function. The solution here is the “hidden” vanity—furniture that looks like a desk or console but opens up to reveal storage.
The classic flip-top desk is a winner here. When closed, it is a sleek writing surface or a place to drop your keys. When the top lifts, it reveals a mirror and segmented storage for your products. This keeps visual clutter to an absolute minimum, which is essential for mental clarity in small living spaces.
Common Mistakes + Fixes
Mistake: Using a deep writing desk as a vanity.
Fix: Makeup items are small. Deep drawers become black holes where lipsticks go to die. Use shallow console tables (12-18 inches deep). If you must use a deep desk, use drawer dividers that lock into place to prevent items from sliding to the back.
Mistake: Ignoring the chair.
Fix: A bulky office chair ruins the aesthetic of a bedroom vanity. Choose a ghost chair (acrylic) or a small ottoman that can tuck completely underneath the console when not in use. This preserves your walkways.
What I’d do in a real project:
- I would source a vintage console table with a shallow depth.
- I would line the drawers with velvet or felt to prevent products from rolling and clicking.
- I would install a dedicated power strip inside the drawer or mounted to the back leg to keep hair tool cords invisible.
3. Lighting: The Make-or-Break Factor
You can have the most organized storage in the world, but if the lighting is poor, the setup fails. In small spaces, we often rely on a single overhead ceiling fixture, which casts unflattering shadows under the eyes and chin.
For a makeup station, lighting must be at face level. This is non-negotiable. You need cross-illumination—light coming from both the left and right sides of the mirror.
The Technical Specs:
When buying bulbs or integrated LED mirrors, pay attention to the Kelvin (K) rating and the CRI (Color Rendering Index).
- Kelvin: Aim for 3000K to 4000K. This mimics natural daylight. Anything under 2700K is too yellow (candlelight), and anything over 5000K is too blue (hospital lighting).
- CRI: Look for a CRI of 90 or higher. This ensures that colors look true to life. A low CRI will make reds look muddy, leading to mismatched foundation or overly aggressive blush application.
Sconces vs. Vanity Bars
If you are renting and cannot hardwire sconces, do not despair. Plug-in sconces are a fantastic design feature. Mount them so the bulb is roughly 60 to 66 inches from the floor, which is standard eye level for most people while standing. If you are seated, adjust accordingly so the light source aligns with your face, not your forehead.
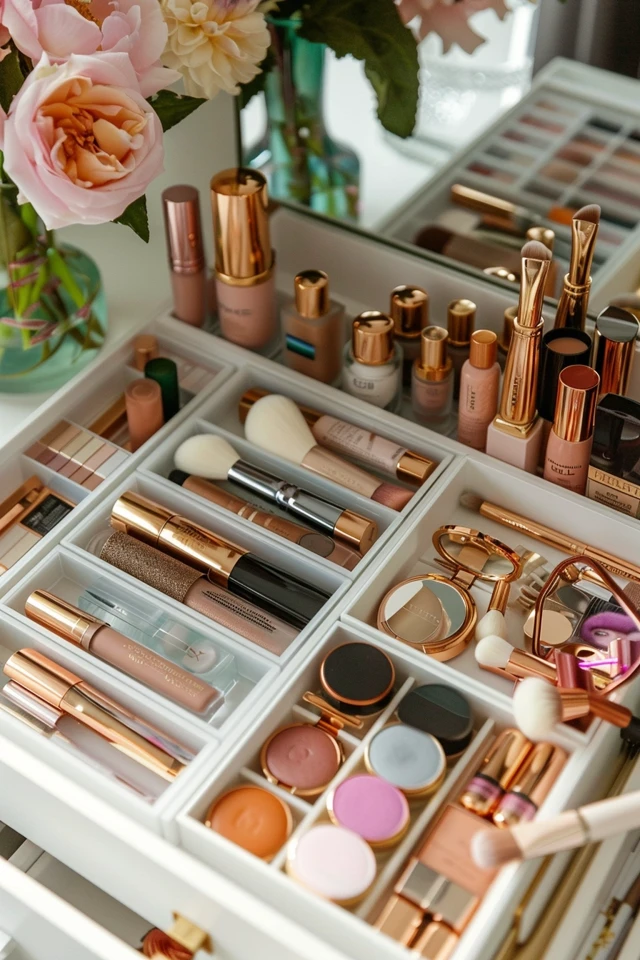
4. Interior Drawer Organization and “Micro-Storage”
The battle for organization is won or lost inside the drawers. In a small vanity, you do not have the luxury of “junk drawers.” Every square inch counts.
I use a “zoning” approach with my clients. We categorize items by frequency of use, not just by type. Daily essentials (concealer, mascara, brow gel) go in the front-most compartment or the top drawer. Special occasion items (glitter palettes, bold lips) go to the back or lower drawers.
Acrylic vs. Bamboo Dividers
I prefer clear acrylic dividers for makeup. They are easy to wipe clean—spilled foundation ruins bamboo or fabric bins instantly. Furthermore, clear dividers allow you to see exactly what you have, preventing the accidental purchase of duplicates.
The Rule of Decanting
If you must store items on the counter due to lack of drawer space, aesthetics become functional. Packaging adds visual noise. I recommend decanting cotton rounds, swabs, and sponges into matching glass or acrylic jars. It turns utilitarian items into decor.
Micro-Storage Solutions:
- Stackable Palettes: Use vertical file organizers (like those for letters) to store eyeshadow palettes upright like books. It saves massive amounts of horizontal space.
- Magnetic Boards: For ultra-tiny spaces, frame a sheet of magnetic metal on the wall. Glue small magnets to the back of your compacts. This turns your makeup collection into wall art and uses zero counter space.
5. Renter-Friendly Mobile Solutions
Sometimes, you cannot drill holes, and you do not have space for new furniture. This is where the utility cart becomes your best friend. However, there is a right way and a wrong way to style a cart so it doesn’t look like a dorm room.
The Tiered Logic
Treat the cart like a piece of architecture.
- Top Tier: Daily essentials and aesthetically pleasing perfumes. Keep this sparse.
- Middle Tier: Palettes and skincare bottles. Use bins here to keep things upright.
- Bottom Tier: The ugly stuff. Hair dryers, curling irons, and heavy distinct bottles.
To elevate the look, color-coordinate the cart to your walls. If you have white walls, get a white cart. It will blend in rather than standing out as a piece of clutter.
Over-the-Door Options
Don’t neglect the back of your bathroom or bedroom door. Hanging organizers have evolved beyond the cheap plastic shoe pockets. Look for systems with structured baskets and over-the-door hooks that utilize metal and canvas. This utilizes “dead” air space that is otherwise wasted.
Designer’s Note: The Weight Distribution
When using mobile carts or door organizers, heavier items must always go on the bottom. This lowers the center of gravity, making the unit stable. I have seen top-heavy carts tip over, shattering expensive powders. Stability is key.
Final Checklist: Planning Your Compact Vanity
Before you buy a single bin or shelf, run through this checklist to ensure your plan is solid.
1. Inventory Audit
- Lay out every single beauty item you own.
- Throw away expired products (mascara > 3 months, liquid foundation > 1 year).
- Be realistic: If you haven’t used it in 6 months, you don’t have space for it.
2. Measure Your Zone
- Measure width, depth, and height.
- Account for swing radius of doors and drawers.
- Check for outlet proximity for hair tools and lighted mirrors.
3. Select Your “anchor”
- Is it a floating shelf? A console? A cart?
- Confirm the scale fits the room (use painter’s tape on the floor/wall).
4. Lighting Check
- Do you need plug-in sconces?
- Is there natural light? (Never rely solely on a window; it changes throughout the day).
5. Component Shopping
- Buy dividers after you measure the drawers of your new unit.
- Ensure containers are wipeable.
Frequently Asked Questions
How do I organize hair tools in a small space?
Heat-resistant holsters are the best solution. They can hang on the side of a cabinet, a cart, or a towel bar. They allow you to put tools away while they are still hot, clearing your counters immediately. Cord tamers (velcro straps) are also essential to prevent the “spaghetti” mess of wires.
Is a lighted mirror enough, or do I need wall lights?
A high-quality lighted vanity mirror is often sufficient for the makeup application itself. However, it does not provide ambient light for the room. I recommend a lighted mirror for task work, combined with a standard ceiling fixture for general navigation.
How do I keep dust off open shelving?
This is the downside of open storage. If you use open shelves, you must commit to a weekly dusting routine. To mitigate this, store items in covered acrylic drawers or attractive lidded boxes on the shelves. Only leave sealed bottles (like perfume) or items you use daily completely exposed.
Can I put a vanity in a walk-in closet?
Absolutely. This is often the best use of space. If you have a windowless closet, lighting becomes the priority. Use 4000K LED strips along the sides of the mirror to simulate daylight. Ensure you have ventilation or keep the door open while getting ready to prevent the space from becoming too hot.
Conclusion
Creating a functional makeup station in a small space is less about buying more storage products and more about editing and ergonomics. It requires a hard look at what you actually use and a creative approach to where you put it.
By leveraging vertical space, choosing double-duty furniture, and prioritizing lighting, you can carve out a sanctuary for self-care in even the tightest floor plan. Remember that a small space forces you to be curated. It prevents the accumulation of clutter and ensures that everything you own is something you truly love and use.
Start with the measurements, audit your collection, and build a station that serves your routine. You deserve a space that makes you feel ready to take on the day, regardless of your square footage.
Picture Gallery


