
Concrete Patio Border – Creative Ideas for Your Yard
A standard concrete slab is the workhorse of backyard design. It is durable, functional, and relatively affordable to install, but let’s be honest: it can look incredibly flat and unfinished on its own. Adding a border to your concrete patio is the landscaping equivalent of framing a piece of art; it provides structure, defines the space, and elevates the overall aesthetic from “construction site” to “outdoor living room.”
There are endless ways to approach this, from hardscaping additions like brick and stone to softscaping solutions using plants and textures. The goal is to create a visual transition between your hard patio and the softer elements of your lawn or garden. We have curated a comprehensive Picture Gallery at the end of this blog post to spark your imagination.
Whether you are pouring a new slab or trying to dress up an existing one, the right border changes everything. I have spent years helping clients rescue boring grey rectangles, and I am going to walk you through the most effective design strategies to give your patio the edge it deserves.
1. The Classic Contrast: Brick and Paver Borders
One of the most timeless ways to finish a concrete patio is by edging it with contrasting clay bricks or concrete pavers. The red or deep brown tones of clay brick provide a warm counterpoint to the cool, industrial grey of concrete. This is my go-to solution for traditional, colonial, or farmhouse-style homes because it instantly adds a sense of history and permanence.
When designing a brick border, the orientation of the brick matters just as much as the color. A “soldier course” (bricks laid side-by-side standing upright) creates a strong, regimented line that draws the eye. Alternatively, a “running bond” (bricks laid end-to-end) can make the patio feel wider and more relaxed.
Designer’s Note: Watch Your Scale
One specific mistake I see homeowners make is installing a border that is too narrow for the size of the patio. If your patio is 20 feet wide, a single row of standard 4-inch bricks will look skimpy and unintentional. For larger patios, I always recommend a double row of pavers or a border that is at least 8 to 12 inches wide. This visual weight ensures the border looks like a deliberate design feature, not an afterthought.
Installation Realities
If you are adding this to an existing slab, you do not necessarily need to pour more concrete. You can dig a trench around the perimeter, install a proper crushed stone and sand base, and set the pavers flush with the concrete surface.
- Drainage is key: Ensure the pavers slope away from the concrete at a rate of 1/4 inch per foot to prevent water from pooling at the seam.
- Edge restraints: You must use invisible plastic or metal edging on the outer side of the bricks to keep them from migrating into the lawn over time.
- Polymer sand: Always finish the joints with polymeric sand. It hardens like grout but remains flexible enough to prevent cracks and stop weeds.
2. Organic Textures: Natural Stone and River Rock
If your style leans more toward rustic, cottage, or contemporary organic, uniform bricks might feel too stiff. Natural stone borders soften the harsh lines of a concrete slab and help blend the hardscape into the surrounding garden. Materials like flagstone, slate, or bluestone offer irregular shapes and natural color variations that concrete simply cannot mimic.
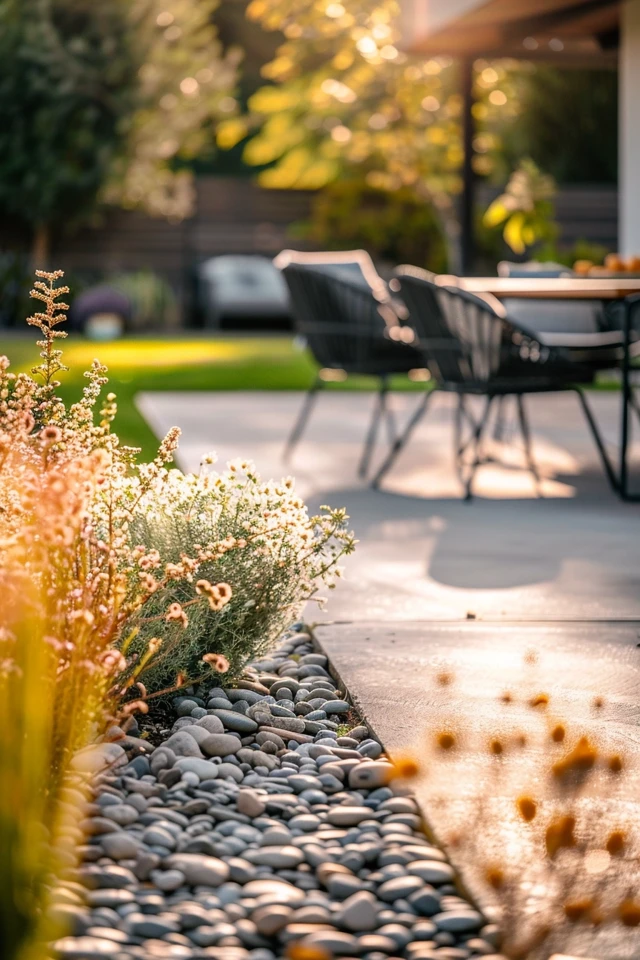
For a modern look, I often use “Mexican Beach Pebbles” or smooth black river rocks. instead of setting these in mortar, I create a 12-inch wide trench around the concrete, line it with heavy-duty landscape fabric, and fill it with loose stones. This creates a “negative edge” that functions as a drainage channel.
The “Floating” Patio Effect
Using a loose stone border creates a visual gap between the patio and the grass, making the concrete appear to float. This is an excellent trick for small yards where you want to increase the feeling of space without pouring more cement.
Common Mistakes + Fixes
- Mistake: Using stones that are too small. Small pea gravel travels everywhere. It gets kicked onto the patio and stuck in shoe treads.
- Fix: Use stones that are at least 1 to 2 inches in diameter (often called “egg rock”). They are heavy enough to stay put during a rainstorm or when using a leaf blower.
- Mistake: uneven transitions. If the rock border is lower than the grass, it becomes a ankle-twisting hazard.
- Fix: Keep the rock level relatively flush with both the concrete and the adjacent lawn, or use metal edging to create a clear definition.
3. Living Edges: Softscaping and Planted Borders
Sometimes the best border isn’t stone at all—it’s foliage. A “living edge” softens the hard line of concrete and introduces movement, scent, and seasonal color to your outdoor room. This approach is particularly effective in urban courtyards where greenery is scarce, or in spaces where you want to create a sense of enclosure and privacy.
The key here is layering. You don’t want a single line of sad marigolds. You want structural plants that define the boundary year-round.
Best Plants for Patio Borders
- Boxwoods or Yews: These create a formal, clipped low hedge. This mimics the architectural line of a wall without blocking the view. Keep them pruned to 18 inches high for a clean look.
- Ornamental Grasses: Varieties like Fountain Grass or Liriope soften the edge beautifully. They spill over onto the concrete slightly, blurring the harsh line and adding movement in the wind.
- Lavender or Rosemary: If your patio is in full sun, these Mediterranean herbs thrive next to the radiant heat of the concrete. Plus, when you brush against them, they release a wonderful fragrance.
Designer’s Note: The “Root Rule”
When planting right next to concrete, be mindful of root systems. Aggressive trees or large shrubs can lift and crack your slab over time. Stick to perennials, ornamental grasses, or shallow-rooted shrubs. If you must plant a tree near the border, install a root barrier panel underground to direct roots downward rather than sideways.
4. Integrated Design: Stained and Stamped Perimeters
If you are in the planning stages of pouring a new patio, you have the most flexibility. You can pour the border simultaneously with the main slab but treat it differently to create a custom look. This is often more cost-effective than bringing in masons to lay brick later, as the concrete crew can handle it all in one go.
A popular technique is to stamp the outer 12 to 18 inches of the patio with a texture mat that resembles slate, wood, or brick, while leaving the center smooth or broom-finished. This saves money (stamping the whole patio is expensive) while still giving you that high-end detail.
Retrofitting an Existing Slab
You can actually apply this concept to an old patio as well. We use a circular saw with a diamond blade to cut shallow lines into the existing concrete.
- The Cut: Score a line 12 inches from the edge around the entire perimeter.
- The Stain: Use an acid stain or a solid-color concrete stain to darken this outer border. A dark charcoal or deep terracotta border on a standard grey slab looks sharp and intentional.
- The Seal: Always apply a high-quality acrylic sealer afterwards. This makes the color pop and protects the border from mildew and fading.
Common Mistakes + Fixes
- Mistake: Painting concrete with standard house paint. It will peel within six months due to moisture rising from the ground.
- Fix: Use products specifically labeled as “concrete stain” or “masonry dye.” These penetrate the pores of the concrete rather than just sitting on top.
5. Modern Industrial: Steel and Timber Edging
For a sleek, contemporary aesthetic, consider combining raw materials like Corten steel or pressure-treated timbers with your concrete. This looks exceptional in xeriscapes or modern minimalist backyards.
Corten steel edging (weathering steel) develops a stable, rust-like appearance after exposure to the weather. It creates a razor-sharp line that separates your patio from the garden. You can install this right against the concrete edge to create a barrier for mulch or gravel, or set it back a few inches to create a planting pocket.
Timber Borders
Using 6×6 timbers as a border adds chunky, architectural weight. It can also double as casual seating if the grade allows. If your patio is slightly sunken, a timber retaining wall acts as the perfect border.
What I’d Do in a Real Project: The Timber Bench
In a recent small backyard renovation, we had a flat concrete pad that felt lost in the yard. We installed a low, floating bench made of cedar and steel brackets along two sides of the concrete.
- This created a “virtual wall” that defined the space without blocking light.
- It provided seating for 8-10 people without cluttering the patio with chairs.
- It hid the rough, chipped edges of the original 1980s concrete pour perfectly.
Final Checklist: Designing Your Border
Before you buy a single brick or bag of mulch, run through this checklist to ensure your plan is viable.
1. Check your clearance
Do you have swing doors that open outward? Ensure your new border height (especially if using pavers or stone) doesn’t block the door swing.
2. Measure for furniture
A border reduces the usable “visual” space of a patio if you fill it with plants. If you have a dining table, you need at least 36 inches of clearance from the table edge to the patio edge for chairs to slide back. Do not plant tall hedges in this zone.
3. Assess drainage
Where does the water go when it rains? If your patio slopes toward the new border, ensure the border material allows water to pass through (like gravel) or has gaps for runoff. A solid concrete curb could turn your patio into a wading pool.
4. Color coordination
Take a sample of your border material and place it next to your home’s siding and the existing concrete.
- Warm tones (beige, tan, red): coordinate well with brick houses and wood siding.
- Cool tones (blue, grey, black): coordinate well with white siding, grey stucco, and modern architecture.
Frequently Asked Questions
Can I install a paver border myself?
Yes, a paver border is a very manageable DIY project compared to pouring a slab. The most labor-intensive part is digging the trench and hauling the base material. If you are comfortable using a level and a rubber mallet, you can achieve professional results.
How much does a concrete patio border cost?
This varies wildly by material.
- Budget ($2-$5 per linear foot): Gravel, plastic edging, or DIY staining.
- Mid-Range ($10-$20 per linear foot): Clay bricks, concrete pavers, or pressure-treated timber.
- High-End ($30-$60+ per linear foot): Natural bluestone, Corten steel, or installing a masonry sitting wall.
How do I stop grass from growing between the concrete and the border?
This is the “maintenance nightmare” zone. The best defense is a physical barrier. Install heavy-duty landscape fabric under any gravel or sand base. For brick borders, the polymeric sand in the joints will stop weeds. For planting beds, maintain a sharp “spade edge” (a small trench) between the grass and the bed to stop rhizomes from creeping in.
Conclusion
A border is the finishing touch that transforms a slab of concrete into a true outdoor destination. It signals that the space is cared for and designed, rather than just existing. Whether you choose the sharp contrast of red brick, the organic softness of ornamental grasses, or the modern clean lines of river rock, the investment will pay off every time you look out your window.
Remember that outdoor design is about layers. The concrete is your base layer, the border is your frame, and your furniture and lighting are the details. Don’t be afraid to mix materials—sometimes the most interesting designs come from the tension between smooth concrete and rough stone.
Picture Gallery


