
Stepping Stones – Creative Painting Ideas & Tips
Nothing transforms a garden or side yard faster than a thoughtful pathway. As a designer, I view outdoor spaces as extensions of the living room, and the path is essentially your hallway. While traditional flagstone or poured concrete has its place, painted stepping stones offer a unique opportunity to inject personality, color, and texture into your landscape without a massive renovation budget.
I have seen simple concrete pavers turn into stunning focal points that rival expensive mosaic tile work. Whether you are renting and want a temporary splash of color, or you are looking for a weekend project to do with the kids, painting your walkway pavers is accessible and rewarding. It allows you to customize the color palette to match your patio furniture, your blooming perennials, or the architectural style of your home.
However, painting outdoor surfaces comes with a specific set of rules if you want the finish to last through rain, sprinklers, and foot traffic. If you are looking for visual inspiration, check out our curated Picture Gallery at the end of this blog post.
1. Selecting the Right Material and Prep Work
The longevity of your painted stepping stones is determined before you even open a can of paint. In my projects, I always emphasize that the “canvas” matters just as much as the art.
Concrete vs. Natural Stone
For painting projects, pre-cast concrete pavers are superior to natural stone. Concrete is porous and consistent, which allows masonry primer to bite into the surface effectively. Natural stones like slate or river rock often have uneven textures or mineral deposits that can cause paint to flake off prematurely. If you purchase standard 12×12 or 18×18 concrete pavers from a hardware store, you have the perfect blank slate.
The Cleaning Ritual
You cannot paint over dirt, moss, or efflorescence (that white, powdery residue often found on concrete).
- If you are reusing old stones, you must pressure wash them. A simple hose down is rarely enough to remove embedded algae.
- If you are using brand new stones, they still need to be scrubbed. Manufacturing dust can prevent adhesion.
- Use a stiff-bristled brush and a solution of water mixed with a TSP substitute (Trisodium Phosphate). This degreases the stone and opens the pores.
- Let the stones dry completely. I recommend waiting at least 24 to 48 hours in dry weather. If moisture is trapped inside the concrete when you paint, it will eventually try to escape, taking your paint with it in the form of bubbles and peels.
2. Choosing the Best Paint and Tools
One of the most frequent questions I get is about which paint to use. Please do not use standard craft acrylics or leftover interior wall paint. They are not formulated to withstand standing water or UV radiation.
Exterior Porch and Floor Paint
This is the gold standard for base coats. It is formulated to handle foot traffic and weather extremes. It is durable, often self-priming (though I still recommend a separate primer), and resistant to scuffing.
Outdoor Acrylics for Detail
If you are doing intricate designs, like mandalas or flowers, look for “Patio Paint” or acrylics specifically labeled for outdoor use. These contain UV blockers that prevent colors from fading within a few months.
The Sealer is Mandatory
You must seal your work. I generally prefer a water-based spar urethane or a dedicated concrete sealer.
- Matte vs. Gloss: As a designer, I almost always lean toward a matte or satin finish for stepping stones. High gloss can look plastic and cheap in a natural garden setting. Furthermore, glossy finishes are significantly more slippery when wet.
- Tools of the Trade: use synthetic bristle brushes for the base coats and fine-point detail brushes for the artwork. Foam brushes generally fall apart on the rough texture of concrete, so avoid them.
3. Design Concepts: Matching Your Home’s Aesthetic
When I consult on landscape design, I look at the architectural lines of the house to dictate the path design. Your stepping stones should feel like they belong to the property, not just an afterthought.
Modern and Minimalist
If your home is Mid-Century Modern or Contemporary, avoid overly organic or flowery designs. Stick to geometric shapes.
- Color Blocking: Tape off sections of the paver to create triangles or stripes. Use a palette of charcoal, cool gray, and a single pop of color like mustard yellow or teal.
- The Stencil Method: Use large geometric stencils. A Moroccan trellis pattern or a simple hexagon repeat looks high-end and clean.
Cottage and Whimsical
For cottage-style gardens or farmhouse exteriors, you can be more illustrative.
- Botanical Prints: Paint oversized ferns, hydrangeas, or bees. These designs forgive imperfections and blend beautifully with encroaching grass.
- Faux Mosaic: This is a brilliant technique where you paint “shards” of color separated by thick lines of gray or white (mimicking grout). It gives the look of a trencadis mosaic without the sharp edges or difficult labor.
The “Invisible” Designer Look
Sometimes the best paint job is subtle. I often have clients who want aged stone but only have the budget for new concrete. We use a technique called “antiquing.” By layering watered-down washes of moss green, brown, and charcoal gray, you can make a bright gray paver look like 100-year-old slate. This adds instant character and depth to a new garden.
4. Execution: A Professional Workflow
To ensure your project looks professional and lasts for seasons, follow this specific order of operations. Do not rush the drying times; humidity plays a massive role in how paint cures.
Step 1: Priming
Apply a high-quality masonry primer. This is a milky liquid that bonds to the concrete and provides a surface for the paint to grab. One coat is usually sufficient. Let it dry for 4 hours.
Step 2: The Base Coat
Apply your background color using an exterior floor paint. I recommend rolling this on with a small foam roller for an even finish, then using a brush to push the paint into the crevices of the stone. You need two coats here to ensure the gray concrete doesn’t show through.
Step 3: The Artwork
This is the fun part. If you are using stencils, use painter’s tape to secure them firmly.
- Tip: When stenciling on rough concrete, use a “stippling” motion (dabbing up and down) rather than brushing side to side. This prevents paint from bleeding under the stencil.
- If free-handing, sketch your design with a piece of chalk first. Chalk washes off easily if you make a mistake, whereas pencil lead is surprisingly hard to cover with light paint colors.
Step 4: The Safety Layer
Before you apply your final sealer, consider the texture. Painted concrete becomes smooth, and wet smooth concrete is a slip hazard. I recommend mixing a clear non-slip additive (often sold as “shark grip” or silica sand) into your final coat of sealer. It adds a subtle grit that provides traction underfoot without obscuring your design.
5. Placement and Spacing Rules
You have beautiful stones; now you need to place them correctly. Bad spacing is the most common error I see in DIY landscaping. A path that is difficult to walk on is a failed design, regardless of how pretty it is.
The 24-Inch Rule
The average human stride is roughly 24 to 26 inches. When placing stepping stones, measure from the center of one stone to the center of the next.
- If you space them 24 inches apart (center-to-center), most adults can walk naturally without having to hop or take tiny steps.
- Test the layout before digging. Lay the stones on the grass and walk the path yourself. Walk it while carrying a tray or a bag of groceries. If you have to look down constantly to ensure your footing, adjust the spacing.
Digging In
Never just lay a paver on top of the grass. It will wobble, crack, and become a nightmare for your lawnmower.
- Place the stone where you want it and cut the sod around the perimeter with a spade.
- Remove the turf and excavate about an inch deeper than the thickness of the stone.
- Fill that extra inch with sand or stone dust. This allows you to level the stone and provides drainage so the stone doesn’t rock back and forth.
- The top of the stone should be roughly half an inch above the soil line. This keeps it visible but low enough that a lawnmower blade can pass over it safely.
Designer’s Note: The Reality of Wear and Tear
In my years of designing outdoor spaces, the biggest lesson I’ve learned about painted surfaces is that nature always wins eventually. Even the best epoxy paints will fade or chip over five to seven years if exposed to harsh winters or intense direct sun.
To prevent disappointment, I advise clients to embrace the patina. Don’t aim for a “plastic perfect” finish. Designs that look slightly distressed or organic tend to age much more gracefully than crisp, high-contrast geometric lines. Also, avoid painting the very bottom edge of the stone where it meets the soil; moisture wicks up from there and causes peeling. Stop your paint about half an inch from the bottom edge to let the stone “breathe.”
Common Mistakes and Quick Fixes
Mistake: Using Dark Colors in Full Sun
The Fix: Dark black or navy stones absorb heat. In the summer, they can become hot enough to burn bare feet or pet paws. In sunny areas, stick to lighter pastels, terra cotta, or cool grays.
Mistake: “Floating” Stones
The Fix: Visually, stepping stones look ungrounded if they are just surrounded by dirt. Soften the edges by planting creeping thyme, moss, or dwarf mondo grass between the stones. This locks them in place and adds a high-end, established look.
Mistake: Ignoring Nighttime Visibility
The Fix: A painted path is useless if you can’t see it at night. Use glow-in-the-dark paint additives for a whimsical touch, or more practically, install solar stake lights every 4 to 6 feet along the path to illuminate your work.
What I’d Do: My Project Checklist
If I were installing a painted path for a client this weekend, this is exactly how I would handle the logistics:
- Purchase Pavers: I would buy 18×18 inch square concrete pavers. (12×12 feels too small for an adult foot).
- Prep Surface: Power wash and let dry for 48 hours in the garage.
- Prime: Apply one coat of bonding masonry primer.
- Design: I would create a “rug runner” effect. I would paint the stones a solid neutral color (like slate blue) and then stencil a white border only on the two sides that align with the path direction. This guides the eye forward.
- Seal: Two coats of matte spar urethane with a pinch of non-slip sand mixed in.
- Install: I would dig them into a bed of stone dust, spaced 25 inches on center, ensuring they are level.
- Finish: I would plant “Blue Star Creeper” between the stones to create a lush, green grout line.
Final Checklist for Your Project
Before you start painting, ensure you have ticked all these boxes:
- Weather Check: Do you have 3 consecutive dry days with temps above 50°F?
- Stone Condition: Are the stones clean, dry, and free of moss?
- Paint Type: Do you have Porch/Floor paint or Exterior Acrylics?
- Safety: Do you have a non-slip additive for the topcoat?
- Layout: Have you walked the path to test the stride distance?
- Leveling: Do you have sand or stone dust to place under the pavers?
Frequently Asked Questions
Can I paint plastic stepping stones?
Technically yes, if you use a plastic-bonding spray paint (like Krylon Fusion). However, plastic stepping stones tend to crack and warp quickly. I rarely recommend them for long-term landscaping.
How do I maintain painted stones in the winter?
If you live in a freeze-thaw climate, avoid using rock salt or chemical de-icers on painted concrete. The chemicals can eat through the sealer and lift the paint. Use sand or kitty litter for traction instead.
Is this safe for kids and pets?
Once cured (dried completely), water-based exterior paints are generally safe. The main safety concern is slipping. Never skip the non-slip grit additive in your final sealer coat.
Can I paint stones that are already installed?
You can, but it is back-breaking work and harder to get clean edges. It is much easier to lift the stones, clean and paint them on a workbench or tarp, and then reinstall them. This also gives you a chance to re-level the ground beneath them.
Conclusion
Painted stepping stones are one of the few landscaping projects that offer high impact with low risk. They allow you to experiment with color and pattern in a way that permanent hardscaping does not. By following professional preparation standards—cleaning thoroughly, using the right exterior products, and spacing them for a natural stride—you can create a custom walkway that invites guests to explore your garden. It is a practical, durable, and artistic addition to any home exterior.
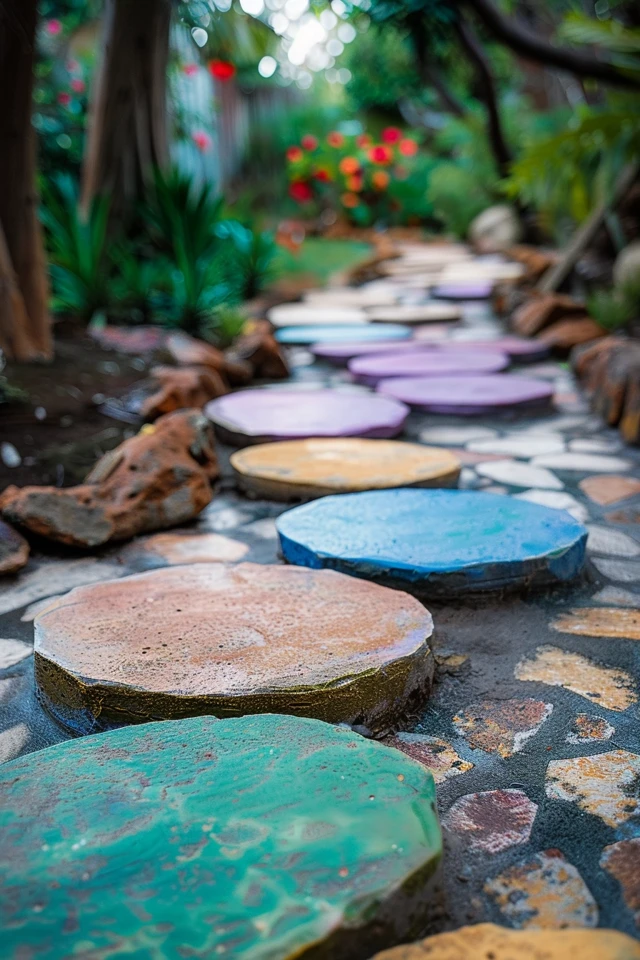
Picture Gallery


