
DIY Closet Door Makeover Ideas to Inspire You
Closet doors often get overlooked in home design, yet they take up a massive amount of vertical visual real estate in a bedroom or hallway. Most builder-grade homes come with flat, hollow-core slabs or standard louvered bi-folds that lack personality. Transforming these doors is one of the highest-impact DIY projects you can tackle on a weekend.
I have seen countless rooms completely change character simply by addressing the closet doors. It is the difference between a room that feels “furnished” and a room that feels “designed.” Whether you are dealing with a small rental apartment or a large master suite, there is a solution that fits your skill level.
Before we dive into the technical details and step-by-step guides, I want to ensure you see the potential of these projects. Make sure to check out the Picture Gallery at the end of this blog post for visual inspiration to guide your own makeover.
1. Adding Architectural Character with Applied Molding
If you have flat, hollow-core slab doors, they are essentially a blank canvas waiting for dimension. The most classic way to upgrade these is by adding applied molding to create a “panel” look. This mimics the construction of expensive solid wood stile-and-rail doors.
To achieve a timeless look, you typically want to create two or three boxes on the face of the door. A common layout is a small square box at the top and a longer rectangular box at the bottom, separated by a “rail” space.
Pro-Tip on Spacing:
As a general design rule, your molding should sit about 4 to 5 inches away from the edge of the door. The space between the top box and the bottom box (the middle rail) should be roughly 6 to 8 inches to accommodate the door handle comfortably.
The Tools You Will Need
- Miter box or miter saw (for 45-degree cuts)
- Construction adhesive (like Liquid Nails)
- Pin nailer or finishing nails
- Paintable caulk
- Wood filler
Execution Strategy
Start by sanding the door lightly to help the glue adhere to the faux-wood grain or laminate surface. Cut your molding strips with 45-degree angles at the corners to create crisp picture frames. Use a level to ensure your lines are perfectly straight; nothing ruins this look faster than crooked trim.
Once the trim is glued and nailed, the most critical step is caulking. You must run a bead of caulk along both the inside and outside edges of the trim where it meets the door. This fills the tiny gaps and makes the trim look like it was carved out of the door itself, rather than just stuck on top.
2. The Cane Webbing Transformation
Cane webbing and rattan have made a massive comeback in interior design, adding warmth and organic texture to spaces. This look works particularly well for recessed panel doors or for replacing the slats in old bi-fold doors. It bridges the gap between coastal casual and mid-century modern aesthetics.
This method requires a bit more patience than painting, but the payoff is high-end and tactile. It allows for airflow, which is actually excellent for linen closets or wardrobes to prevent mustiness.
Working with Cane
Cane is a natural material that expands and contracts. Before you attach it to anything, you must soak the cane webbing in warm water for about 30 minutes. This makes it pliable and easy to stretch.
As the cane dries after installation, it shrinks and tightens up, becoming perfectly taut like a drum skin. If you skip the soaking step, your cane will likely sag or ripple over time.
Installation Steps
- Remove the center panel of your door (if using a shaker style) or measure the recessed area.
- Cut the soaked cane about 1 inch larger than the opening on all sides.
- Staple the cane to the back of the door frame or the recessed front face, pulling tight as you go.
- Cover the rough edges with a piece of flat trim molding to hide the staples and prevent fraying.
3. Using Paint to Create Illusion and Depth
Sometimes you do not need power tools or glue; you just need the right paint strategy. Painting closet doors a contrasting color is a bold move, but painting them the same color as the walls is a designer trick to make a small room feel massive.
When the closet doors blend into the walls, the eye does not stop at the boundary, effectively erasing the visual clutter of the door frames. This is my go-to strategy for small bedrooms or narrow hallways.
Choosing the Right Finish
The finish (sheen) of the paint matters just as much as the color.
- Satin or Semigloss: Use this for the doors. It is durable, easy to wipe down, and resists the oils from hands.
- Matte or Eggshell: Generally used for walls.
If you are painting the doors to match the walls, you can use the same color code but switch the sheen. The slight difference in light reflection adds a subtle, sophisticated texture while keeping the monochromatic look.
Faux-Panel Painting
If you cannot install real wood molding, you can paint it on. Tape off “boxes” on your flat door using high-quality painter’s tape. Paint the borders in a slightly lighter or darker shade than the base color. From a distance, this tricks the eye into seeing depth and shadow, mimicking a paneled door.
4. Mirrors to Maximize Light and Space
Mirrored closet doors often get a bad reputation because of the cheap, frameless sliding gold-track doors from the 1980s. However, when done correctly, mirrors are a functional asset that doubles the perceived size of a room.
The key is to make the mirror look intentional, like a framed piece of furniture, rather than a builder-grade default.
Antique vs. Clear Mirror
For a romantic or vintage vibe, consider using antiqued mirror glass or applying an antique window film over a standard mirror. This softens the reflection and turns the door into an art piece.
If you need a functional full-length mirror for dressing, stick to clear glass but add a chunky wooden frame around the perimeter. You can glue a plywood frame directly onto an existing frameless mirror door to instantly update it.
Safety Considerations
Glass is heavy. If you are gluing a mirror to a hollow-core door, use a lightweight acrylic mirror instead of real glass. Hollow-core doors have a cardboard honeycomb interior that cannot support excessive weight. Acrylic is safer, lighter, and easier to cut.
5. Wallpaper and Fabric Insets
If you are a renter or simply want a reversible change, wallpaper is your best friend. This technique works exceptionally well on doors that have recessed panels or raised molding, as the trim creates a natural frame for the pattern.
Using peel-and-stick wallpaper allows you to introduce bold prints without committing to them forever. It is a fantastic way to tie in accent colors from your bedding or rug.
The Fabric Option
For a softer, upholstered look, you can use fabric. Apply a layer of liquid starch to the door (the kind used for ironing laundry) and press your fabric onto it. When it dries, the fabric hardens and sticks.
When you move out, you simply sponge it with warm water, and the fabric peels right off, leaving no residue. This is the ultimate renter-friendly hack.
Pattern Scale
Pay attention to the scale of the pattern.
- Small doors: Use smaller, tighter patterns to avoid cutting off the design awkwardly.
- Large double doors: You can get away with large-scale murals or chinoiserie panels.
Designer’s Note: The Reality of Door Clearance
In my years of designing, the number one issue that ruins a closet makeover is ignoring the floor clearance. I once saw a client add thick, beautiful trim to the bottom of their closet doors, only to realize the doors would no longer open because the trim hit the high-pile rug.
The Fix:
Before you add anything to the bottom of a door, check your floor clearance. If you are adding a rug nearby, ensure the door can swing over it. If you are using a bi-fold door, remember that the door folds in toward the closet slightly. Ensure your new trim does not jam the hinge mechanism when the door is fully open.
Common Mistakes + How to Fix Them
Mistake 1: Painting the Hardware in Place
It is tempting to just paint over the hinges and knobs to save time. Do not do it. Paint gums up the hinge mechanism, causing squeaking and peeling later.
The Fix: Take the extra 10 minutes to unscrew the hardware. If you want to change the hardware color, spray paint it separately or buy new hardware.
Mistake 2: Not Sanding Glossy Surfaces
Closet doors are often finished with a slick, durable coating. If you paint directly over this, the paint will scratch off with a fingernail.
The Fix: You do not need to sand to bare wood. Just do a “scuff sand” with 120-grit sandpaper to rough up the surface so the primer can bite.
Mistake 3: Ignoring the Back of the Door
You might think no one sees the inside, but you will see it every morning. Leaving the back of the door unfinished makes the project feel incomplete and cheap.
The Fix: Paint the inside edges and the back face, even if it is just a simple coat of white. It seals the door and prevents warping.
What I’d Do in a Real Project: A Quick Checklist
If I were walking into your home today to upgrade your closet doors, here is the mental checklist I would run through to choose the right materials:
- Is the room small? I would choose mirrors or paint the doors the same color as the walls to reduce visual noise.
- Is the room lacking texture? I would lean toward cane webbing or beadboard inserts.
- Is it a high-traffic kids’ room? I would avoid mirrors and fabric. I would use semi-gloss paint and durable applied molding that can take a beating.
- Is the door hollow or solid? If hollow, I will skip heavy wood planks and use lightweight PVC trim or plywood strips.
Final Checklist for Execution
Ready to start? Follow this order of operations to ensure durability.
- Remove Hardware: Take off knobs, pulls, and hinges. Label them in ziplock bags if you plan to reuse them.
- Clean: Wipe the doors down with a degreaser or a TSP substitute to remove hand oils and dust.
- Repair: Fill any dents or old screw holes with wood filler. Let dry and sand smooth.
- Scuff Sand: Lightly sand all surfaces with 120 to 150-grit sandpaper. Wipe away the dust with a tack cloth.
- Apply Trim/Texture: If you are adding molding or wallpaper, do it now.
- Caulk: Caulk all seams where trim meets the door. Let it cure completely.
- Prime: Use a high-quality bonding primer. This is non-negotiable for laminate doors.
- Paint: Apply two coats of high-quality cabinet or trim paint. Use a foam roller for a smooth finish without brush marks.
- Cure: Let the paint cure for at least 24 to 48 hours before reattaching hardware.
Frequently Asked Questions
Can I cut a hollow core door to fit a new opening?
Usually, no. Hollow core doors only have a solid wood block of about 1 inch around the perimeter. If you cut more than an inch off, you will expose the hollow cardboard interior. If you must cut it, you will need to dig out the cardboard and glue a new wood block into the bottom gap.
How do I stop my bi-fold doors from coming off the track?
This is usually an issue with the track, not the door. Builder-grade aluminum tracks bend easily. Replace the hardware kit with a heavy-duty steel track system. It is an inexpensive upgrade that makes the doors feel solid and glide smoothly.
Is it better to roll or brush closet doors?
For flat doors, a high-density foam roller is best as it leaves no texture. For paneled doors, use a brush to get into the grooves and corners first, then use a small roller for the flat surfaces to smooth out the brush strokes.
Can I turn bi-fold doors into French doors that swing out?
Yes! This is a great upgrade. You will need to remove the track, fill the holes, and potentially add a magnetic catch at the top to keep them closed. You just need to ensure you have enough floor space for the doors to swing out fully into the room.
Conclusion
Updating your closet doors is one of the most satisfying home improvement projects because the results are immediate and highly visible. You interact with these doors every single day. They should feel substantial, function smoothly, and contribute to the beauty of your room rather than detract from it.
Whether you choose a simple paint refresh, a chic cane insert, or architectural molding, the key is proper preparation and patience with the details. Take the time to sand, caulk, and align your trim. These small steps are what separate a “DIY look” from a professional finish.
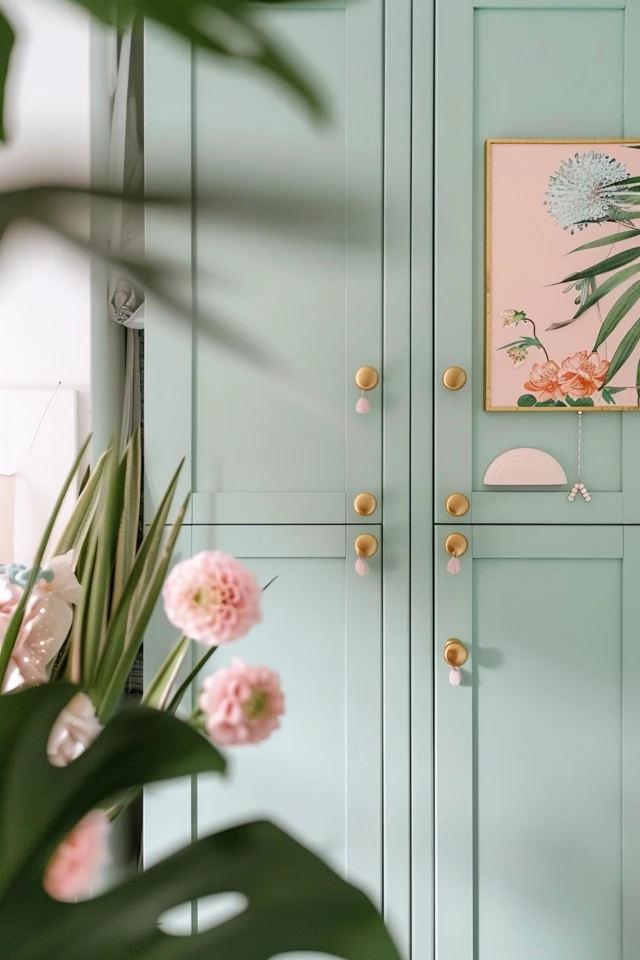
Picture Gallery


