
Fresh Shoe Display Ideas for Stylish Spaces
For many of us, shoes are more than just a utility; they are a collection of memories, investments, and artistic expression. Yet, they often end up in a piled mess at the bottom of a closet or cluttering the front door. I have walked into countless high-end homes where the furniture is pristine, but the entryway is tripped up—literally—by a mountain of sneakers and boots.
Transforming your shoe storage from a chaotic pile into a curated display changes the entire energy of a room. It turns a daily frustration into a design feature. Whether you have a dedicated walk-in closet or a tight city apartment, treating your footwear with the same respect as your books or vases elevates your space instantly.
For serious visual inspiration, scroll to the bottom because the full Picture Gallery is at the end of the blog post.
1. The Entryway: blending functionality with first impressions
The entryway is the handshake of the home. It is the first thing guests see and the last thing you see when rushing out the door. The design challenge here is balancing the need for a “drop zone” with the desire for a clean aesthetic.
In my projects, I often recommend a “hybrid” approach for entryways. We use closed storage for the daily beaters—the running shoes and muddy boots—and open display for the pieces that add character. A floating console table with a slatted shelf underneath keeps the floor visual clear, making the hallway feel wider.
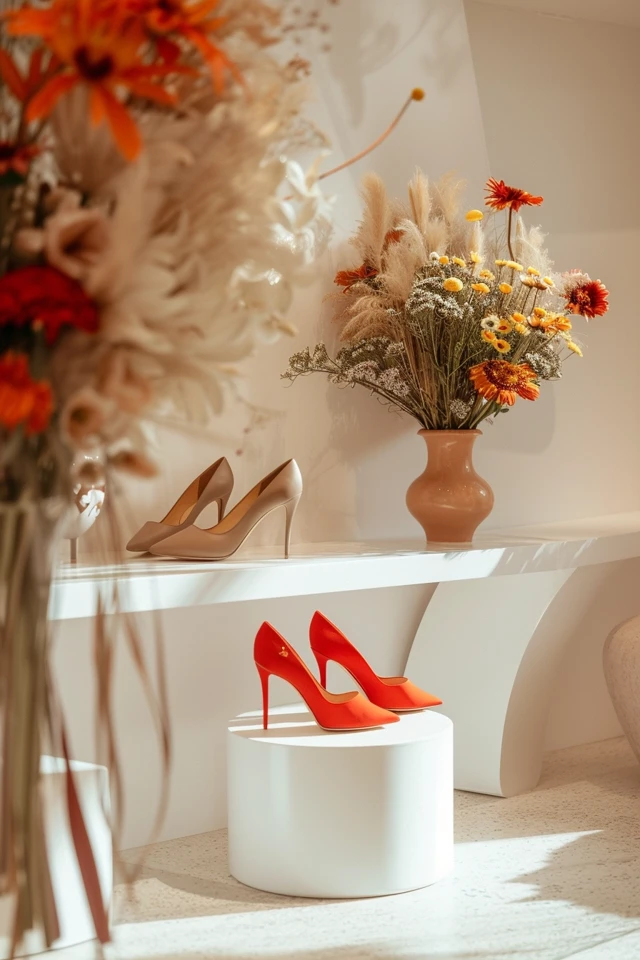
If you have a narrow hallway, verticality is your best friend. I love installing shallow, wall-mounted picture ledges. While typically used for art, they are the perfect depth for heels or slim sneakers. This keeps the shoes off the floor and turns them into a vertical gallery.
Designer’s Note: The durability factor
One lesson I learned the hard way early in my career involved specifying painted wood shelves for a client with heavy boots. Within a month, the paint was chipped and scuffed.
Now, I always recommend using a high-pressure laminate or a durable melamine for surfaces that shoes rest directly on. If you must use real wood, ensure it is sealed with a high-traffic polyurethane finish. Shoes pick up grit and small rocks that act like sandpaper on soft finishes.
2. The Boutique Closet: creating the luxury look
If you have the space for a walk-in closet, the goal is often to recreate the feeling of a high-end boutique. The secret to this look isn’t actually the shoes; it is the lighting and the negative space.
In luxury retail design, products are never crowded. When planning your shelves, follow the “two-finger rule.” You should be able to fit two fingers between each pair of shoes. If they are touching, the look instantly degrades from “display” to “storage.”
Lighting is the second critical component. I almost exclusively use LED tape lighting set into routed channels at the front of the shelves, angled inward at 45 degrees. This illuminates the face of the shoe rather than just the top.
Measurements that matter
When designing custom built-ins or adjusting adjustable shelving, specific dimensions are key to maximizing space without cramping the visual:
- Standard Flats and Heels: Allow 7 to 8 inches of vertical clear space.
- Ankle Boots and High Tops: Allow 9 to 10 inches of vertical space.
- Mid-Calf to Knee-High Boots: These vary wildly. Always measure your tallest pair and add 2 inches for comfortable removal. This usually lands between 18 and 22 inches.
- Shelf Depth: Standard depth is 14 inches. If you have feet larger than a men’s US 11, aim for 16 inches so the toes or heels don’t hang over the edge.
3. Small Spaces and Renter-Friendly Solutions
Not everyone can tear down walls or install custom joinery. For renters or those in smaller urban spaces, we have to get creative with non-permanent solutions that still look intentional.
One of my favorite hacks is using a vintage ladder. Leaning a wooden orchard ladder against a bedroom wall creates instant, rustic shoe storage. The rungs are perfect for hanging heels by the heel block, and you can clip boots to the sides using strong binder clips or specialized boot hangers.
Another robust option is the tension rod system. Floor-to-ceiling tension poles with adjustable palettes allow you to utilize the full height of a room without drilling a single hole. Look for systems with a matte black or brass finish to avoid the “dorm room” aesthetic.
Maximizing the “dead” space
In small bedrooms, the space above the door is often ignored. Installing a single, long shelf about 12 inches above the door frame creates a perfect home for out-of-season footwear.
Because this storage is high up and visually heavy, use white brackets and white shelves (or match your wall color) to make the structure disappear. This makes the shoes appear to float and keeps the room feeling airy.
4. The Sneaker Wall: treating kicks as art
Sneaker culture has influenced interior design significantly over the last decade. For collectors, the shoes are the art, and they should be displayed accordingly. The approach here differs from a standard closet; we are often showcasing the side profile or the sole, rather than the heel.
For a dedicated sneaker wall, I prefer clear acrylic floating shelves. Acrylic lets the design of the shoe speak for itself without adding visual weight. It also allows light to pass through, preventing dark shadows on lower shelves.
When arranging a sneaker wall, color coordination is powerful. Organizing by gradient (light to dark) or by color family creates a cohesive visual wash that calms the chaotic energy of different logos and styles.
Common Mistakes + Fixes
Mistake: Ignoring UV damage.
Fix: High-end sneakers and leather shoes will fade and yellow in direct sunlight. If your display is near a window, you must apply a clear UV-blocking film to the window glass. Alternatively, rotate your display monthly so one side of the shoe doesn’t bleach out.
Mistake: Overcrowding the “grails.”
Fix: Identify your top 5 pairs—your “grails.” Give them their own dedicated space, perhaps on a pedestal or a separate shelf with integrated puck lighting. Treat them like sculptures.
5. Materials, Finishes, and Maintenance
The backdrop of your shoe display matters as much as the layout. Dark backgrounds (charcoal, navy, or black) can make white sneakers and metallic heels pop dramatically. Conversely, a white or light wood background feels fresh and spa-like, which is great for sandals and neutral tones.
For the shelves themselves, consider texture. I recently completed a dressing room where we lined the shoe shelves with a commercial-grade felt. This serves two purposes: it protects the red soles of luxury heels from scratching, and it adds a soft, tactile layer of luxury.
The “Real Project” Checklist
If I were coming to your home tomorrow to redesign your shoe storage, this is the exact process we would follow:
- The Purge and Count: We pull every single pair out. We categorize them: Daily, Formal, Seasonal, and “Archive” (sentimental but rarely worn).
- The Measurement: We measure the linear footage required for each category. We also measure the height of your tallest boots and the length of your largest wedges.
- The Zone Assignment: Daily shoes go to the entry. Formal and seasonal go to the closet. Archive pairs might go to high shelves or under-bed storage.
- The System Selection: We decide between adjustable tracks (versatile) or fixed joinery (cleaner look). I almost always push for adjustable tracks because shoe collections change over time.
6. Handling Tall Boots and Floppy Materials
Tall boots are the nemesis of tidy closets. As soon as you take them off, they flop over, creating a messy pile and damaging the leather at the crease point.
To maintain a clean display, boot shapers are non-negotiable. You don’t need expensive cedar ones; simple rolled magazines or inflatable shapers work perfectly to keep the shaft upright.
For a more specialized display, I love using inverted boot racks in mudrooms. These are pegs that hold the boot upside down. It prevents dust from settling inside the boot and allows damp soles to air dry more efficiently—perfect for families with kids or avid hikers.
Final Checklist for a Polished Display
Before you finalize your setup, run through this quick list to ensure functionality meets style:
- Check the depth: Are toes hanging over the edge? (Ideally, they shouldn’t).
- Check the light: Is the corner dark? Add a wireless motion-sensor light if hardwiring isn’t an option.
- Check the flow: Can you easily grab your daily runners without moving three other pairs?
- Check the height: Do you have 2 inches of clearance above your tallest heels to lift them out?
- Check the smell: For enclosed cabinets, have you added cedar blocks or charcoal bags to absorb moisture and odors?
FAQs
What is the best way to store shoes in a deep cabinet?
Deep cabinets (24 inches or more) are tricky because shoes get lost in the back. The best solution is a pull-out shelf or a heavy-duty drawer. This allows you to see the back row as easily as the front. If you can’t install drawers, store off-season shoes in clear bins at the back and current season shoes in front.
How do I display shoes without them getting dusty?
Dust is the reality of open shelving. To mitigate this, keep your “special occasion” shoes in clear acrylic drop-front boxes. They stack beautifully and keep the shoes pristine. For open shelves, a quick pass with a Swiffer duster once every two weeks is usually sufficient.
Can I store shoes on a wire rack?
I generally advise against standard wire shelving. High heels slip through the gaps, and the wire can leave indentations on soft leather soles. If you have wire shelving, purchase plastic shelf liners or cut thin acrylic sheets to create a solid surface.
How high should a shoe bench be?
A standard bench height for sitting to put on shoes is between 18 and 20 inches. If you are building storage underneath, ensure the cubbies are at least 6 to 7 inches high to accommodate most standard footwear.
Conclusion
Curating a fresh shoe display is about respecting the items you own and the space you live in. It stops the cycle of clutter and searching, replacing it with a system that feels calm and boutique-like.
Whether you are installing custom LED-lit shelves or simply arranging your favorite heels on a vintage bookcase, the key is consistency. Give each pair room to breathe, pay attention to lighting, and don’t be afraid to show off your personality. Your shoes carry you through your life; they deserve a beautiful place to rest at the end of the day.
Picture Gallery


