
To build your own Ikea greenhouse cabinet, follow these step-by-step instructions. This guide will walk you through the process of assembling the cabinet, drilling holes for cables, installing lights and fans, and adding shelves. Additionally, it will provide a list of necessary tools and materials, along with their prices, to help you plan and budget for the project. Whether you’re a plant enthusiast looking for a new home for your plants or someone looking to add a unique and functional piece of furniture to your space, this step-by-step guide will help you create your own Ikea greenhouse cabinet.
Key Takeaways:
- Follow the step-by-step instructions to build your own Ikea greenhouse cabinet.
- Learn how to assemble the cabinet, drill holes for cables, install lights and fans, and add shelves.
- Find a list of necessary tools and materials, along with their prices, to help you plan and budget for the project.
- Create a unique and functional piece of furniture to house your plants.
- Enhance your space and bring joy to your plant care routine.

Choosing the Right Ikea Cabinet for Your Greenhouse
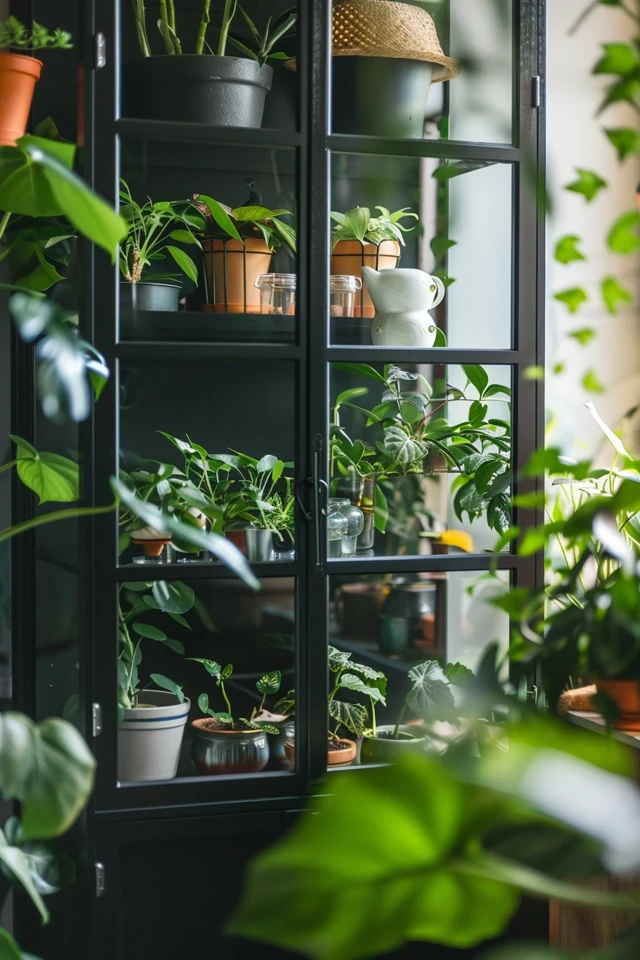
Before you start building your Ikea greenhouse cabinet, it’s important to choose the right Ikea cabinet model for your project. The most common models used for greenhouse cabinets are the Detolf, Rudsta, Fabrikör, and Milsbo. Each model has its own unique features and design, so it’s important to consider factors such as space, budget, and aesthetic preferences when making your decision.
- Detolf: This cabinet model is known for its sleek glass design, making it perfect for showcasing your plants. It offers ample space and visibility for your greenhouse setup.
- Rudsta: If you’re looking for a cabinet with a metal frame and glass doors, the Rudsta is a great choice. It provides a modern and industrial look, while still providing a sturdy structure for your plants.
- Fabrikör: The Fabrikör cabinet combines a metal frame with glass panels and adjustable shelves. It offers practicality and versatility, allowing you to customize the cabinet to suit your plant collection.
- Milsbo: If you prefer a cabinet with a more open design, the Milsbo model might be the right fit for you. With glass shelves and a glass door, it provides a bright and airy feel to your greenhouse setup.
When selecting the perfect Ikea cabinet for your greenhouse, consider the available space in your home, the number of plants you plan to accommodate, and your personal style preferences. Take inspiration from the various designs and setups by searching the hashtag #ikeagreenhousecabinet on Instagram or by checking out @ikeagreenhousecabinet for ideas and creative approaches from greenhouse enthusiasts around the world.
Tools, Materials, and Installation
To build your Ikea greenhouse cabinet, you will need a few essential tools and materials. Here’s a list of everything you’ll need:
- Drill: A reliable drill will be your best friend throughout this project. It will help you create holes for cables and secure various components.
- Step Drill Bit: A step drill bit is essential for drilling clean and precise holes for your cables. It ensures a professional-looking finish.
- Zip Ties: Zip ties are great for securing and organizing the wires inside your greenhouse cabinet. They will keep everything neat and tidy.
- Electrical Tape: Use electrical tape to provide additional insulation and protection for your electrical connections. It will keep them secure and safe.
- AC Infinity Fans: AC Infinity fans are perfect for providing ventilation and maintaining optimal airflow within your greenhouse cabinet. They’ll keep your plants fresh and healthy.
- Grow Lights: Grow lights are a crucial component of any indoor greenhouse. They provide the necessary light spectrum for your plants to grow and thrive.
- Power Strip: A power strip will help you conveniently connect all the electrical components of your greenhouse cabinet. Make sure it has enough outlets to accommodate your needs.
- Magnetic Hooks: Magnetic hooks are fantastic for hanging lightweight tools, accessories, or small plants inside your cabinet. They provide extra storage options.
- Weather Stripping: Weather stripping will ensure a tight seal for your greenhouse cabinet, preventing any unwanted drafts or temperature fluctuations.
- Shelves: Shelves are essential for maximizing space and organizing your plants. Depending on your needs, you can use adjustable or fixed shelves.
The installation process will involve drilling precise holes for cables, hanging lights and fans, securing the weather stripping, and installing shelves. Follow the step-by-step guide to ensure accurate placement and stability for all the components.

Conclusion
Building an Ikea greenhouse cabinet is an exciting and fulfilling DIY project that empowers you to create a lush indoor haven for your precious plants. With this step-by-step guide, you can easily assemble and personalize your own cabinet, tailored to your unique needs and preferences. Whether you’re a seasoned indoor gardener or just starting to explore the joys of plant care, a greenhouse cabinet offers an ideal environment for your plants to thrive.
Indoor gardening has become increasingly popular, and the Ikea greenhouse cabinet provides a practical solution to bring nature inside your home. This functional piece of furniture not only serves as a stylish display for your greenery, but it also helps regulate temperature, humidity, and light, ensuring optimal conditions for your plants’ growth and well-being.
By following the instructions in this guide and gathering the necessary tools and materials, you can create a beautiful and versatile indoor oasis. Your DIY greenhouse cabinet will not only enhance the aesthetic appeal of your space but also provide a space-saving solution for housing your beloved plant collection. So, why wait? Let’s embark on this rewarding project and immerse ourselves in the art of indoor gardening with an Ikea greenhouse cabinet!