
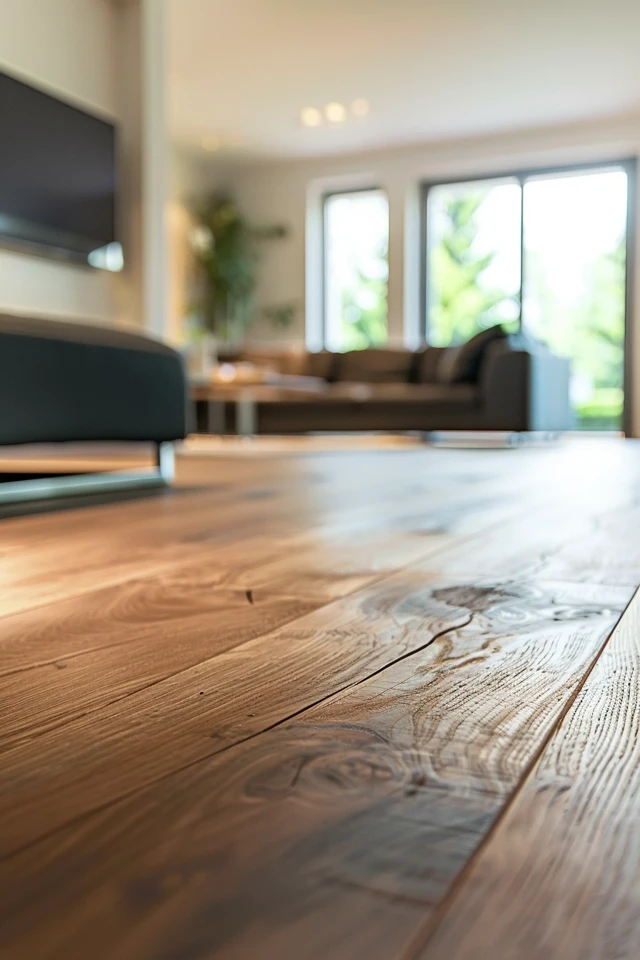
If you have just removed the carpet from your hardwood floors, I’m here to guide you through the process of restoring them to their former glory. Removing carpet can leave behind residue and damage, but with the right techniques, your hardwood floors can shine again.
Hardwood floor restoration is a multi-step process that involves assessing the condition of your floors, removing any remaining carpet glue, sanding, staining, and sealing. By following these steps, you can bring your floors back to life and prolong their lifespan.
Key Takeaways:
- Assess the condition of your hardwood floors before starting the restoration process.
- Use a scraper or heat gun to remove any remaining carpet glue.
- Sand the floors to smooth out imperfections like scratches and dents.
- Choose the right wood stain and sealant to enhance the color and protect the floors.
- Maintain your wood floors regularly to keep them looking their best.
Assessing the Condition of Your Floors
Before you start the restoration process, it’s important to assess the condition of your floors. This will help you understand the extent of any hardwood floor damage, such as scratches or stains, and determine the best course of action for restoration.
Take a close look at your floors and examine them for any signs of wear and tear. Look out for visible scratches, particularly deep ones that may require more extensive repair. Check for stains caused by spills or other accidents that may have seeped into the wood.
If you notice severe damage, it’s advisable to seek professional help. They have the expertise and specialized tools to handle complex repairs effectively. However, for minor damage, you can often fix it yourself with a little sanding and refinishing.
Remember, assessing the condition of your floors is the first step in the restoration process. By identifying any issues early on, you can plan your restoration approach accordingly and achieve the best possible results.

“Assessing the condition of your floors allows you to determine the level of damage and the necessary restoration steps.”
- Look for scratches, stains, or other damage
- Seek professional help for severe damage
- Minor damage can often be fixed with sanding and refinishing
Removing the Remaining Carpet Glue
Once you have assessed the condition of your floors, it’s time to remove the remaining carpet glue. This step is crucial in preparing the floors for sanding and achieving a smooth, polished finish.
To remove the carpet glue, you will need a scraper and a heat gun (if necessary). Follow these steps:
- Step 1: Begin by using a scraper to gently scrape away the glue. Be careful not to apply too much pressure or damage the underlying floor.
- Step 2: If the glue proves stubborn, try using a heat gun to soften it. Hold the heat gun a few inches away from the glue and move it back and forth to apply heat evenly. This will make the glue more pliable and easier to scrape away.
- Step 3: Once the glue is softened, continue scraping with the scraper until all the glue is removed. Take your time and work in small sections to ensure thorough removal.
Note: It’s important to protect yourself while working with a heat gun. Wear safety goggles and work in a well-ventilated area to avoid inhaling fumes.
“Removing carpet glue can be a challenging task, but with the right tools and techniques, you can achieve great results. Take your time, be patient, and remember to protect the underlying floor.”
Once all the carpet glue has been removed, your floors will be ready for the next step: sanding.

Sanding the Floors
When it comes to restoring hardwood floors after removing carpet, sanding is a crucial step in the process. It not only helps in removing any leftover adhesive residue from the carpet but also smooths out imperfections such as scratches or dents, giving your floors a fresh and polished look.
Sanding is an essential part of the floor restoration process. It allows me to get rid of any stubborn glue remnants and achieve a smooth surface for refinishing. Plus, it helps me eliminate those unsightly scratches and dents that can diminish the appearance of the floors.
To start the sanding process, gather the necessary sanding tools, including a drum sander, an edge sander, and sandpaper with varying grits. Begin with a coarse sandpaper, such as 60 or 80 grit, to effectively remove any stubborn glue or surface damage. Be sure to follow the manufacturer’s instructions for operating the sanding tools safely and effectively.
As you progress, gradually switch to a finer grit sandpaper, such as 120 or 150 grit, to achieve a smoother finish. Take your time and pay attention to detail, making sure to sand the entire floor evenly. Remember to take breaks in between each sanding stage and vacuum any dust or debris that may have accumulated.
When sanding my hardwood floors, I always begin with a coarse grit sandpaper to tackle the initial adhesive removal and surface imperfections. Then, I switch to a finer grit sandpaper for a more refined and smooth finish. This gradual approach ensures that I achieve the best results.
By sanding your hardwood floors properly, you’ll create a clean and even surface, ready for the next steps in the restoration process. It’s an essential technique that requires patience and attention to detail, but the results are well worth the effort.
Recommended Tools for Sanding Hardwood Floors:
- Drum sander
- Edge sander
- Sandpaper (coarse and fine grit)
- Dust mask
- Protective goggles
- Ear protection
- Vacuum cleaner
Staining and Sealing the Floors
After sanding your hardwood floors to perfection, it’s time to bring out their natural beauty with a stunning stain and sealant. Staining not only enhances the color of the wood but also provides a polished finish that adds depth and character to your floors. Meanwhile, sealing the floors not only protects them from wear and tear but also adds a beautiful, glossy sheen.
To begin, choose a high-quality wood stain that complements your desired aesthetic. Whether you prefer a rich, dark hue or a light, natural tone, select a stain that resonates with your personal style. Remember to test the stain on a small, inconspicuous area of the floor first to ensure you achieve the desired color.
Once you have your chosen stain, it’s time to apply it to the floors. Start by thoroughly cleaning the surface to remove any debris or dust left from the sanding process. Then, apply the stain in the direction of the wood grain using a brush, cloth, or sponge. This ensures an even distribution of color and prevents streaks or uneven patches. Make sure to wipe away any excess stain with a clean cloth to achieve a uniform appearance.
After applying the stain, allow it to dry completely before moving on to the next step. This typically takes 24-48 hours, depending on the brand and environmental conditions. Be patient and resist the temptation to rush the drying process, as this can negatively impact the final result.

Once the stain is dry, it’s time to seal the floors to protect them and create a stunning finish. Choose a high-quality wood floor sealant that is compatible with the type of stain you used. There are various types of sealants available, including polyurethane, water-based, and oil-based options. Read the manufacturer’s instructions carefully to ensure you choose the right sealant for your floors and follow the recommended application process.
When applying the sealant, use a brush, roller, or applicator pad, and work in small, manageable sections. Apply the sealant in thin, even coats, and be sure to follow the recommended drying time between each coat. This helps to achieve a durable, long-lasting finish that enhances the beauty and resilience of your hardwood floors.
Once you have completed the staining and sealing process, allow the floors to dry completely before walking on them or replacing furniture. This will ensure the best results and prevent any damage to your newly restored floors.
Now that you know how to stain and seal hardwood floors, you can transform your space into a stunning showcase of natural elegance and timeless beauty.
Conclusion
Restoring hardwood floors after removing carpet is a rewarding process that can revive the natural beauty of your floors. By following these hardwood floor restoration tips, you can bring new life to your space and enjoy the timeless appeal of hardwood for years to come.
First, assess the condition of your floors and address any damage such as scratches or stains. Minor damage can often be fixed with sanding and refinishing, but severe damage may require professional help.
Next, remove any remaining carpet glue using gentle scraping techniques or a heat gun to soften the adhesive. This step is essential in preparing the floors for sanding, which will help remove any residue and imperfections. Remember to vacuum between each sanding stage for a clean and smooth result.
Once your floors are sanded, you can enhance their appearance with a wood stain of your choice. Apply the stain in the direction of the grain and wipe away any excess. Finally, seal the floors with a quality sealant to protect them and achieve a polished finish.
It’s important to note that maintaining wood floors is key to their longevity. Regular cleaning and preventative measures, such as using furniture pads and avoiding excessive moisture, can help preserve the beauty and durability of your floors. By following these hardwood floor restoration tips and maintaining regular care, you can enjoy the timeless elegance of your hardwood floors for years to come.