
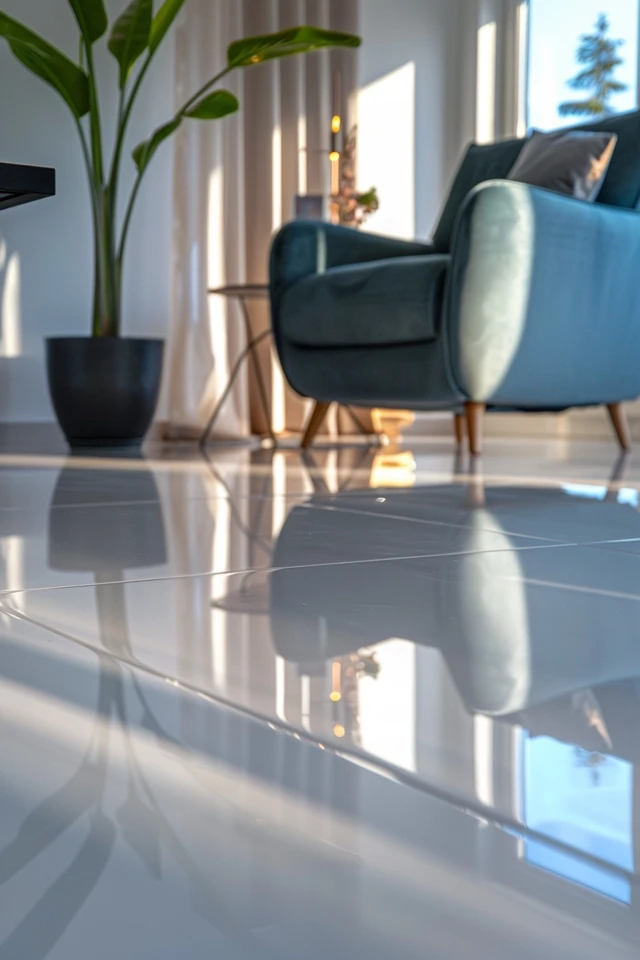
Hi, I’m here to share my expertise on how to restore the gloss to your ceramic floor tiles. Over time, ceramic tiles can lose their shine due to foot traffic, spills, and general wear and tear. Fortunately, there are effective methods to bring back their glossy finish and make them shine like new again.
When it comes to restoring the gloss of ceramic floor tiles, using a high gloss sealer is the best approach. While there are alternative methods such as vinegar, baking soda, or floor polish, these can potentially harm the tiles and are not as effective in achieving a long-lasting shine. High gloss tile sealers, on the other hand, provide superior results without causing any damage to the tiles or grout.
When choosing a sealer, look for one with a high concentration of active solids, preferably around 50%. This ensures a strong and durable protective layer that will keep your tiles looking glossy for longer. To apply the sealer, follow the manufacturer’s recommended steps. This will ensure proper adhesion and allow for adequate drying time.
By using a high gloss sealer specifically designed for ceramic floor tiles, you can restore the shine and luster of your tiles, giving your space a fresh and polished appearance. Say goodbye to dull and worn-out tiles, and hello to gleaming floors that will impress everyone who walks through your door.
Key Takeaways:
- Restoring gloss to ceramic floor tiles can be achieved by using a high gloss sealer.
- Alternative methods like vinegar or baking soda may not yield long-lasting results and can potentially damage the tiles.
- Look for a sealer with a high concentration of active solids, preferably around 50%.
- Follow the recommended steps for applying the sealer to ensure proper adhesion and drying time.
- A high gloss sealer designed specifically for ceramic tiles provides the best and most durable shine.

The Most Common Methods to Shine Matte Tile Floors
When it comes to making matte tile floors shine, there are several common methods that people often try. These include using vinegar, baking soda, bleach, ammonia, and floor polish. While these methods may seem convenient and cost-effective, it’s important to note that they may not provide long-lasting results and can potentially harm your tiles or grout.
Vinegar: Vinegar is a popular natural cleaning solution, but it can be damaging to your matte tiles. The acidic nature of vinegar can erode the protective coatings on top of the tiles, leading to a dull appearance over time.
Baking Soda and Bleach: While baking soda and bleach may be effective in removing stains and grime, they can also cause micro scratches on the surface of your tiles. These scratches can accumulate over time, resulting in a loss of shine.
Ammonia: Ammonia is another common ingredient found in many household cleaning products. However, using ammonia on your matte tiles can lead to discoloration and damage, ultimately diminishing their shine.
Floor Polish: Applying wax or floor polish to matte tiles can require more labor-intensive processes. Additionally, these products can build up over time, creating a sticky residue that is difficult to remove and can dull the appearance of your tiles.
Instead of relying on these potentially harmful methods, it is recommended to use a high-gloss tile sealer specifically designed for ceramic tiles. This will ensure the best and most durable shine for your matte tiles without causing any damage. By using a high-quality sealer, you can enjoy long-lasting results and maintain the natural beauty of your tiles.
Check out the next section to learn how to properly apply a tile sealer to make your matte floor tiles glossy.

How To Apply Tile Sealer To Make Matte Floor Tile Glossy
When it comes to transforming matte floor tiles into a glossy masterpiece, applying the right tile sealer is an essential step. To achieve optimal results, follow these simple guidelines:
Start with a clean surface: Before applying the sealer, it’s crucial to ensure that the floor is free from any previous sealers, paint, dirt, oil, or grease. Clean the tiles thoroughly using a mild detergent or a specialized tile cleaner to remove any contaminants.
Remove existing sealers if necessary: If there is an existing sealer on the floor, it must be removed to allow the new sealer to bond properly. Use an appropriate stripping product as per the manufacturer’s instructions. For porous grout, an etching solution may be required to remove any penetrating sealer.
Apply the sealer: Once the surface is clean and dry, it’s time to apply the tile sealer. Use a good quality roller or brush to achieve smooth and even coverage. Start from one corner of the room and work your way towards the exit to avoid stepping on the freshly sealed tiles.
Mix and prepare the sealer: Follow the manufacturer’s instructions to properly mix the sealer. Only prepare as much sealer as can be used within 60 to 90 minutes to ensure its effectiveness. This will prevent wastage and ensure the best possible finish.
Allow sufficient drying time: Once the sealer has been applied, it’s important to let it dry completely. The recommended waiting time before walking on the tiles is two hours for light foot traffic and six hours for heavy traffic. Avoid moving furniture or placing rugs on the floor until the sealer has fully cured.
Keep in mind that the application process may vary depending on the specific type and brand of tile sealer you are using. Always refer to the manufacturer’s instructions for detailed guidance on the application technique and recommended drying times.
Pro Tip:
To achieve the best results, it’s advisable to conduct a small test area before applying the sealer to the entire floor. This will ensure compatibility with your specific type of matte tiles and help you determine the desired level of sheen.
With the right tile sealer and proper application techniques, you can transform your matte floor tiles into a glossy, elegant surface that enhances the overall appearance of your space. Enjoy the stunning transformation!

Conclusion
When it comes to restoring the gloss and shine to your ceramic floor tiles, using a high gloss tile sealer is key. While off-the-shelf sealers may seem convenient, they often lack the durability and long-lasting performance needed to maintain that beautiful finish over time. To ensure the best results, choose a sealer with a high concentration of active solids, around 50%, specifically formulated for dense, glazed, non-porous tiles.
Proper application of the sealer is crucial for achieving optimal results. Make sure the surface is clean and dry before applying the sealer, following the recommended steps provided by the manufacturer. Allow for adequate drying time, ensuring a minimum of two hours for light foot traffic and six hours for heavy traffic. By maintaining the sealed tiles and avoiding harsh chemicals, you can preserve that glossy shine for an extended period.
So, whether you’re looking to revive the shine of your kitchen floor or enhance the elegance of your bathroom tiles, using a high gloss tile sealer designed for ceramic floor tiles is the way to go. Don’t settle for less when it comes to restoring the gloss and maintaining the beauty of your ceramic floor tiles.