
Greetings! In this guide, I will walk you through the process of repotting your beloved Calathea plant. Whether you’re new to plant care or a seasoned green thumb, learning how to repot a Calathea is an essential skill to keep your plant thriving and happy.
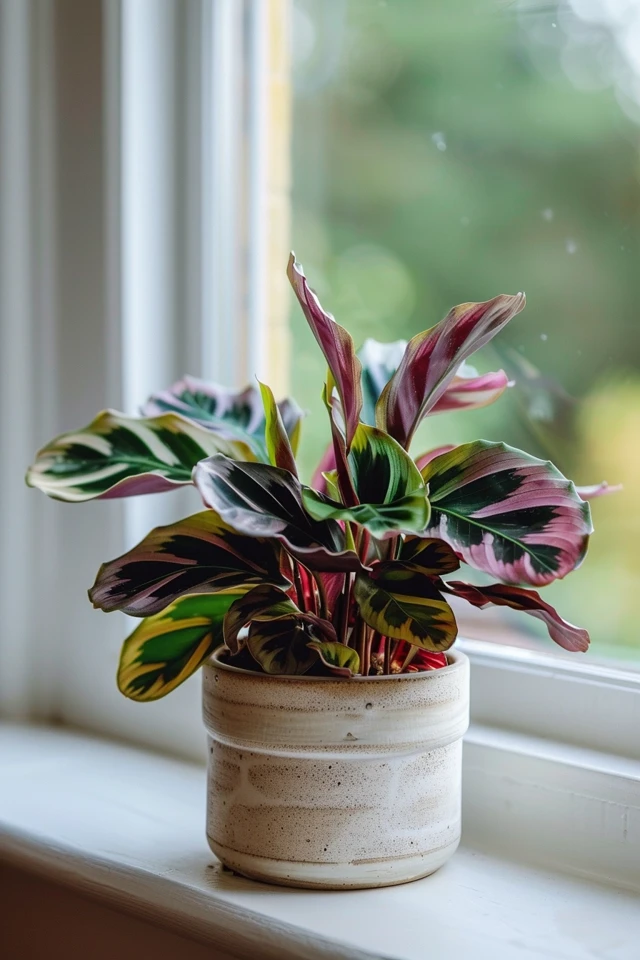
Calatheas, also known as Goeppertia and Prayer Plant, are prized for their beautiful foliage and ability to purify the air. With their love for medium light and high humidity, they make perfect additions to homes and offices.
Before we dive into the step-by-step process of repotting, let’s discuss some important tips and facts about Calatheas:
- Calatheas prefer well-draining soil that is consistently moist but not soggy.
- They thrive in medium light and high humidity environments.
- Fertilize your Calatheas every two weeks during the summer.
- They are pet-friendly and non-toxic to humans and animals.
- Common Calathea varieties include Freddie, Lancifolia, Makoyana, Medallion, Roseopicta, and Orbifolia.
Now, let’s explore the signs that indicate it’s time to repot your Calathea.

Signs It’s Time to Repot
Keeping a close eye on your Calathea will help you determine whether it needs a new home. Look out for the following signs:
- Roots peeking out of the drainage holes or circling the surface.
- Watering issues, such as water draining straight through or the soil drying out quickly.
- Slow growth and lack of flowering.
If you spot any of these signs, it’s time to repot! Let’s move on to the step-by-step guide for repotting your Calathea.
How to Repot Calathea: Step-By-Step Guide
Follow these simple steps to give your Calathea a fresh start:
- Choose a pot that is 1-2 inches wider than the current one and has drainage holes.
- Prepare the new pot by adding a layer of well-draining soil and creating a small mound in the center for the roots.
- Gently coax the Calathea out of its current pot, being careful not to damage the stems.
- Inspect the roots and trim any brown or spongy ones with clean, sharp scissors.
- Mix the soil with perlite for improved drainage and moisture retention.
- Position the Calathea in the new pot, making sure it is at the appropriate depth.
- Backfill the pot with the soil mixture, tapping lightly to secure the plant in place.
- Water the Calathea lightly after repotting and consider using a plastic bag to increase humidity.
- Adjust watering and light exposure to help the plant settle into its new home.
- Monitor the plant for any signs of stress and adjust care accordingly.
Congratulations! You have successfully repotted your Calathea. Keep in mind that each Calathea variety may have slightly different care requirements, so be sure to research and understand your specific plant’s needs.

Key Takeaways:
- Calatheas prefer well-draining soil and medium light with high humidity.
- Signs that it’s time to repot include roots peeking out, watering issues, slow growth, and lack of flowering.
- When repotting, choose a slightly larger pot, trim the roots if necessary, and use a mixture of well-draining soil and perlite.
- After repotting, adjust watering and light exposure while monitoring the plant for signs of stress.
- Remember to research the specific care requirements of your Calathea variety for optimal growth.
Now that you know how to repot a Calathea, give your plant a fresh start and watch it flourish in its new home!
Signs It’s Time to Repot
Knowing when to repot your Calathea is essential for ensuring its health and vitality. By paying attention to certain signs, you can determine when your plant needs a fresh start in a new pot. Here are some key indicators:
- Roots peeking out of drainage holes or circling the surface: If you notice roots extending out from the drainage holes or wrapping around the soil surface, it’s a clear signal that your Calathea is running out of room to grow.
- Watering issues: When a Calathea becomes root-bound, its root system can become unable to absorb water effectively. This leads to drying out of the soil surface quickly or water draining straight through the pot without being properly absorbed.
- Slow growth: A root-bound Calathea may experience stunted growth as its roots struggle to penetrate compacted soil or compete for limited resources.
- Lack of flowering: Repotting a Calathea can stimulate new growth and potentially increase the chances of flowering. If your Calathea hasn’t bloomed in a while, it may be a sign that it’s time for a larger pot.
By observing these signs, you can determine if your Calathea is ready for a new home. Regularly repotting your Calathea ensures it has enough space to grow, prevents root-bound issues, and promotes overall plant health and vitality.

How to Repot Calathea: Step-By-Step Guide
Repotting your Calathea is an important step in keeping it healthy and thriving. Here’s a step-by-step guide to repotting your Calathea and ensuring a successful transition to its new home.
Choosing the Right Pot
Start by selecting a pot that is 1-2 inches wider than the current one. Make sure the pot has drainage holes to prevent waterlogging and promote healthy root growth.
Preparing the New Pot
Add a layer of well-draining soil to the bottom of the new pot. Create a small mound in the center of the pot to provide support for the roots.
Removing the Calathea from Its Current Pot
Gently coax the Calathea out of its current pot by lightly squeezing the sides. Be careful not to tug on the stems, as they can be fragile.
Inspecting and Trimming the Roots
Take a close look at the roots and remove any brown or spongy ones using clean, sharp scissors. This helps ensure the plant’s health and vitality in its new pot.
Creating the Soil Mixture
Mix the soil with perlite to improve drainage and moisture retention. This combination provides the ideal environment for the Calathea to thrive.
Placing the Calathea in the New Pot
Position the Calathea in the new pot, making sure it’s not too deep or shallow. Adjust the height of the soil mound as needed to achieve the proper placement.
Backfilling and Securing the Plant
Fill the pot with the soil mixture, gently tapping it down to secure the Calathea in place. Avoid packing the soil too tightly, as it can hinder water drainage.
Watering and Post-Repotting Care
After repotting, water the Calathea lightly to settle the soil. Consider placing a plastic bag over the plant to create a mini greenhouse and boost humidity.
Adjusting Watering and Light Exposure
Monitor the Calathea for any signs of stress, such as wilting or yellowing leaves. Adjust the watering schedule and light exposure to help the plant adjust to its new environment.
Encouraging Flowering and Growth
To encourage flowering, maintain high humidity levels and provide consistent temperatures. Calatheas thrive in medium light and high humidity conditions, which can help promote blooming.
Choosing the Right Pot Material
When selecting a pot for your Calathea, consider the pros and cons of different materials. Terracotta pots promote air exchange but may require more frequent watering. Ceramic pots offer a balance of moisture retention and air flow. Plastic pots are lightweight but can be prone to waterlogging. Fabric pots enhance aeration and prevent root circling.
Follow these step-by-step instructions to repot your Calathea and provide it with the ideal growing environment. By taking the time to repot your Calathea properly, you can ensure its continued health and vibrant growth.
Conclusion
In conclusion, repotting your Calathea plant is an essential step in ensuring its optimal growth and health. By following the proper techniques and guidelines, you can refresh your plant’s home and provide it with the ideal conditions it needs to thrive.
Signs that it’s time to repot your Calathea include roots peeking out of drainage holes or circling the surface, watering issues, slow growth, and lack of flowering. By keeping an eye out for these indicators, you can take timely action to repot your plant and prevent potential problems.
The repotting process involves choosing a suitable pot, preparing the new pot with well-draining soil, gently removing the plant from its current container, and properly positioning it in the new pot. After repotting, adjust your watering and light exposure, monitor the plant for any signs of stress, and provide the necessary care to encourage flowering.
Remember, Calatheas are stunning and versatile houseplants that not only add beauty to your indoor space but also provide air-purifying benefits. By following the steps outlined in this guide, you can successfully repot your Calathea and continue to enjoy its vibrant foliage for years to come.