
How To Store Brooms And Mops Without A Closet: Organization Hacks
Living without a dedicated utility closet is a common challenge, whether you are in a historic home, a city apartment, or an open-concept renovation. The frustration of brooms sliding down walls or mops cluttering the bathroom corner is a universal design grievance that disrupts the visual flow of a home.
However, a lack of built-in storage is actually an invitation to get creative with vertical space and specialized hardware. For a dose of visual inspiration, scroll down to the Picture Gallery at the end of the blog post to see these storage solutions in action.
At-a-Glance: Key Takeaways
- Verticality is key: When you lack floor space, you must use wall height effectively.
- Aesthetics matter: If you cannot hide your tools, you must upgrade them to match your decor.
- Gap utilization: The four to six inches between appliances are often wasted gold mines for storage.
- Hardware selection: Swap plastic organizers for architectural hooks and rails to elevate the look.
- Moisture management: Proper airflow is critical for mops to prevent wall damage and mildew.
What This Style Means (and Who It’s For)
This approach to organization is often referred to in the industry as “Utility Chic” or “Integrated Function.” It rejects the idea that cleaning tools must be hidden in a dark hole and instead treats them as essential, accessible components of the home’s machinery.
This method is specifically designed for renters who cannot build new walls, homeowners with older properties that lack storage depth, and anyone living in a smaller footprint where every square inch counts. It requires a shift in mindset from “concealing” to “curating.”
If you are tired of tripping over the vacuum cord or having the broom handle hit you when you open the pantry, this guide is for you. It combines the practicality of a janitor’s station with the aesthetic polish of a high-end mudroom.
The Signature Look: Ingredients That Make It Work
Creating a cohesive storage system without a closet requires specific design elements. The goal is to reduce “visual noise” so that even if the tools are visible, they do not look messy.
Uniformity in Tools
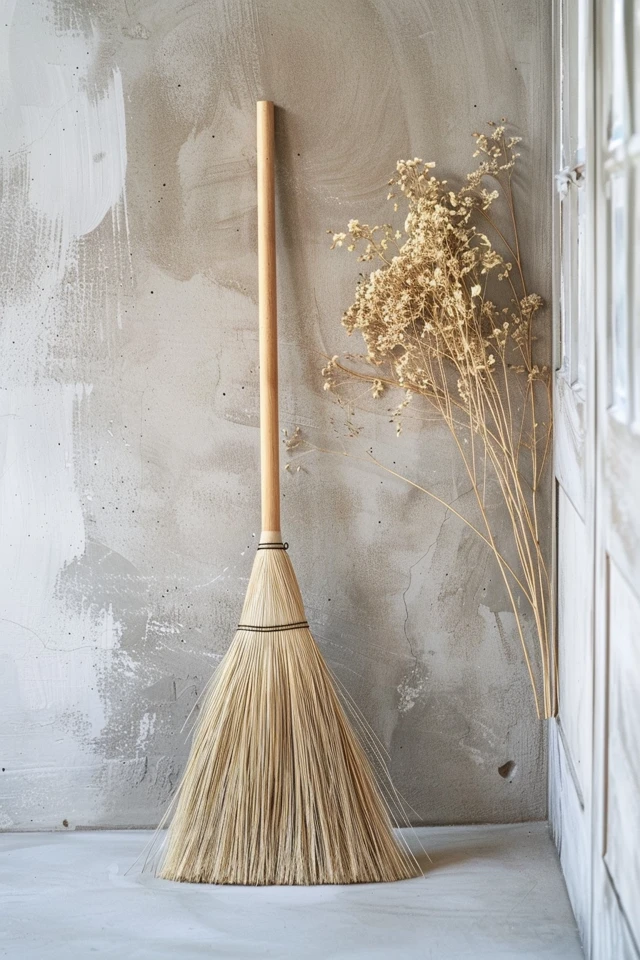
The quickest way to ruin an open storage look is with mismatched, neon-colored plastic tools. To achieve a designer look, swap out standard grocery store brooms for ones made of wood, bamboo, or matte black metal. Natural bristles and neutral colors turn a cleaning tool into a textural accent rather than an eyesore.
Architectural Hardware
Avoid the standard white plastic clamp organizers found in big-box stores. Instead, opt for shaker peg rails, brass hooks, or matte black tension rods. The hardware should match the existing finishes in your kitchen or bathroom to make the storage feel intentional, not temporary.
The “Gap” Slide-Out
This is a signature element for small kitchens. Utilizing a slim rolling cart or a mounted slide-out rack between the refrigerator and the counter hides unsightly items while keeping them within reach.
Designer’s Note: The “One-Touch” Rule
In my projects, I always advise clients to design for the “One-Touch” rule. You should be able to grab a broom with one hand without moving three other things out of the way. If a system is too complicated to use, the broom will end up leaning against the counter again within a week.
Layout & Proportions (Designer Rules of Thumb)
Installing wall-mounted storage requires precise measurements to ensure functionality and safety. Arbitrary hook placement leads to tools dragging on the floor or handles knocking into each other.
Mounting Height Standards
A common error is mounting hooks based on eye level rather than tool length.
- Standard Rail Height: Install your main hook rail at 60 to 66 inches from the floor. This accommodates most standard broom handles while keeping the bristles off the ground.
- Floor Clearance: Ensure the bottom of your longest broom or mop is at least 4 to 6 inches off the floor. This makes sweeping underneath easier and prevents bristles from bending.
Spacing Between Tools
Crowding is the enemy of organized open storage.
- Handle Spacing: Allow 6 to 8 inches of width per tool. This prevents the mop head from dampening the broom bristles next to it.
- Depth Consideration: If storing behind a door, measure the depth of the thickest tool (usually a vacuum or dustpan). Ensure the doorstop is adjusted so the door knob doesn’t smash into your vacuum canister.
Weight Distribution
Drywall anchors are rarely sufficient for heavy use. A wet mop is significantly heavier than a dry one.
- Stud Finding: Always aim to mount the main rail or heavy hooks into a stud.
- Toggle Bolts: If studs aren’t available, use high-quality toggle bolts rather than plastic push-in anchors to prevent the rack from ripping out of the drywall over time.
Step-by-Step: How to Recreate This Look
Step 1: The Audit and Upgrade
Gather every floor cleaning tool you own. Discard duplicates. If a broom is balding or a mop head is permanently stained, toss it. Assess the aesthetics. If the tools will be visible, budget to replace them with cohesive, neutral options.
Step 2: Location Scouting
Look for “dead zones” in your floor plan.
- The “Dead” Wall: Check behind the laundry room door or the bathroom door.
- Appliance Gaps: Measure the space between your fridge and the wall.
- Cabinet Interiors: Can you spare 5 inches of depth inside a tall pantry cabinet door?
Step 3: Measure and Mark
Hold your tallest tool against the wall where you want it to hang. Mark the top of the handle loop. Add 2 inches to this height for your hook placement. Use a level to draw a light pencil line across the wall where the rail or hooks will go.
Step 4: Installation
Drill pilot holes. If you hit a stud, use wood screws. If you hit hollow drywall, install your toggle bolts. Secure your rail or hooks firmly. Test the weight by pulling down slightly—it should not budge.
Step 5: The Hierarchy of Hanging
Hang items based on frequency of use and visual weight. Place the heaviest or bulkiest items (like the vacuum) on the end closest to the wall corner. Place smaller items (dustpans, dusters) in the middle.
What I’d Do in a Real Project:
If I were designing a kitchen with no utility closet, I would immediately look at the side of the refrigerator enclosure. I would install a custom panel painted to match the cabinetry, creating a 5-inch false wall to conceal a slide-out broom organizer. It looks like millwork but functions as a closet.
Budget Breakdown: Low / Mid / Splurge
Low Budget: $30 – $60
The “Command and Conquer” approach.
- System: Heavy-duty adhesive hooks or over-the-door organizers.
- Tools: Keep existing tools but clean them thoroughly.
- Best for: Renters with strict “no holes” policies or dorms.
Mid Budget: $150 – $300
The “Curated Wall” approach.
- System: A wooden Shaker peg rail painted to match the wall, or a stainless steel friction-grip track.
- Tools: Upgrading to a matching set of bamboo or beechwood cleaning tools.
- Best for: Homeowners who want a functional display that looks intentional.
Splurge: $800 – $2,000+
The “Integrated Millwork” approach.
- System: Custom shallow cabinetry (tall and narrow) or a specialized “filler pull-out” installed by a carpenter.
- Tools: High-end cordless vacuums with mounted charging docks hardwired inside the cabinet.
- Best for: Kitchen renovations or major remodels where seamlessness is the priority.
Common Mistakes (and How to Fix Them)
Mistake 1: Ignoring the “Drip Factor”
Hanging a wet mop directly against a painted drywall surface will eventually cause bubbling paint, water stains, or mildew.
- The Fix: Install a small sheet of acrylic or a stick-on tile backsplash behind the mop area to waterproof the wall. Alternatively, ensure the mop head faces outward, away from the wall.
Mistake 2: Mounting Too Low
People often measure based on the handle loop, forgetting that broom bristles lengthen over time or that new tools might be longer.
- The Fix: Always mount your rail 3 to 4 inches higher than you think you need. It is easier to reach up slightly than to have a broom dragging on the floor collecting dust bunnies.
Mistake 3: The Tangled Cord Chaos
Hanging a vacuum without a plan for the cord results in a messy, tripping hazard.
- The Fix: Install a separate, secondary hook specifically for the coiled cord, or use a velcro strap to secure the cord to the vacuum handle before hanging.
Room-by-Room Variations
The Kitchen
The kitchen is often the highest traffic area for sweeping.
- Strategy: Use the gap between the fridge and the wall. If that isn’t an option, look at the inside of the pantry door.
- Pro Tip: Use magnetic hooks on the side of the fridge for lightweight brooms and dustpans if the side of the fridge is exposed but not visually prominent.
The Laundry Room
This is the most logical place for overflow storage.
- Strategy: Wall-mounted track systems work best here. Since laundry rooms are utilitarian, you can prioritize function over form with larger capacity racks.
- Pro Tip: Install a shelf above the broom rack for cleaning sprays to keep chemicals out of reach of children but close to the tools.
The Bathroom
In small apartments, the bathroom often doubles as the utility closet.
- Strategy: Utilize the “dead space” high up on the wall behind the toilet or behind the door.
- Pro Tip: Because bathrooms are humid, avoid wooden brooms that might warp. Stick to stainless steel or plastic handles that can withstand moisture.
The Entryway / Mudroom
If you have nowhere else, the entryway can work if styled correctly.
- Strategy: Treat the broom like a fashion accessory. It must be a beautiful, natural-material broom. Hang it on the same peg rail as coats and scarves.
- Pro Tip: Do not store mops here. A dirty mop in the entryway is never a good look. Keep the mop in the bathroom and the broom in the entry.
Finish & Styling Checklist
To make your storage solution look like a design choice rather than a compromise, follow this checklist.
- Match Your Metals: If your kitchen faucet is brushed nickel, your broom hooks should be brushed nickel or matte black. Do not mix chrome, brass, and oil-rubbed bronze in a small storage cluster.
- Color Blocking: Buy tools in a single color palette. If you love color, get a red broom, red dustpan, and red vacuum. If you prefer calm, go for white, grey, and wood. Visual consistency reduces the feeling of clutter.
- Wall Protection: Use a semi-gloss or satin paint finish on the wall behind your cleaning tools. Flat or matte paint will scuff instantly when handles bang against it. Semi-gloss is wipeable and durable.
- The “landing pad”: If you are storing a vacuum on the floor, place a small, distinct rubber mat underneath it to frame the space and protect the flooring from scratches.
FAQs
How do I store a heavy vacuum on the wall without it falling?
You must locate a stud. A vacuum is too heavy for drywall anchors, even the heavy-duty ones. If the stud is not in the right spot, mount a piece of 1×4 finished wood horizontally across two studs, and then mount your vacuum bracket onto that wood.
What if I am a renter and can’t drill holes?
Use a tension rod system if you have a niche or alcove. Alternatively, high-strength adhesive mop grippers (specifically rated for 5+ lbs) can work for lighter tools. For heavier items, an over-the-door rack is the safest bet to avoid losing your security deposit.
My mop smells when I hang it up. How do I fix this?
This is an airflow issue. Never hang a soaking wet mop against a wall. Wring it out thoroughly and let it dry in the bathtub or outside first. Once damp-dry, hang it with the head pointing up (if the handle design allows) or ensure the rack pushes the handle far enough off the wall that the head doesn’t touch the drywall.
Can I use a pegboard for this?
Absolutely. Pegboards are fantastic for utility storage because they are adjustable. Paint the pegboard the same color as your wall for a built-in look, or paint it a contrasting bold color to make it a feature.
Conclusion
Living without a utility closet does not mean you are doomed to a life of clutter. By treating your cleaning tools as essential parts of your home’s ecosystem, you can create storage solutions that are both highly functional and surprisingly attractive.
Whether you choose to hide them in the gap beside the fridge or display a beautiful collection of wooden brushes on a hallway peg rail, the secret lies in intentionality. Measure your space, upgrade your hardware, and stop apologizing for having a home that needs cleaning. With the right organization hacks, your broom and mop can finally have a home of their own.
Picture Gallery


