
Two Tier Deck Ideas: Elevate Your Outdoor Space
Two Tier Deck Ideas: Elevate Your Outdoor Space
When homeowners come to me with a backyard renovation, they often face one of two problems. Either their yard is severely sloped, making a standard patio impossible, or their yard is completely flat and lacks visual interest. In both scenarios, a two-tier deck is almost always my favorite architectural solution. It solves grading issues without massive retaining walls, but more importantly, it naturally zones your outdoor living area into distinct, usable “rooms.”
Creating a multi-level deck isn’t just about building stairs; it is about manipulating space to guide how people move and interact. You can separate the high-energy grilling and dining area from a cozy, sunken lounge space intended for quiet conversation. By changing elevation, you define these functions without needing physical walls that block your view or light.
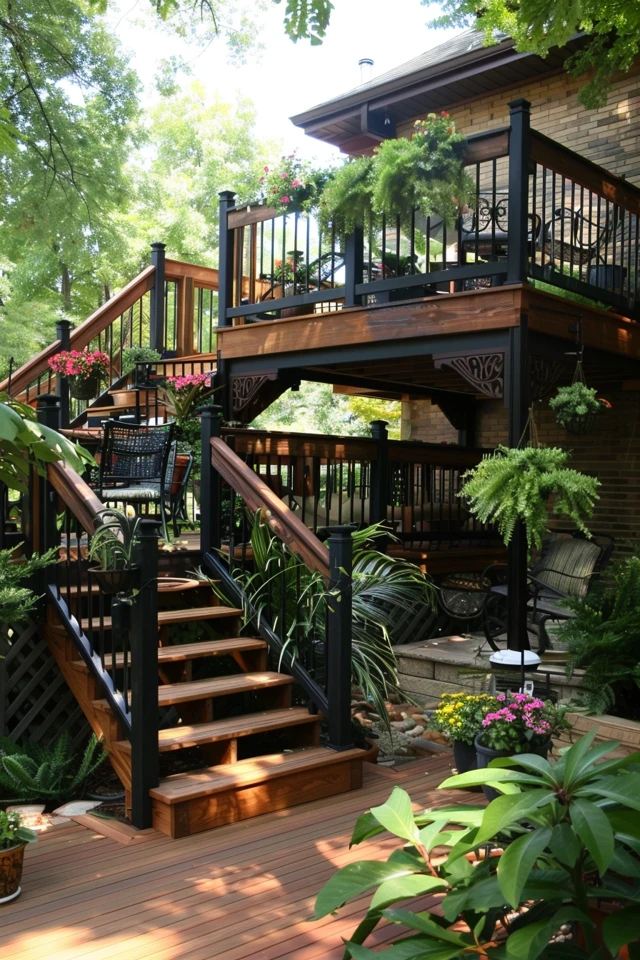
Designing these spaces requires careful attention to flow, scale, and materials. It is easy to build a deck that feels disjointed or clunky if the proportions aren’t right. If you are looking for specific examples of how layouts work in the real world, check out the picture gallery at the end of this blog post.
1. Zoning Your Space: The Upper vs. Lower Deck Strategy
The first rule of interior design—and exterior design—is determining function before form. With a two-tier deck, you have a unique opportunity to dedicate specific square footage to specific tasks.
In 90% of my projects, I recommend placing the dining and cooking zone on the upper tier. This is primarily a logistical choice. The upper tier is usually level with the interior floor and adjacent to the kitchen sliding door. You do not want to be carrying trays of marinated steaks or heavy platters of pasta up and down a flight of stairs. Keep the food loop short and flat.
The lower tier is then reserved for lounging, deep seating, or a fire pit. Stepping down into a lounge area creates a psychological shift. It feels more grounded, intimate, and relaxed. This separation also keeps the smoke from a fire pit away from the house windows and the dining table.
Designer’s Note:
One thing that often goes wrong in DIY designs is “splitting the party.” While you want distinct zones, you don’t want the levels to feel like two different continents. Ensure there is a clear sightline between the grill master on the top deck and the guests relaxing on the lower deck. If the railing is too high or filled with thick balusters, the cook will feel isolated. I recommend cable railing or glass panels on the upper tier to keep that visual connection open.
2. Managing Traffic Flow and Stair Placement
The transition between your two levels is the most critical structural element of the design. Stairs are not just a way to get from A to B; they are a major visual feature.
A common mistake is installing a narrow, standard-width staircase (usually 36 inches) off to the side. This makes the lower deck feel like a basement or an afterthought. In my designs, I aim for a transition point that is at least 4 to 6 feet wide.
Wide stairs act as “bleacher seating” during large parties. If you have teenagers or a large family gathering, people will naturally sit on the steps. This softens the divide between the levels.
Traffic Flow Rules of Thumb:
- The “Slider” Rule: Never place the stairs immediately in front of the sliding glass door. You need a “landing pad” of at least 4 feet before the elevation changes to prevent bottlenecks.
- The Perimeter Flow: Keep the main walking path around the perimeter of your furniture groupings. You should never have to walk between the coffee table and the sofa to get to the stairs.
- Clearance Distances: Allow 30 to 36 inches of clear walking space between any furniture piece and the railing or stair edge.
If you are dealing with a steep slope, you might need a landing between tiers to break up the flight of stairs. This landing is a great spot for a solitary reading chair or a potted herb garden, turning a structural necessity into a design moment.
3. Material Selection: Creating Continuity and Contrast
When you have two levels, you have a lot of surface area. Using the exact same material in the same direction for everything can look monotonous and flat. I like to use subtle visual tricks to distinguish the tiers while maintaining a cohesive look.
Picture Framing:
I always specify a “picture frame” border for decks. This means installing a board creating a border around the perimeter of the deck, perpendicular to the main decking boards. For a two-tier deck, I might use a slightly darker color for the picture frame on both levels. This highlights the edges of the steps and the perimeter, which is a massive safety benefit for guests navigating the levels in low light.
Directional Changes:
Another designer trick is changing the direction of the decking.
- Upper Deck: Run boards diagonally (45 degrees) to draw the eye outward toward the view.
- Lower Deck: Run boards horizontally to make the space feel wider and more grounded.
Material Durability Constraints:
If your lower deck is close to the ground (low elevation), moisture becomes a bigger issue than on the upper deck. Traditional wood requires significant ventilation underneath to prevent warping. For ground-level lower tiers, I almost exclusively recommend capped composite decking or PVC. It handles the ground moisture much better than cedar or pressure-treated pine and won’t rot out in five years.
4. Styling and Scale: Furnishing Two Rooms
Treat your two-tier deck exactly like you would treat a living room open to a dining room inside your house. The furniture needs to be scaled correctly, or the deck will feel cluttered.
The Upper Deck (Dining):
Space is usually tighter here. When selecting a dining table, account for “pull-out space.” You need 36 inches behind every chair so guests can slide back without their chair legs hitting the deck railing or falling off the edge of a step. If your upper deck is 10 feet deep, your table cannot be wider than 40 inches to accommodate chairs on both sides.
The Lower Deck (Lounging):
Here is where you can go big. I love using an L-shaped outdoor sectional on the lower tier to define the corner.
- Rug Sizing: Just like indoors, the “front legs” rule applies. Your outdoor rug should be large enough that at least the front legs of the sofa and chairs sit on it. A 5×7 rug is almost always too small. Go for an 8×10 or 9×12 to anchor the space.
- Anchor Points: Use heavy planters in the corners of the lower deck. This adds greenery to soften the hard lines of the railing and creates a sense of enclosure.
What I’d Do in a Real Project (Rental Friendly):
If you are renting a home with an existing multi-level deck that looks tired, you can’t change the wood. Instead, focus on textiles. Use two indoor/outdoor rugs with complementary patterns (e.g., a stripe up top and a solid texture below) to cover splintery wood and define the zones.
5. Lighting and Privacy Control
Lighting on a multi-level deck serves a dual purpose: ambiance and safety. Darkness hides elevation changes, which is a recipe for twisted ankles.
The Safety Layer:
Riser lights are non-negotiable in my designs. These are small, recessed lights installed into the vertical riser of each step. They cast light down onto the tread below. If you don’t want to wire these, there are decent solar options, but hardwired low-voltage LED is the gold standard for reliability.
The Ambiance Layer:
On the lower level, privacy is often an issue because your neighbors might be able to look down into your space.
- Privacy Screens: Install a slat wall or a trellis on one side of the lower deck. This blocks the view from neighbors but lets air flow through.
- String Lights: Hang bistro lights over the lower tier. If you don’t have a pergola, you can install sturdy poles attached to the railing. The overhead “ceiling” of lights makes the lower deck feel incredibly cozy and intimate.
Designer’s Note:
Avoid floodlights attached to the house. They are too harsh and flatten the look of the space. Instead, use soft, warm lighting (2700K temperature) located at lower levels—under railings, on steps, and in planters.
Common Mistakes and Fixes
Even with the best intentions, I see homeowners make the same errors repeatedly. Here is how to avoid them.
Mistake: Ignoring the “Under-Deck” Area
If your upper deck is high enough, the space underneath is visible. Leaving it as dirt or messy gravel ruins the aesthetic of the lower tier.
Fix: Install an under-deck drainage system if you want to keep the lower patio dry, or use lattice/horizontal slat skirting to hide the structural posts and storage areas.
Mistake: Over-Furniture-ing the Transition
Placing a potted plant or a small side table right next to the top of the stairs to “fill the gap.”
Fix: Leave the transition completely clear. Negative space is necessary for the eye to rest and for people to move safely.
Mistake: Misaligned Railings
Using different railing styles for the upper and lower decks (e.g., glass on top, wood spindles on the bottom) usually looks messy unless executed perfectly.
Fix: Stick to one railing style for continuity. If you need to save money, keep the expensive railing (glass/cable) where the view matters most, and use a simpler version of the same material elsewhere, but keep the color and top rail profile identical.
Final Checklist: Designing Your Two Tier Deck
Before you call a contractor or buy lumber, run through this checklist to ensure your plan is solid.
The “What I’d Do” Checklist:
- Check Zoning: Verify local setback rules. Sometimes a lower deck (under 30 inches high) has different setback requirements than a high deck.
- Define the Drop: Calculate the exact height difference. If it is less than 30 inches, you might not legally need a railing on the lower tier, which opens up the view significantly.
- Measure Furniture First: Do not guess. Measure your actual dining table and sectional. Draw them onto your deck plan to ensure you have walking clearance.
- Plan the Grill Spot: Locate the gas line or propane tank storage. Ensure the grill is not directly under a window or flammable siding.
- Select Low-Maintenance Materials: If you have pets, avoid soft woods like cedar on the lower deck where claws will scratch it. Go with a PVC-capped composite with a “wire brush” texture for scratch resistance.
- Integrated Storage: Consider building bench seating into the perimeter of the lower deck. It saves money on furniture and provides storage for cushions in the off-season.
FAQs
Does a two-tier deck cost more than a single-level deck of the same size?
Generally, yes, but not by a huge margin. The added cost comes from the complexity of the framing (more posts and footings) and the stairs. However, a two-tier deck can sometimes be cheaper than a single high deck if the lower tier is close enough to the ground to avoid needing railings, which are a major line-item cost.
How wide should the stairs be between levels?
For a comfortable, high-end look, I recommend a minimum of 48 inches. If you have the space, 60 inches is luxurious and allows two people to pass each other comfortably with drinks in hand.
Can I build a second tier onto my existing deck?
It is possible, but difficult. The existing footings were likely calculated only for the current load. Adding a new level usually requires new footings and framing. It is often a “tear down and restart” or a “build adjacent and connect” scenario rather than just tacking on.
What is the best height difference between tiers?
I prefer a drop of 2 to 3 steps (roughly 14 to 21 inches). This is enough to create a distinct psychological “zone” change, but not so deep that the people on the lower deck feel like they are in a pit.
Conclusion
A two-tier deck is one of the best investments you can make for your outdoor living experience. It turns a backyard into a destination with distinct rooms for cooking, dining, and relaxing. By paying attention to the transition zones, lighting, and material continuity, you can create a space that feels professionally designed and perfectly suited to your lifestyle.
Remember that the goal is to create a seamless flow between the indoors and the outdoors. Whether you are working with a challenging slope or just want to add dimension to a flat yard, breaking up the levels adds immediate architectural interest. Take your time planning the furniture layout before you lay a single board, and you will end up with a space that serves your family for years to come.
Picture Gallery


