
Are you tired of looking at your dull and outdated laundry room cabinets? Painting them is an easy and cost-effective way to give the space a fresh look. In this tutorial, I will guide you through the process of painting your laundry room cabinets, step by step.
First, let’s gather the supplies you’ll need for this DIY project. You’ll need sandpaper to roughen the surface of the cabinets, primer to create a smooth base, paintbrushes or rollers for applying the paint, your chosen paint color, and finishing wax for added durability.
To start, lightly sand the cabinets to roughen the surface. This helps the primer and paint adhere better. After sanding, wipe the cabinets clean to remove any dust. This step ensures a smooth paint finish.
Once the cabinets are clean, apply a coat of primer. This will help the paint adhere and provide a smooth and even base for the color. Let the primer dry completely before moving on to the next step.
Now it’s time to apply the paint. Choose a color that complements your laundry room’s aesthetics. Light and neutral shades work best to create a bright and inviting atmosphere. Apply three coats of paint, allowing each coat to dry before moving on to the next. This will ensure a solid and even color.
Lastly, apply a finishing wax to protect the paint and add a bit of sheen. The wax will make your cabinets more durable and easier to clean in the long run. Once the wax is dry, your freshly painted laundry room cabinets are ready to enjoy!
Key Takeaways:
- Painting your laundry room cabinets is an inexpensive way to give the space a fresh look.
- Gather all the necessary supplies, including sandpaper, primer, paintbrushes or rollers, paint, and finishing wax.
- Light and neutral shades work best for laundry room cabinets to create a bright and inviting space.
- Apply multiple coats of paint, allowing each coat to dry before applying the next.
- Finish off with a protective wax to ensure durability and easy maintenance.

Step-by-Step Cabinet Painting Guide
If you’re looking to give your laundry room cabinets a fresh makeover, I’ve got you covered with this step-by-step painting guide. Follow these simple instructions to achieve professional results and transform your cabinets into the focal point of your laundry room.
To get started, gather all the necessary supplies. You’ll need sandpaper, primer, paintbrushes or rollers, paint, and finishing wax. Having everything at hand will ensure a smooth and efficient painting process.
Step 1: Prep the Cabinets
Before diving in, it’s important to prep the cabinets properly. Begin by sanding the surface to create a rough texture that allows the paint to adhere better. Use a fine-grit sandpaper and work in the direction of the wood grain. Once you’re done sanding, wipe away any dust or debris with a clean cloth.
Step 2: Prime for Perfection
Applying a coat of primer is crucial for achieving a flawless finish. Choose a high-quality primer that is specifically designed for cabinets. Using a brush or roller, apply an even coat of primer to the entire surface of the cabinets. Allow the primer to dry completely before moving on to the next step.
Step 3: Bring on the Color
Now it’s time to add your chosen paint color to the cabinets. Select a paint that is suitable for cabinet makeovers, ensuring durability and a professional look. Start by applying the first coat of paint, working in smooth and even strokes. Allow this coat to dry thoroughly before applying the second coat. Repeat this process for a total of three coats, allowing each coat to dry completely before proceeding.
Step 4: Finishing Touches
To enhance the durability and sheen of your cabinets, apply a finishing wax. This protective layer will not only add an extra layer of strength but also give your cabinets a beautiful, polished look. Apply the wax using a clean cloth or brush, following the manufacturer’s instructions.
And there you have it! By following this step-by-step cabinet painting guide, you can achieve professional-looking results without breaking the bank. Remember, preparation and attention to detail are key, so take your time and enjoy the transformation process. Now, let’s turn your laundry room cabinets into a stunning focal point with a fresh coat of paint!

Choosing the Right Paint and Color for Your Laundry Room Cabinets
When painting your laundry room cabinets, it’s essential to choose the right paint and color for the desired outcome. Opt for a high-quality paint that is specifically formulated for cabinets to ensure durability and a smooth finish.
Considering Paint Quality: To achieve long-lasting results, invest in a high-quality paint product designed specifically for cabinets. These paints are formulated to withstand the wear and tear that cabinets often endure, ensuring a durable and professional-looking finish. Look for paints that offer excellent coverage and are resistant to stains, chips, and scratches.
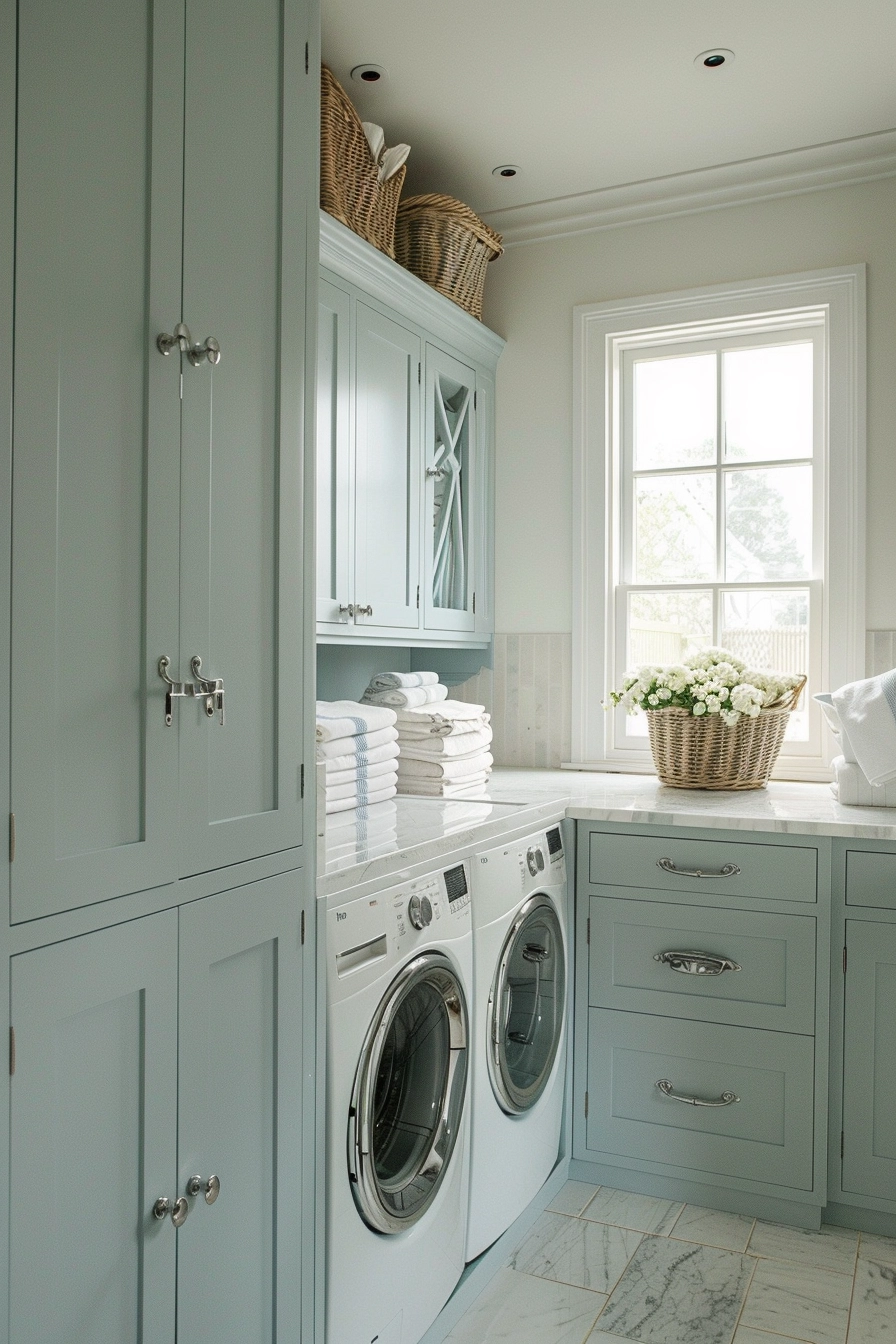
Exploring Color Options: When selecting a paint color for your laundry room cabinets, it’s crucial to consider the color scheme of the overall space. Light and neutral shades are popular choices as they can brighten up the room and create a fresh atmosphere. Consider colors such as creamy whites, soft blues, or pastel hues that complement the existing decor. These colors will not only make the room feel more open but also provide a timeless and elegant look.
Optimizing Maintenance: Along with choosing the right color, it’s essential to select a paint with a finish that enhances both the appearance and functionality of your cabinets. Satin or semi-gloss finishes are commonly used for laundry room cabinets as they offer a balance between aesthetics and practicality. These finishes are easier to clean and maintain, making them ideal for a space that may encounter spills and splatters in the laundry process.
By carefully selecting the paint quality, color, and finish, you can enhance the overall look and feel of your laundry room cabinets. A well-chosen paint color and type will not only rejuvenate the cabinets but also transform the entire space into a more inviting and enjoyable area.
Conclusion
Refinishing your laundry room cabinets doesn’t have to break the bank. With these budget-friendly cabinet painting tips and professional techniques, you can transform your space and give it a fresh new look. By following a step-by-step guide, you’ll be able to achieve a professional-looking cabinet makeover that you’ll be proud of.
Start by sanding the cabinets to create a rough surface for the paint to adhere to. Then, apply a coat of primer to ensure a smooth and even finish. Once the primer is dry, apply multiple coats of your chosen paint color, allowing each coat to dry before applying the next. This will give your cabinets a rich and vibrant look.
To add durability and a polished finish, don’t forget to apply a protective wax. This will help protect your cabinets from daily wear and tear and make them easier to clean. With these professional cabinet painting techniques, your laundry room cabinets will not only look great but also stand the test of time.
So, whether you’re looking to update your laundry room or simply want to give it a fresh new feel, refinishing your cabinets is the way to go. With a little time, effort, and these budget-friendly tips, you can create a bright and inviting space that will make your laundry chores a breeze. Get started on your cabinet painting project today!